Rotating the Horn
The ULTRA-X20XP and ULTRA-X22XP horns may be rotated for increased installation flexibility. However, care must be taken so as to not damage the loudspeaker.
Remove the grille by removing the four 8-32 x 0.5-inch flat-head Phillips screws (two on the top and two on bottom) of the loudspeaker grille.
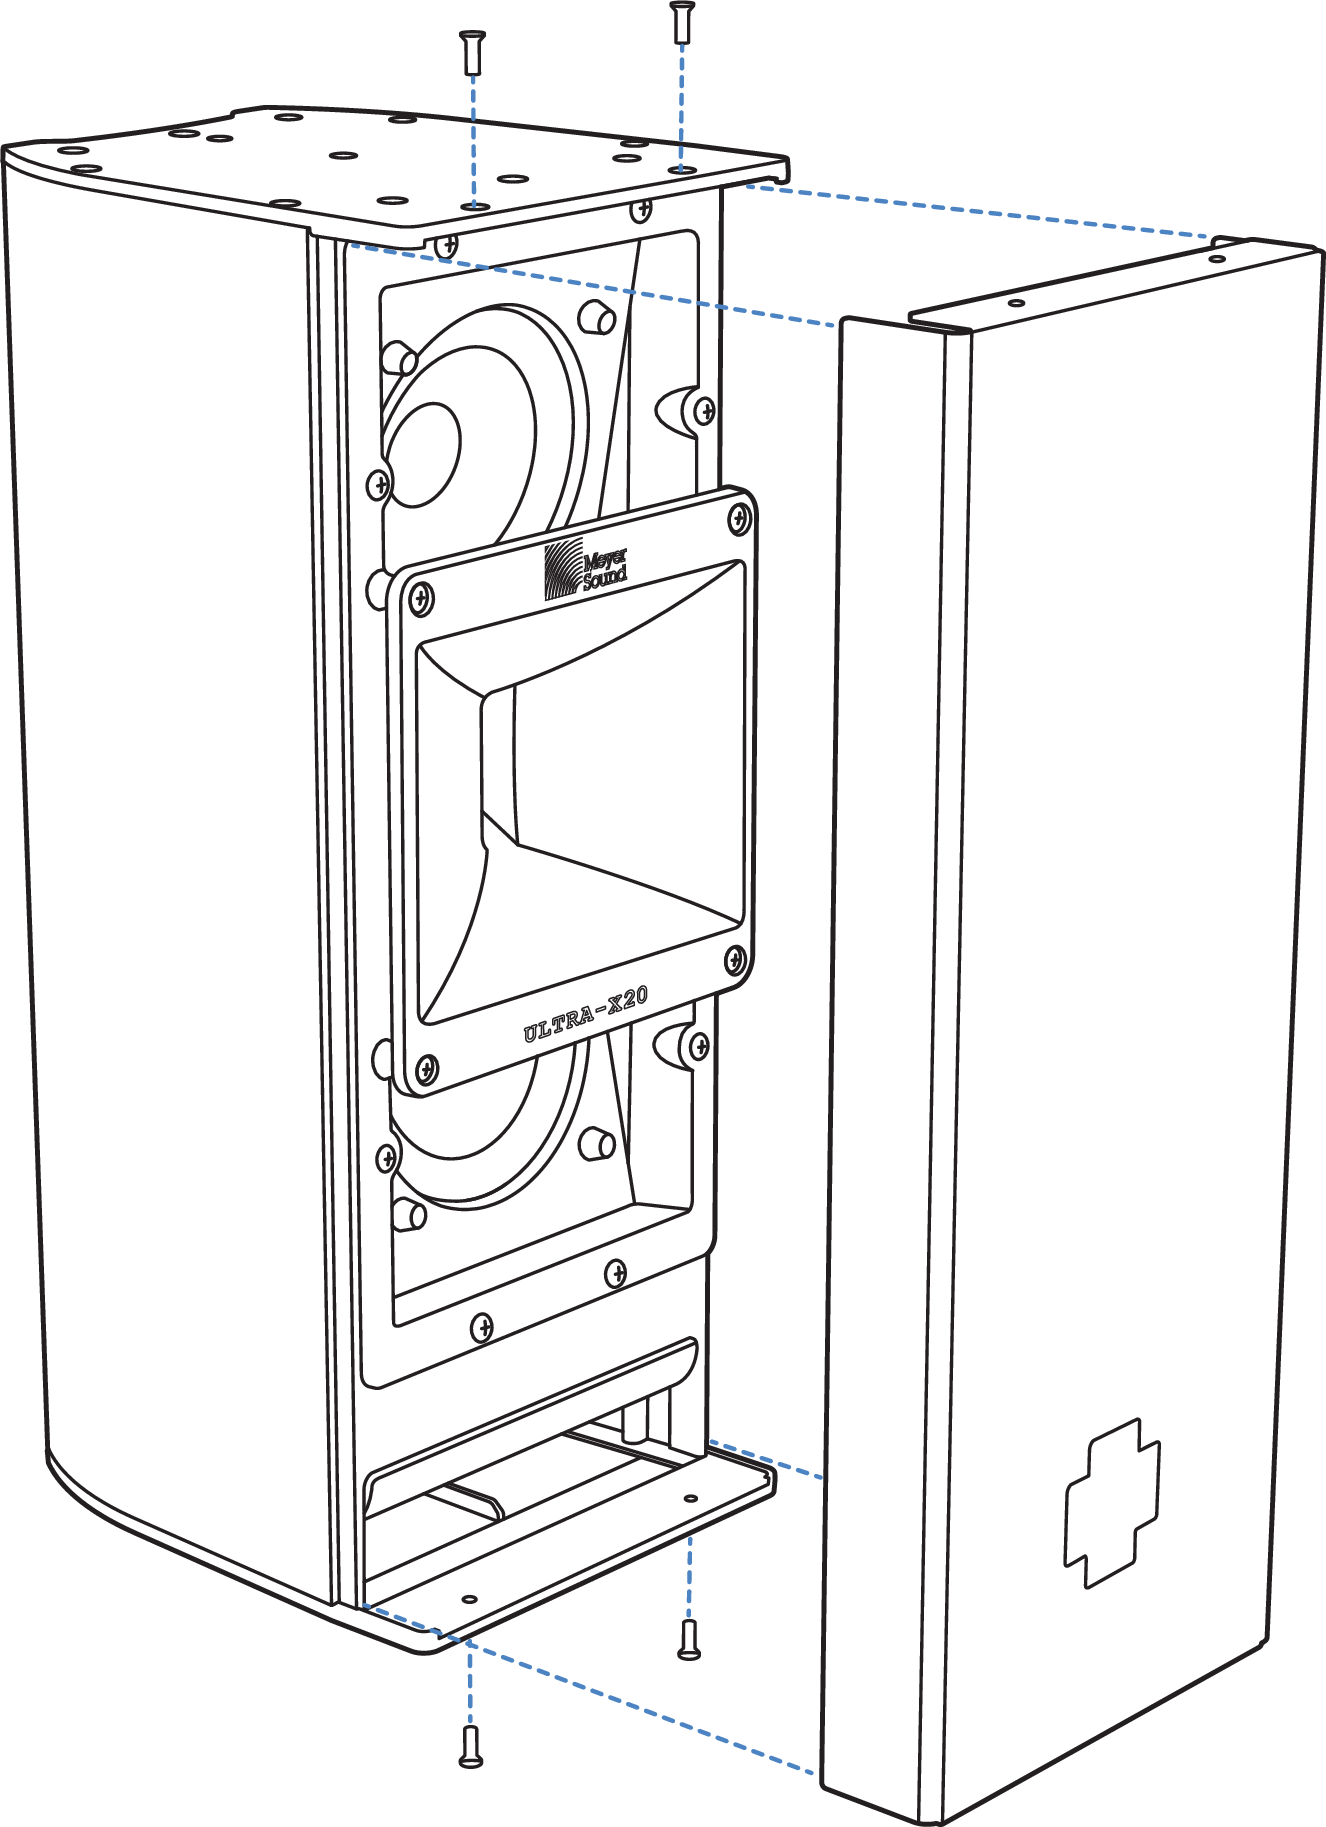
Remove ULTRA-X20XP Grille Frame.
Remove the four truss-head Phillips 8-32 x 0.5-inch screws holding the horn in place.
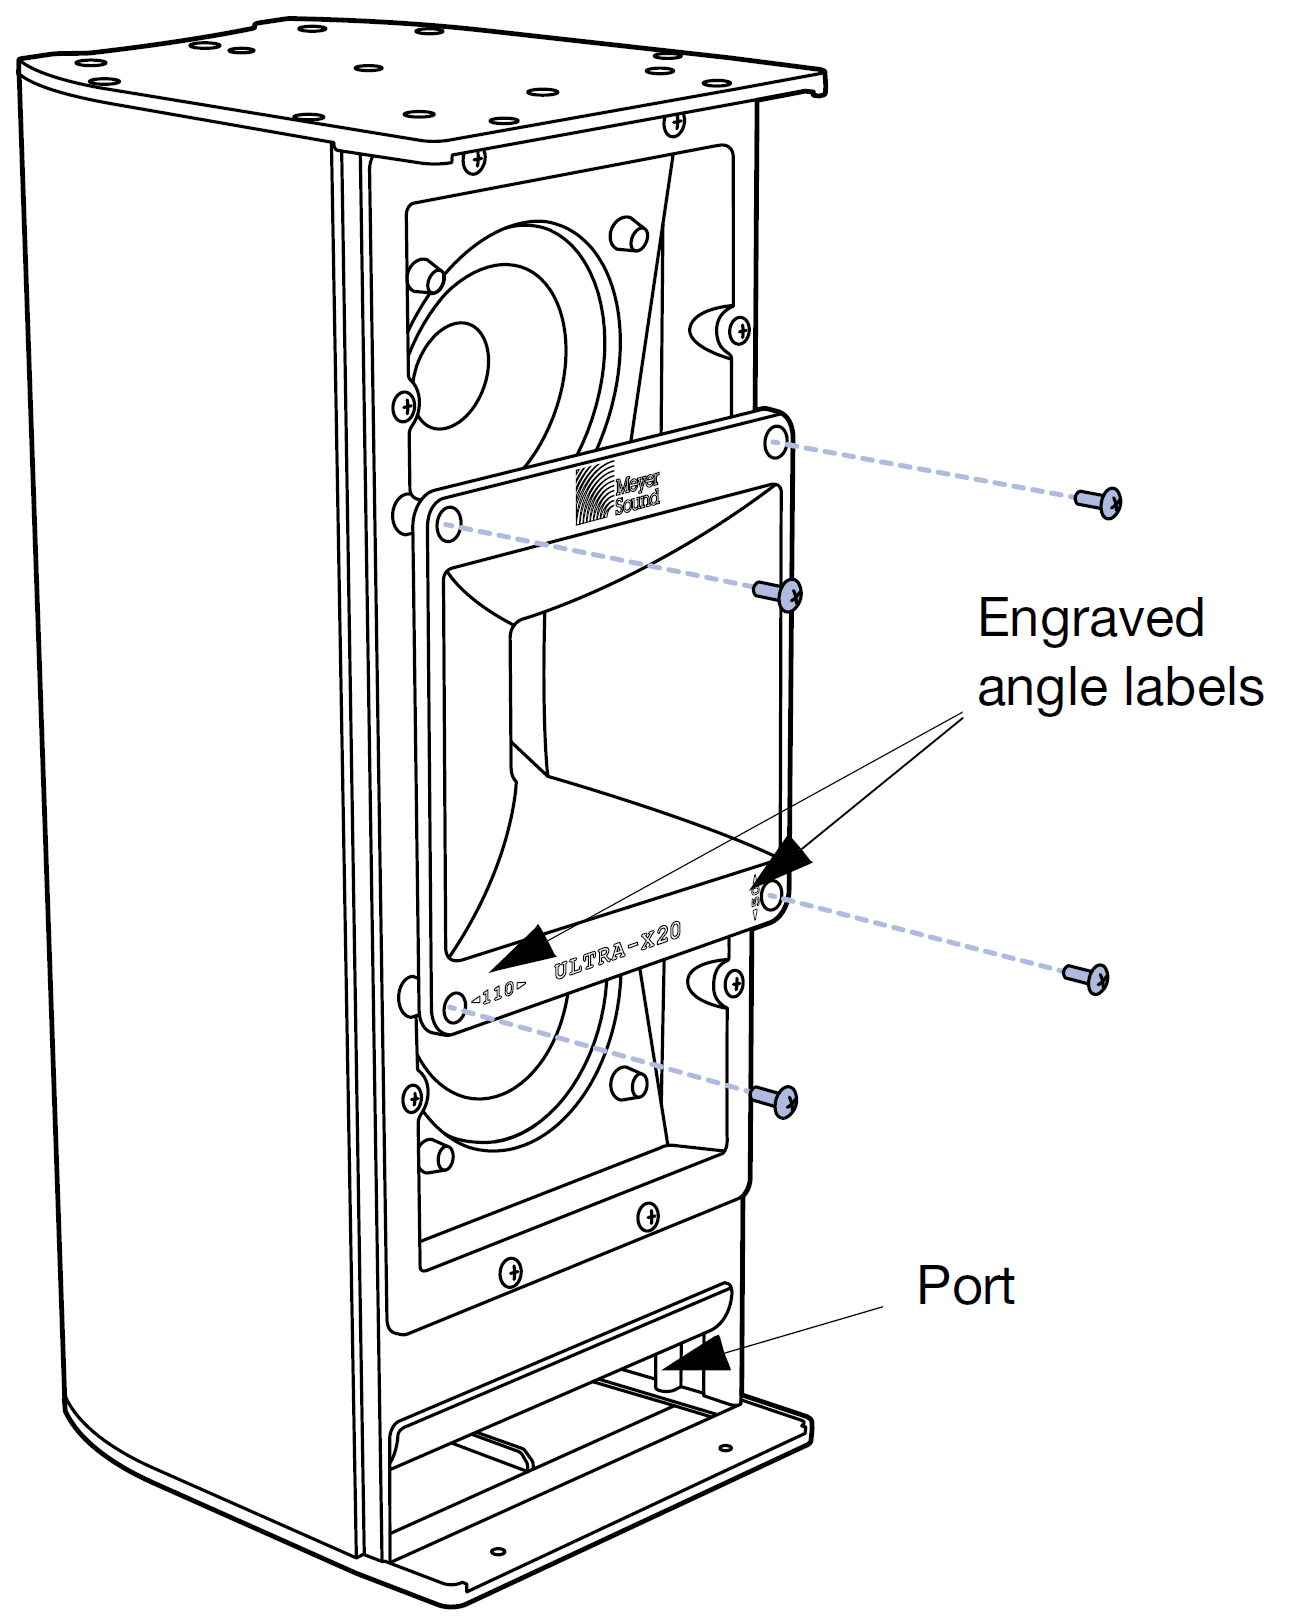
Removing Four Screws Holding the Horn in Place
Determine the present orientation of the horn by checking the horn throat orientation when the speaker is vertical with the port at the bottom. The cabinet is vertical and the horn is in the 110° horizontal by 50° vertical orientation when the Meyer Sound Logo on the horn and on the bezel are at the top, the horn throat is in the vertical orientation, and the 110° emboss is also horizontal, as shown in the figure below.
The cabinet is vertical and the horn is in the 50° horizontal by 110° vertical orientation when the Meyer Sound Logo on the horn is on the right, the horn throat is in the horizontal orientation, and the 50° emboss is also horizontal, as shown in the second figure below.
To rotate the horn from 110° x 50° to 50° x 110°, pull the horn out and rotate it 90°, so that the horn throat is oriented horizontally, the Meyer Sound Logo on the horn is on the right, and the 50° emboss is also horizontal, as shown in the second figure below.
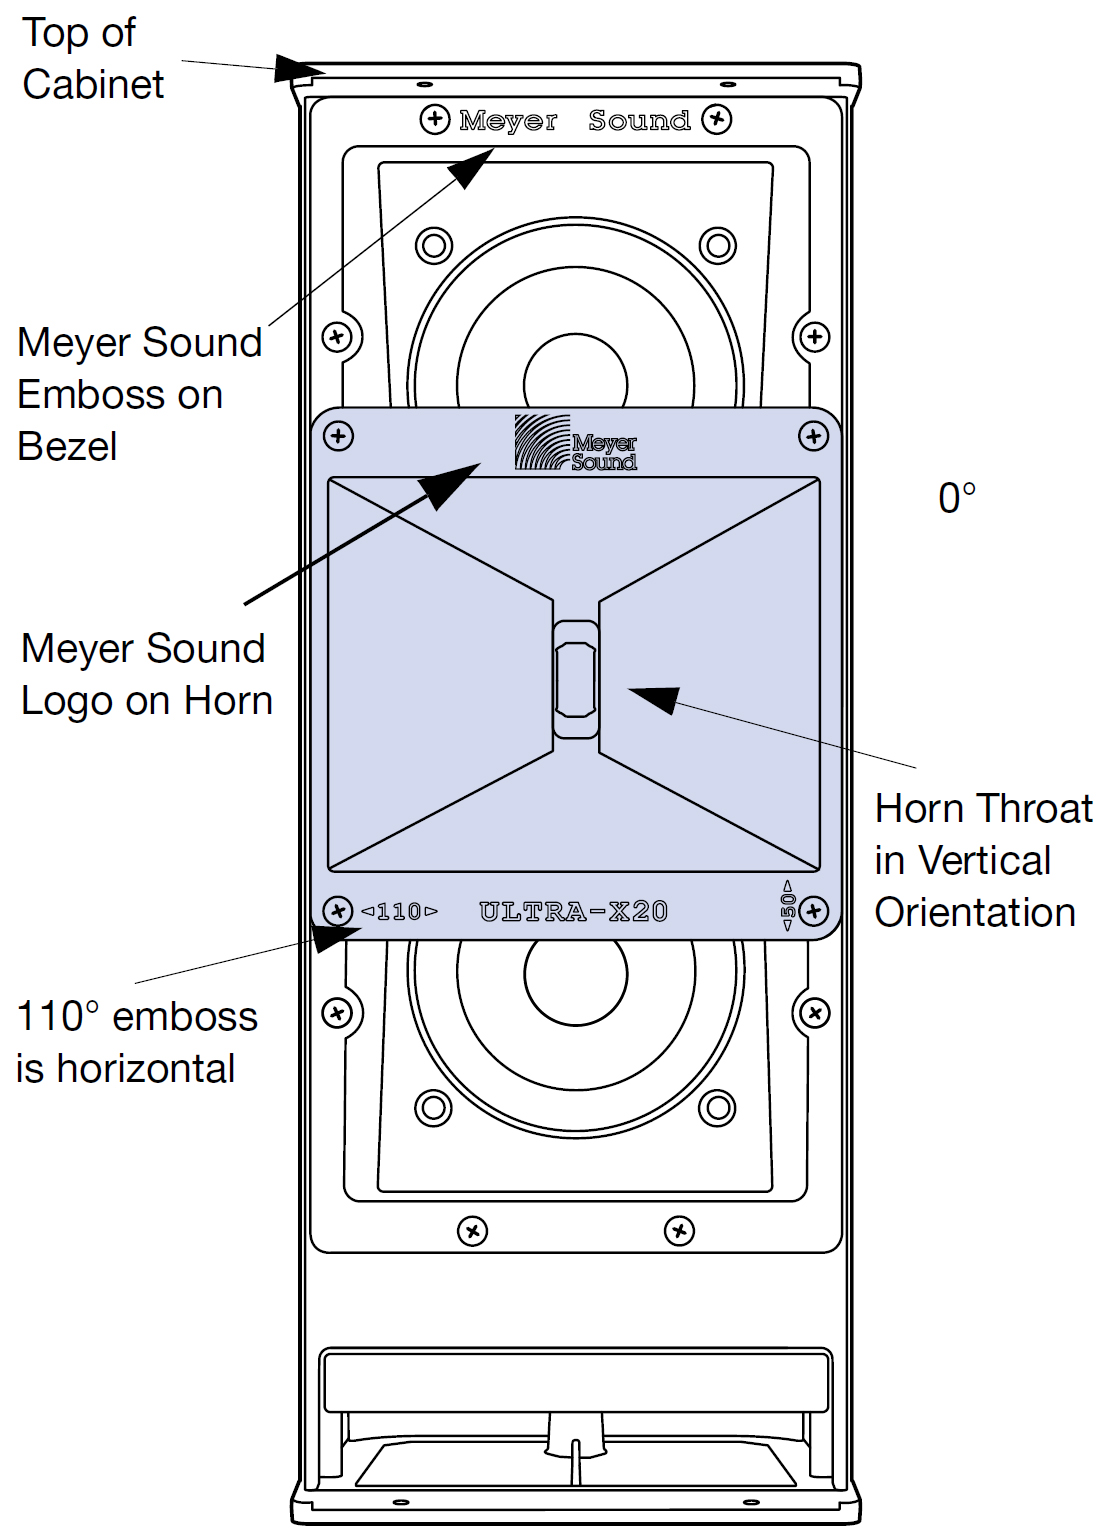
110° horizontal by 50° vertical horn orientation
To rotate the horn from 50° x 110° to 110° x 50°, pull the horn out, rotate it -90°, so that the horn throat is oriented vertically, the Meyer Sound Logo on the horn is on the top, and the 110° emboss is also horizontal, as shown in the figure above.
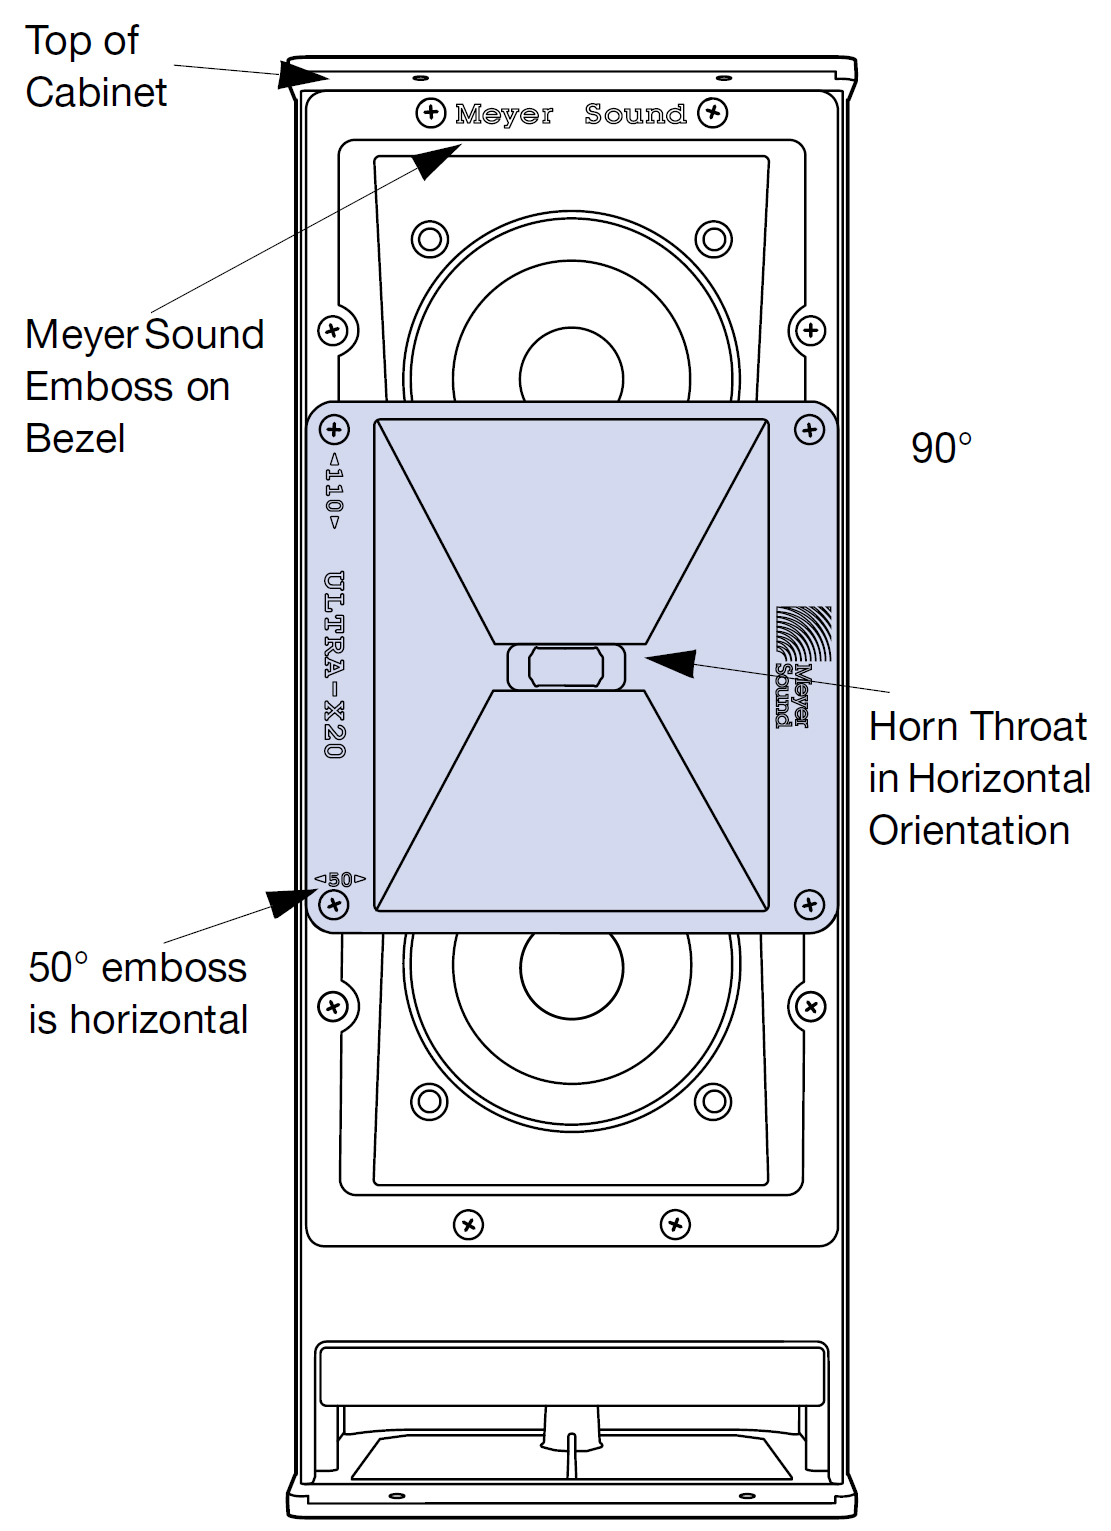
50° horizontal by 110° vertical horn orientation
Replace the four screws removed in Step 2 to re-secure the horn into position. Be sure to use the 8-32 x 0.5-inch screws. The recommended torque value for the horn screws is 12 in-lb (1.36 N·m).
Replace the grille and secure it with the four 8-32 x 1.00-inch screws removed in step 1. MeyerSound recommends applying blue thread locker (medium strength) to screws in the leading three threads before replacing. The recommended torque value for the grille screws is 8 in-lb (0.90N·m).
Note
In the paragraphs above, instructions and graphics for the ULTRA-X20XP are used. The same procedure holds for the ULTRA-X22XP (with 110° replaced by 80°). The ULTRA-X23XP is symmetrical; rotation is possible but not necessary.