QuickFly Rigging
The UPM-1P and UPM-2P can utilize components from Meyer Sound’s QuickFly system — a range of rugged, reliable, and deceptively simple rigging and mounting components. QuickFly facilitates placing loudspeakers in single units, hanging or attached to a surface, for a variety of applications.
Caution
All Meyer Sound products must be used in accordance with local, state, federal, and industry regulations. It is the owner’s and/or user’s responsibility to evaluate the reliability of any rigging method for their application. Rigging should be carried out only by experienced professionals.
Always use properly rated rigging hardware.
It is important to inspect rigging hardware regularly and replace worn or damaged components immediately.
Each loudspeaker includes three rigging plates, situated on the top, bottom, and on one side of the cabinet. There are two types of interchangeable rigging hardware, each fastened by three Phillips screws:
3/8"-16 nut plates
M10 x 1.5 metric nut plates
Caution
Units are rated for the weight of one cabinet only.
Stand mounting the UPM-1P and UPM-2P Loudspeakers
You can mount the UPM-1P or UPM-2P loudspeaker on a stand using the MSA-UPM stand adapter, as shown in the figure below, along with a third-party loudspeaker stand such as those made by Ultimate Support Systems (www.ultimatesupport.com).
The MSA-UPM kit includes 3/8"-16 and M10 hardware. To secure the adapter, attach the adhesive-backed cork washer to the stand and secure the stand to the loudspeaker using the bolt and washer, as shown in the figure below.
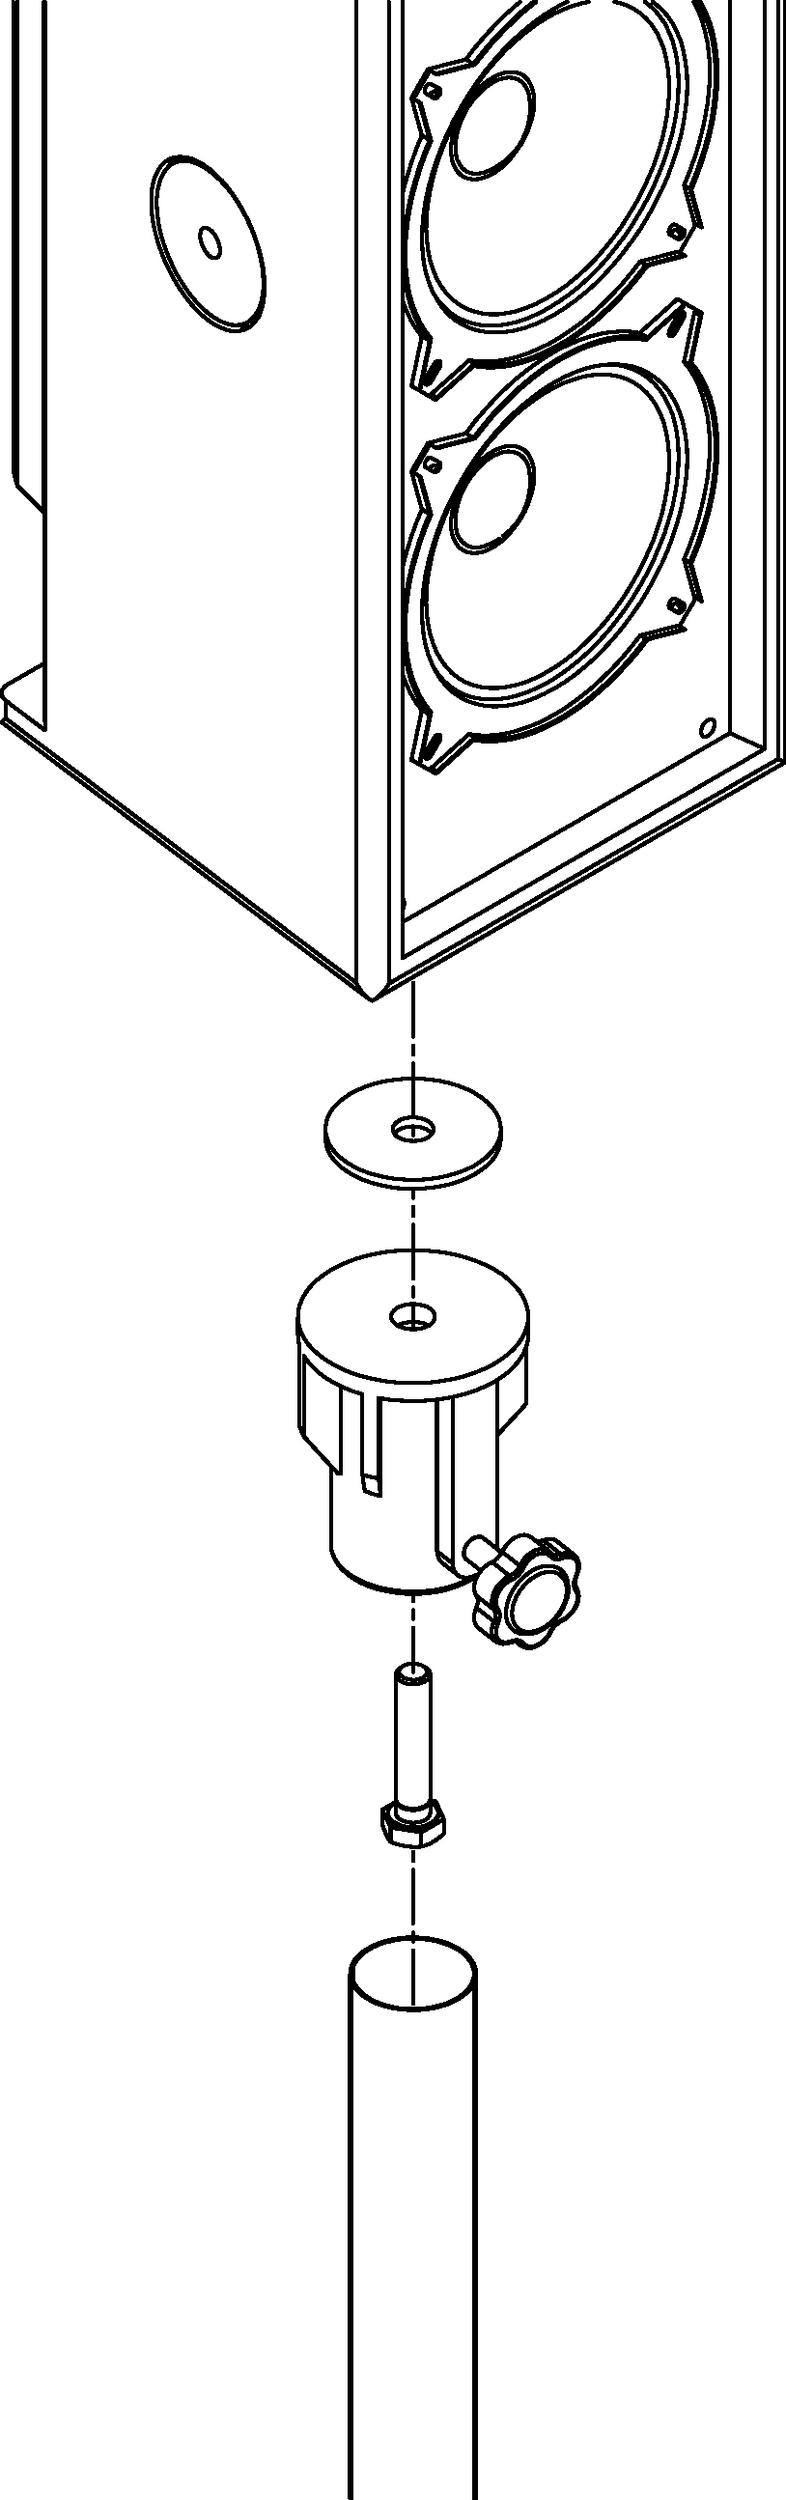
MSA-UPM Stand Adapter
MYA-UPM Mounting Yoke Assembly
This cradle-style mounting yoke, shown in the figure below, suspends a single UPM-1P or UPM-2P loudspeaker and allows a wide range of horizontal and vertical adjustment. The yoke attaches to the top and bottom nut plates. The mounting yoke kit includes 3/8"-16 and M10 hardware.
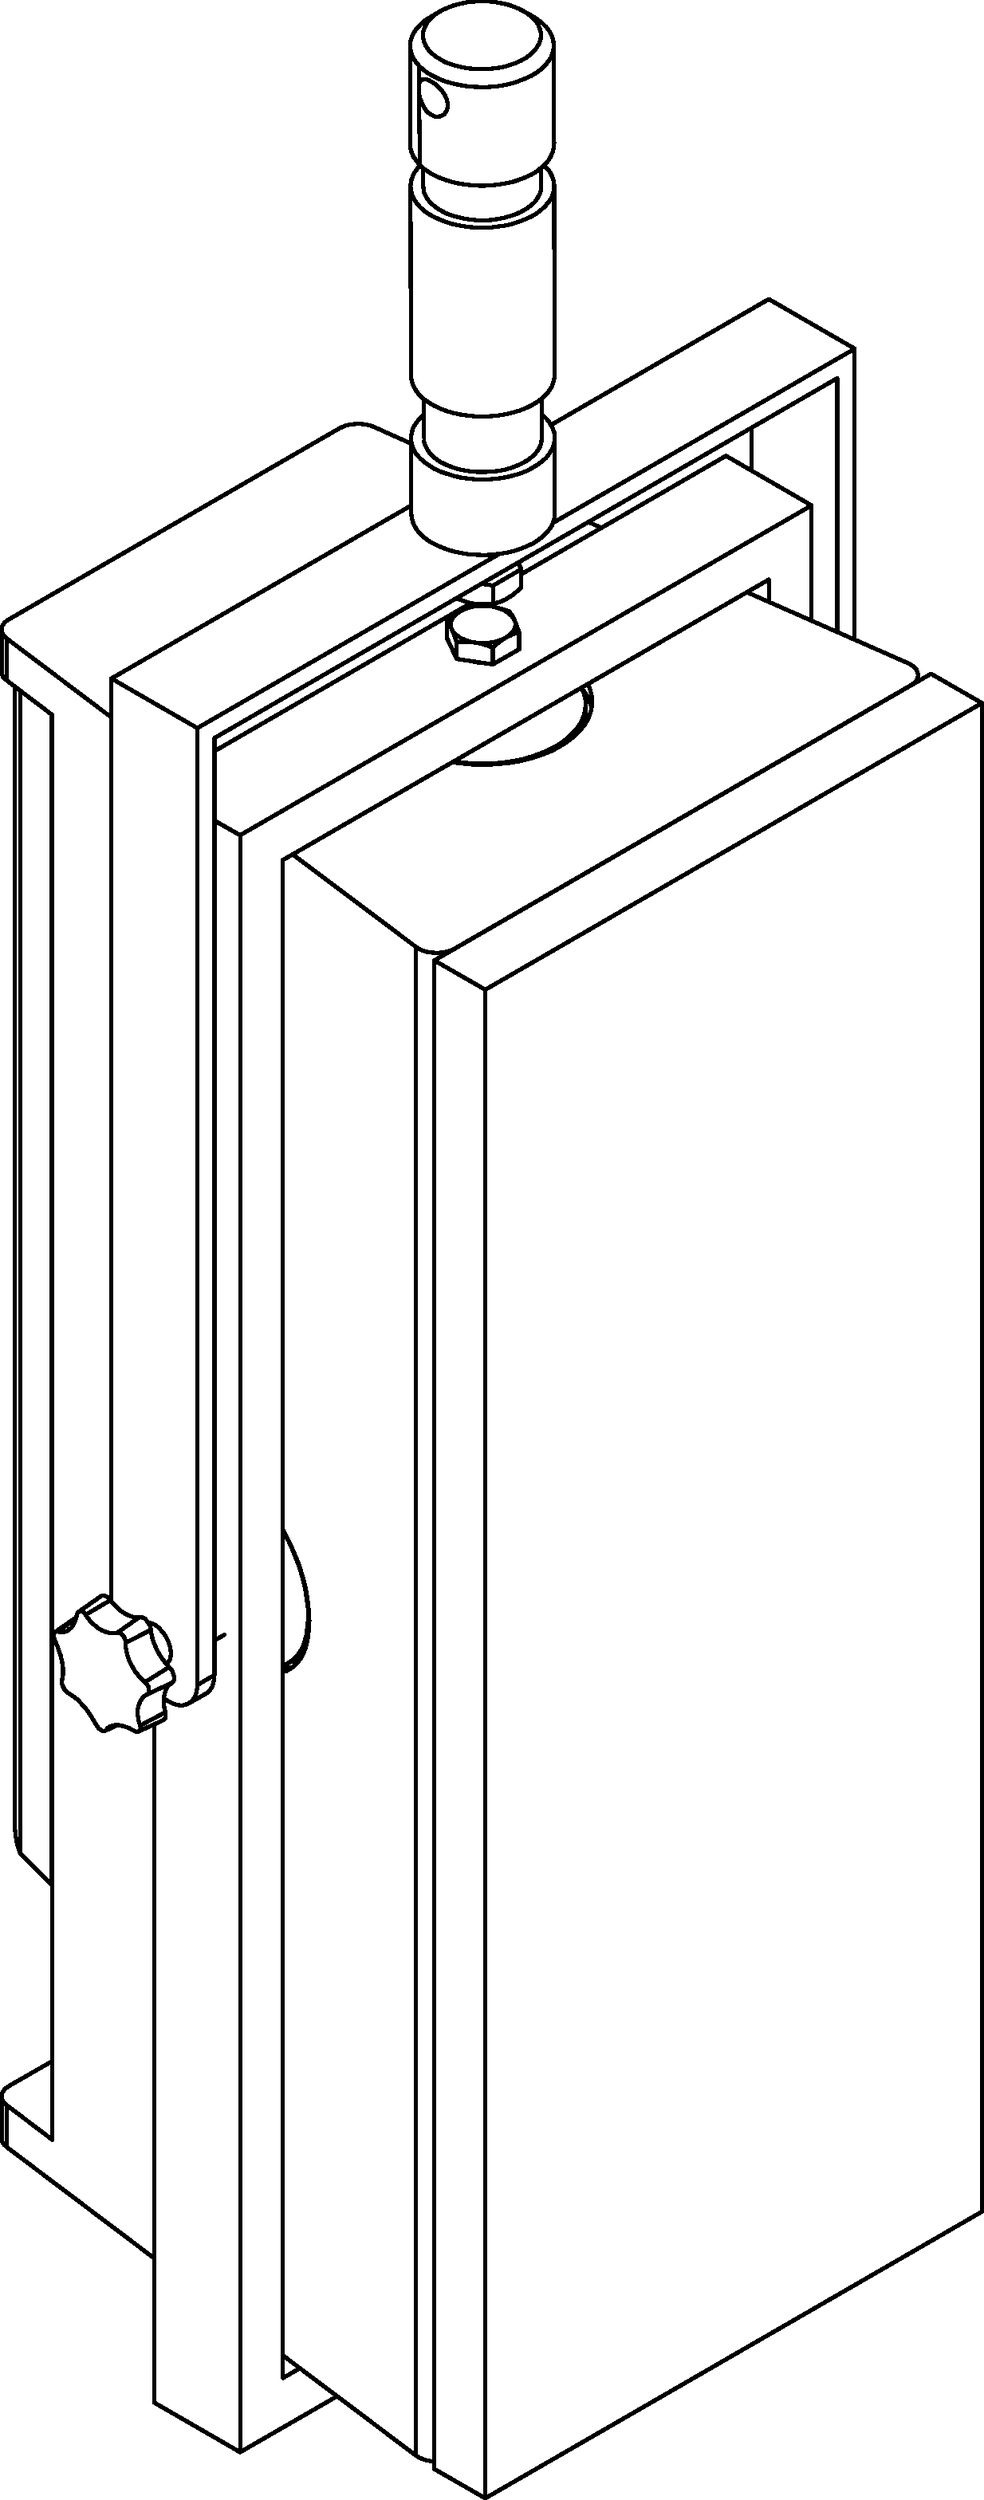
The MYA-UPM is used to suspend a single UPM-1P or UPM-2P cabinet
Caution
To secure the loudspeaker to the yoke, tighten the bottom bolt first and then the top. Do not over-torque the top and bottom bolts, as this may damage the cabinet.
A hanging clamp (“C” or “G” type) and a steel safety cable are required to enable the yoke to be used (not supplied as a part of the yoke assembly kit).
Using the MUB-UPM U-bracket
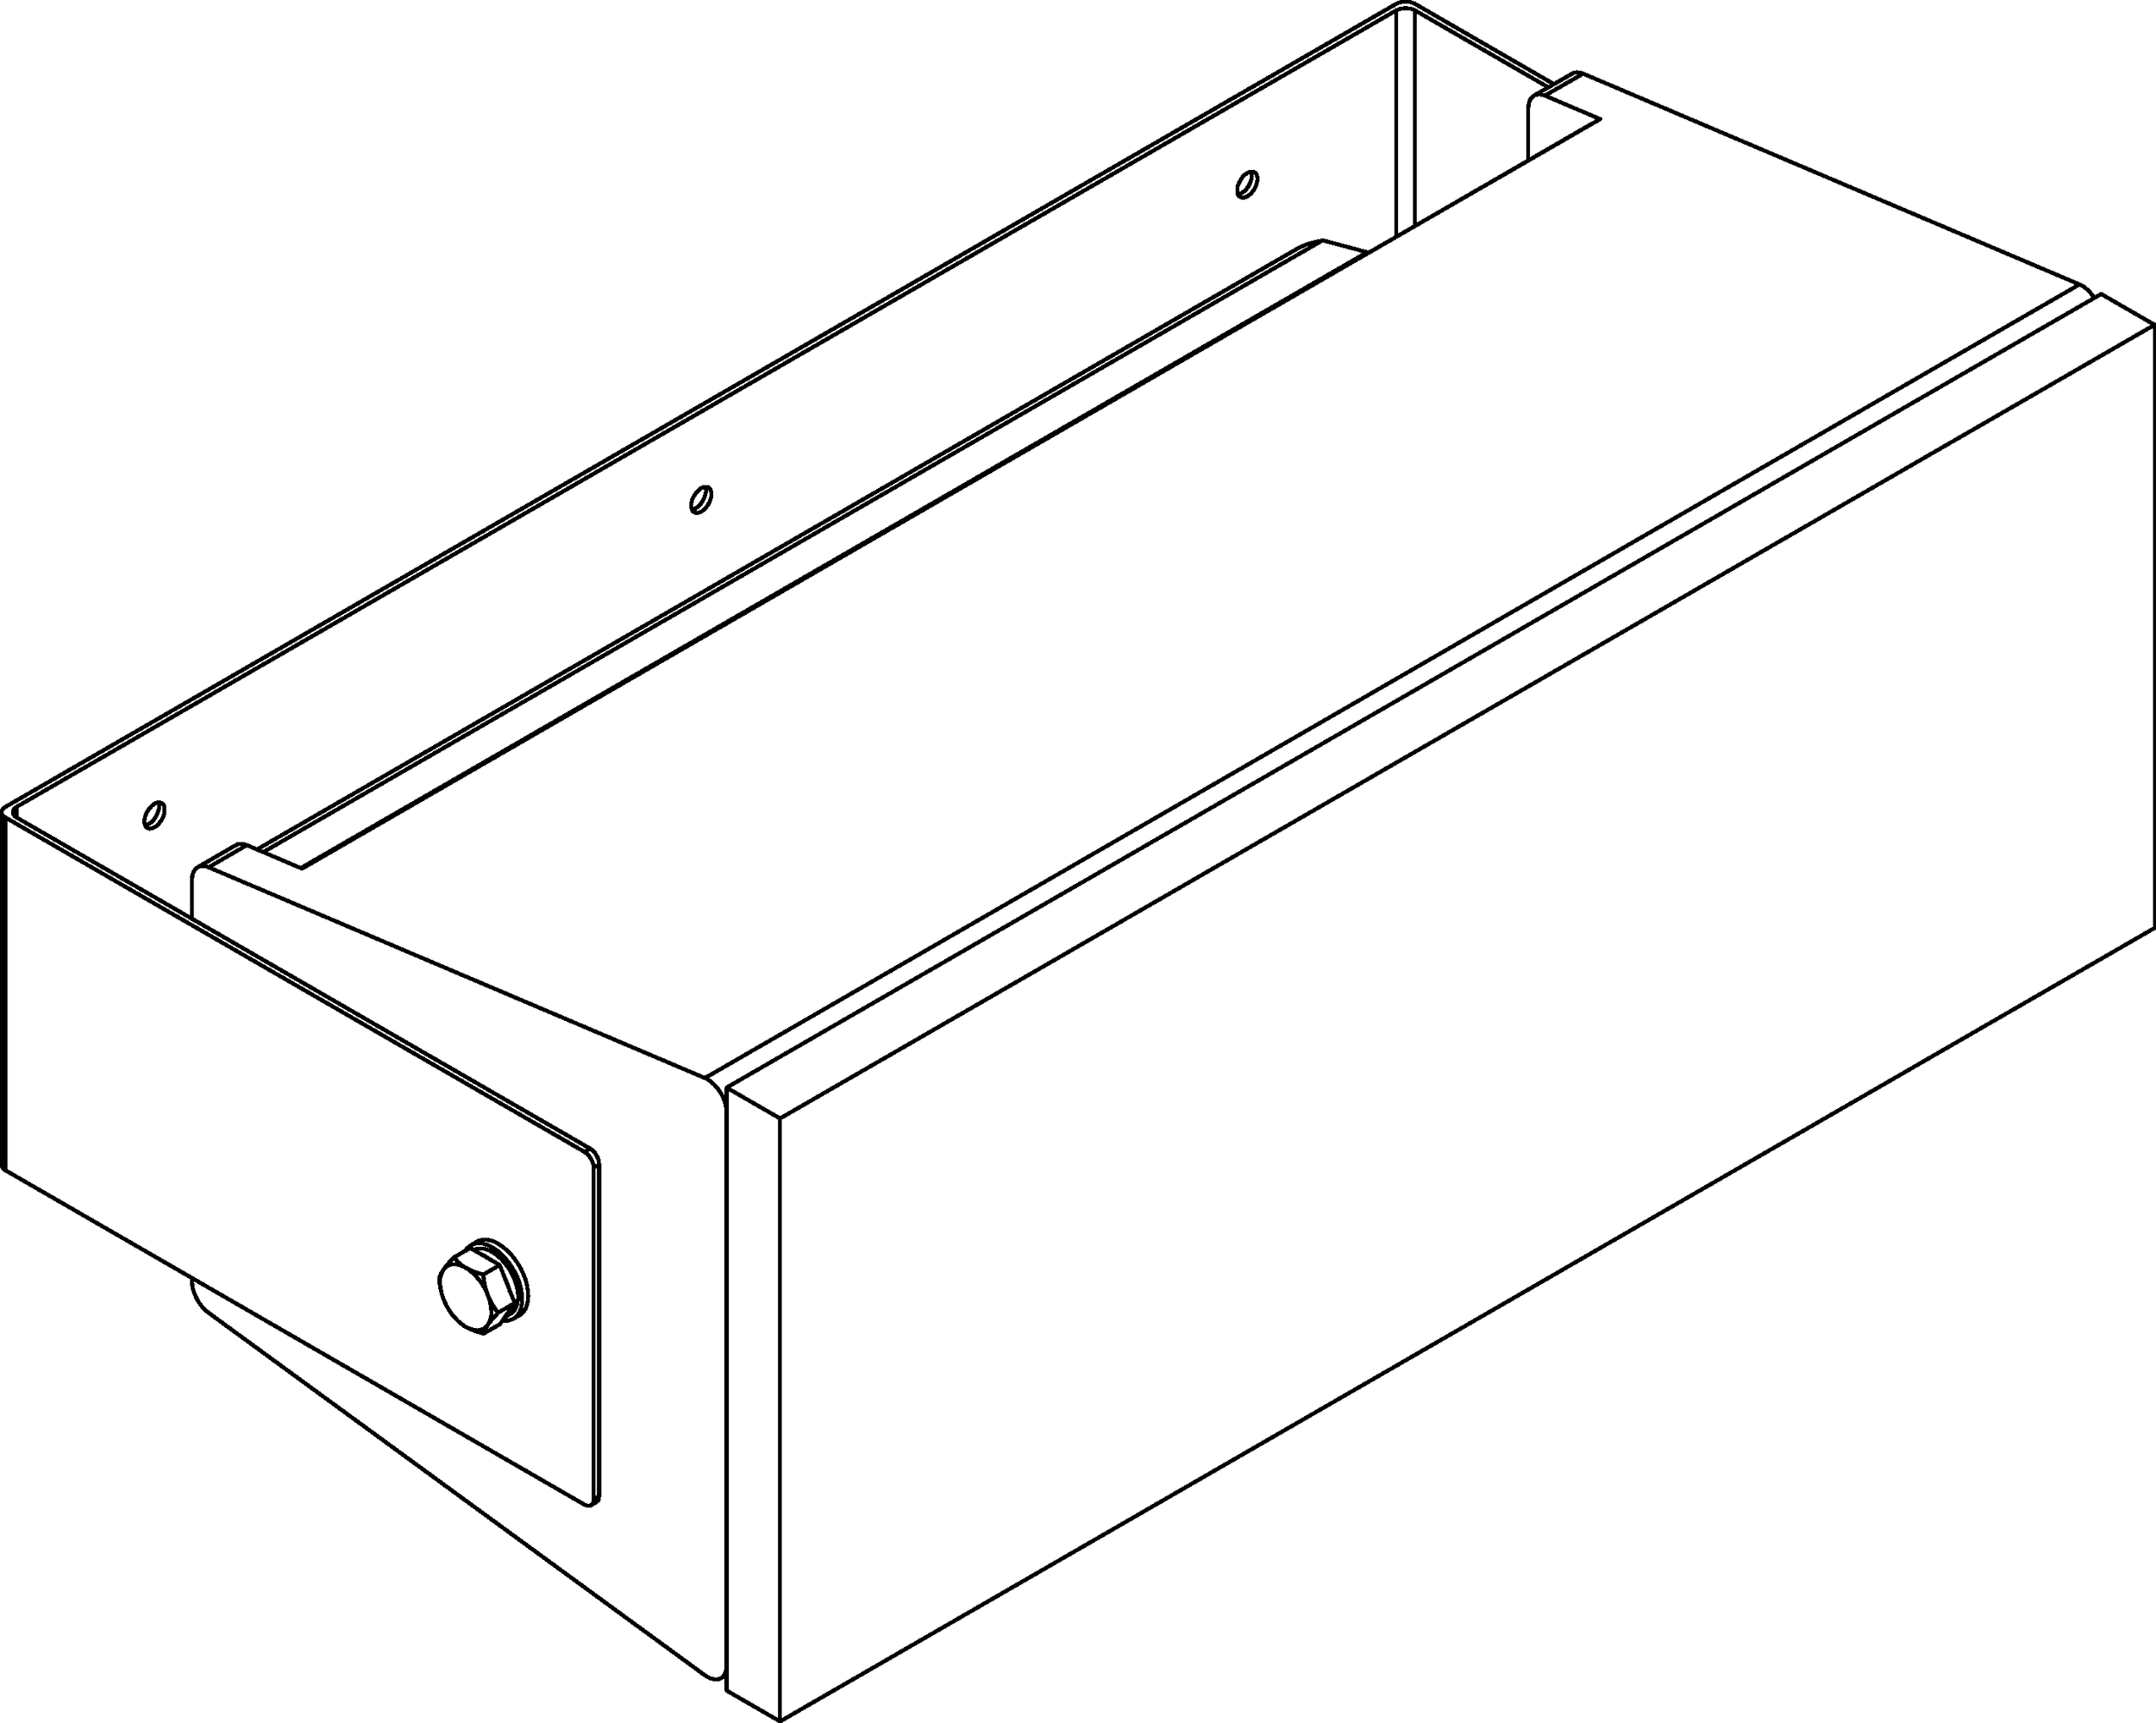
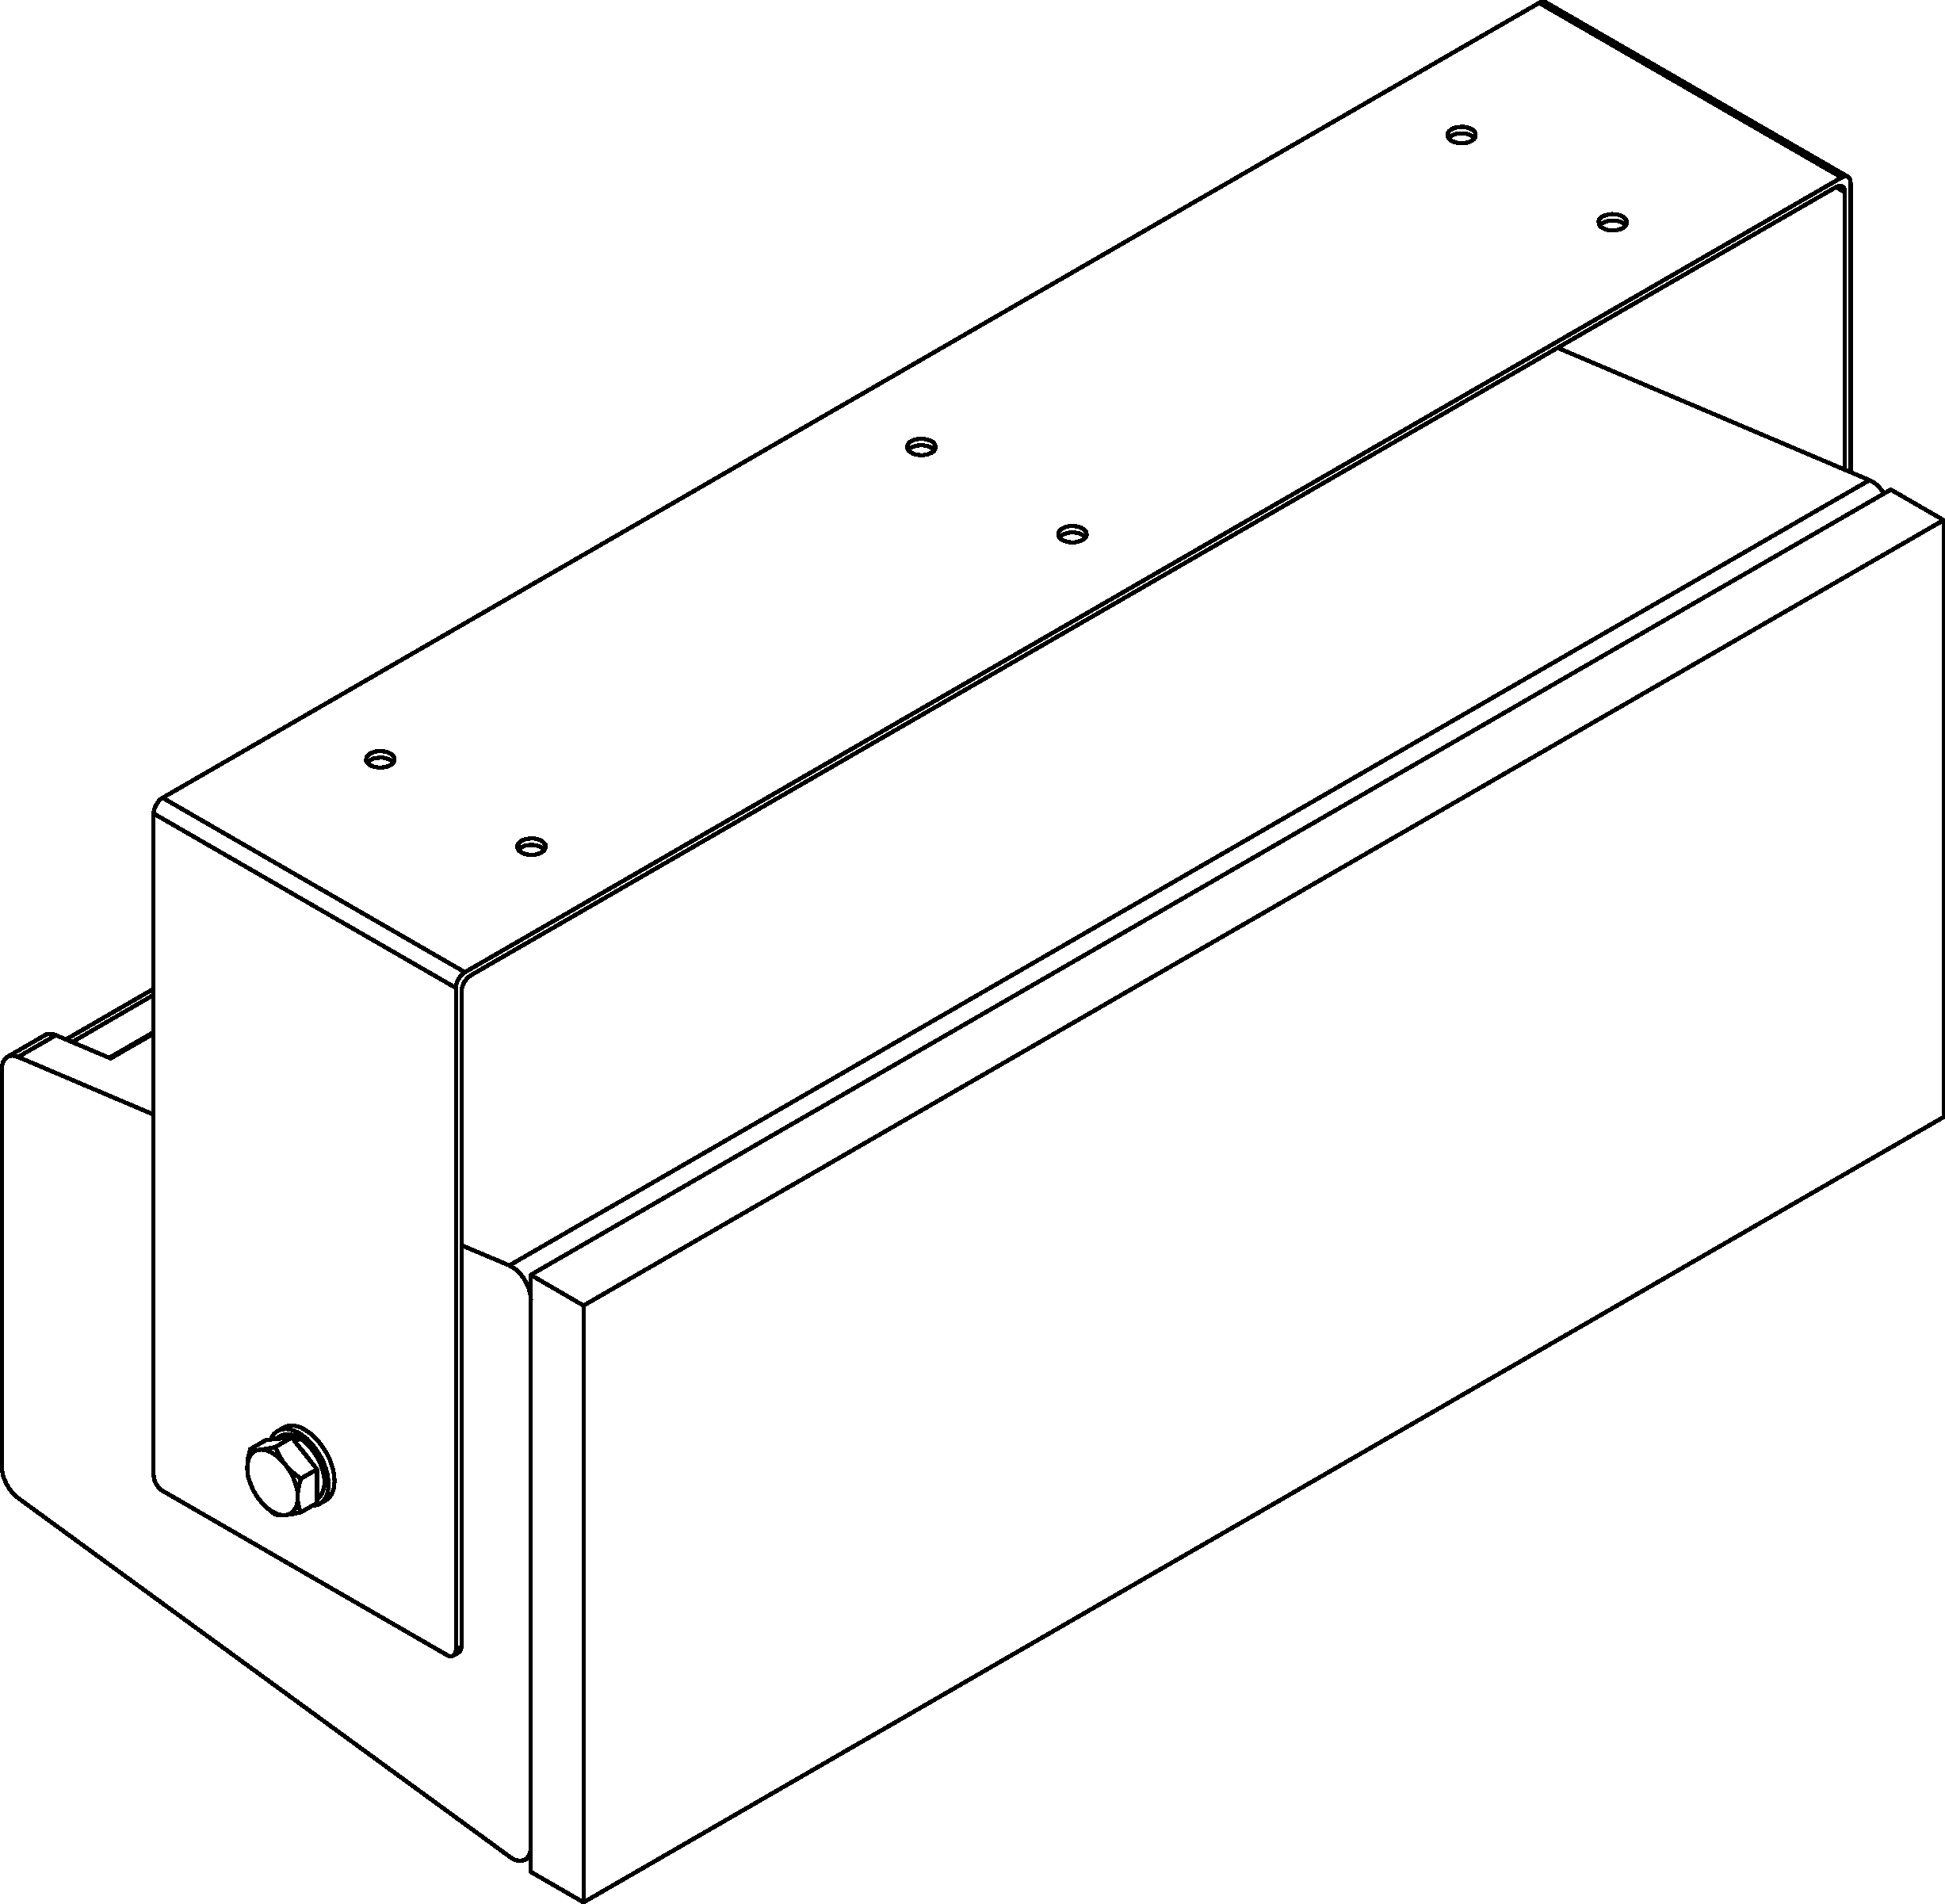
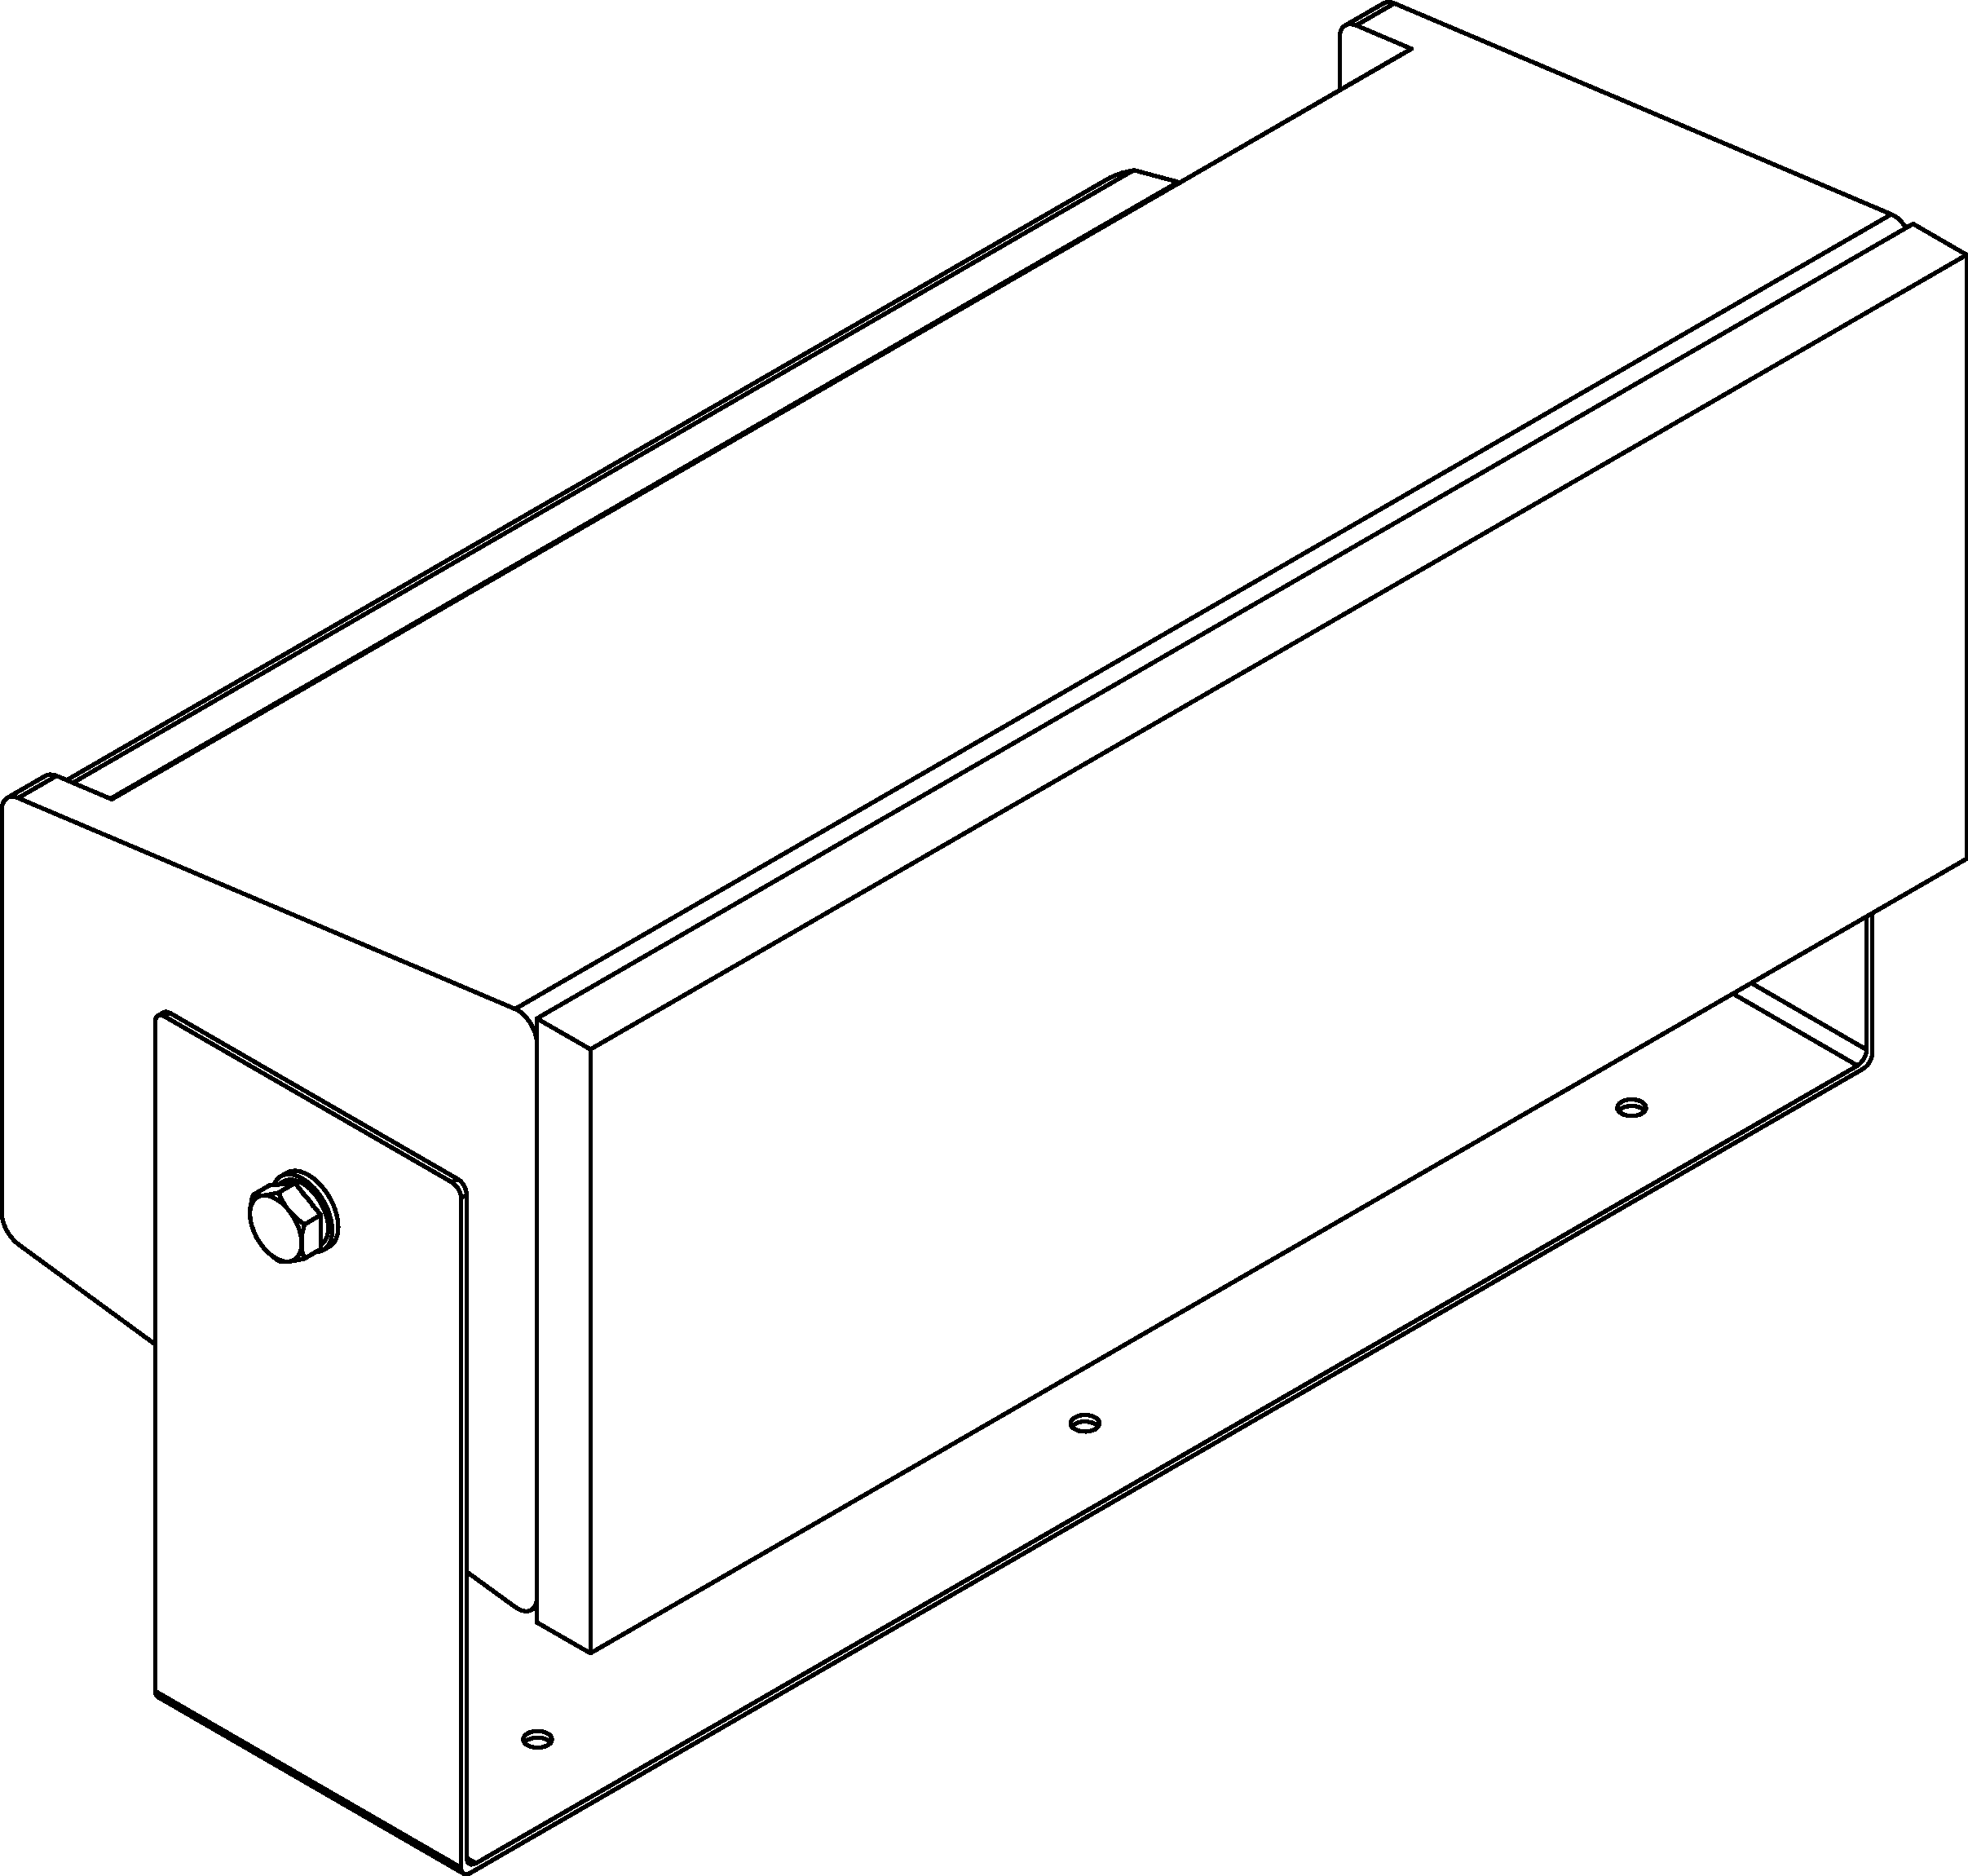
The MUB-UPM U-bracket, shown in the figure below, allows a UPM-1P or UPM-2P loudspeaker to be mounted to a wall, ceiling or floor.
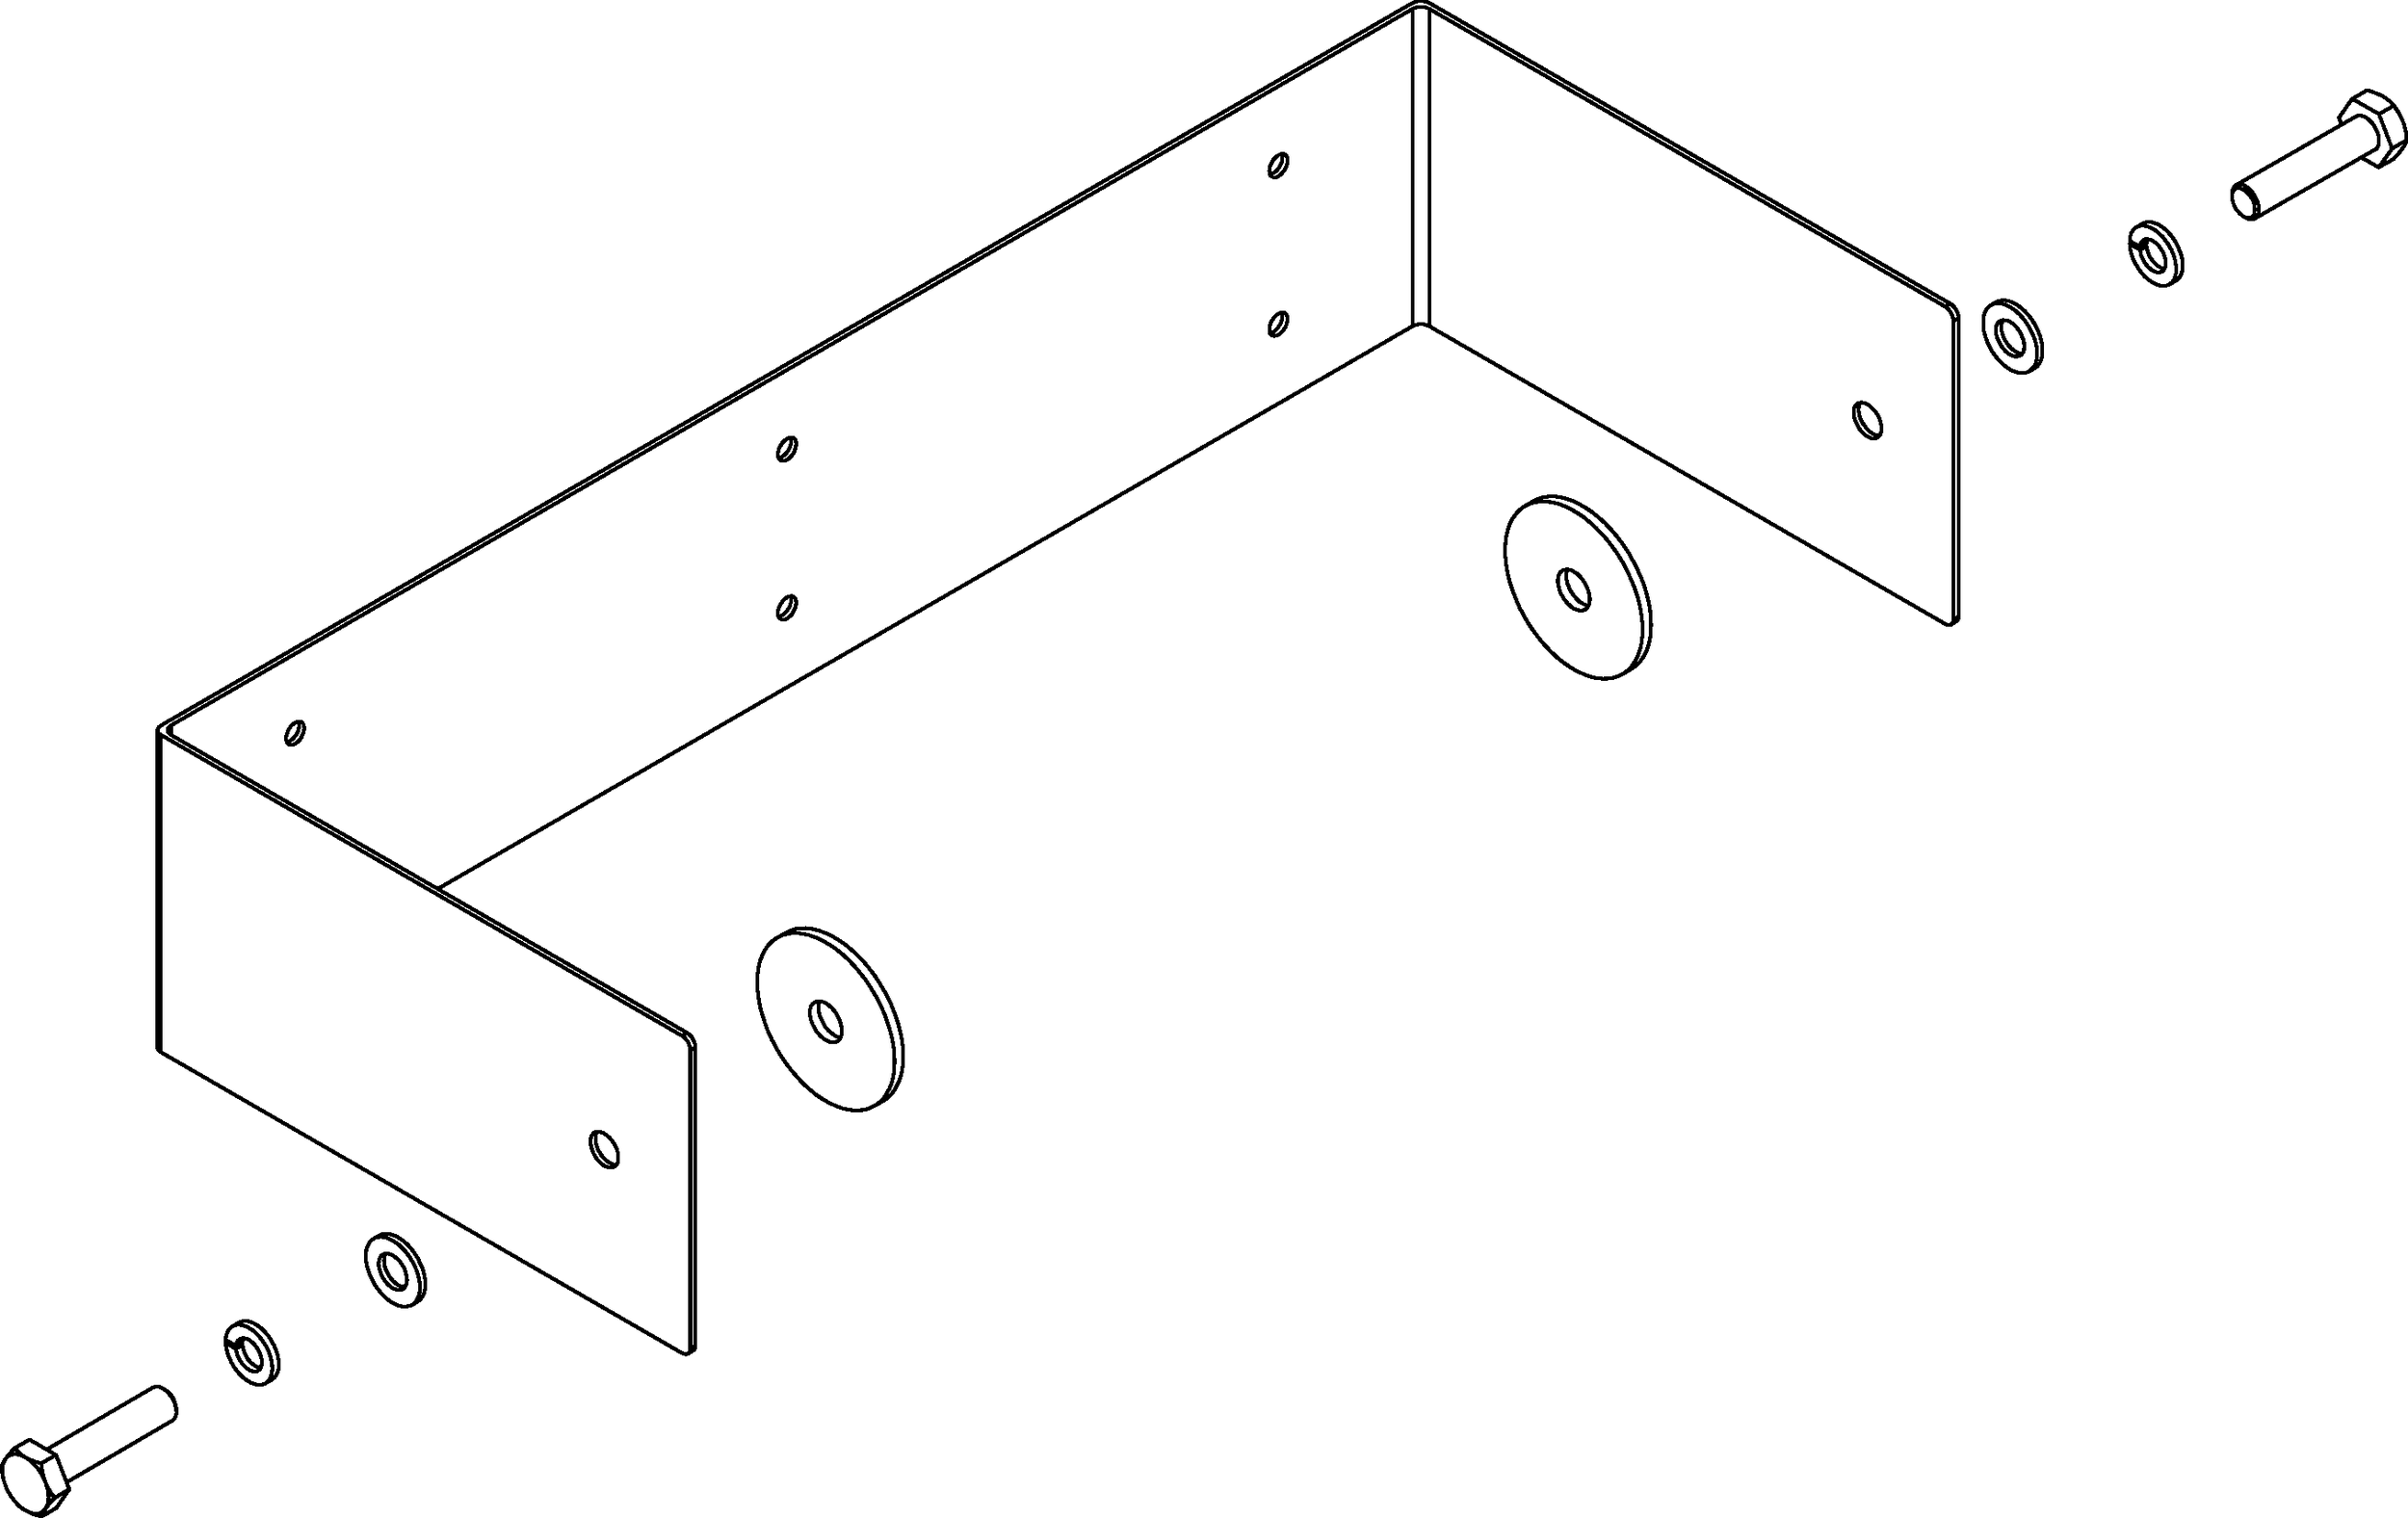
MUB-UPM U-bracket
A single MUB-UPM U-bracket provides maximum flexibility for positioning and securing the U-bracket according to the needs of the design and/or the venue.
To secure the bracket, attach the adhesive-backed cork washer to the inside walls of the bracket and bolt the loudspeaker to the MUB-UPM bracket using the bolts and washers as shown above. Make sure the bolts are well-tightened.
Wall Mount
The MUB-UPM allows you to mount the UPM-1P or UPM-2P in both a vertical and horizontal orientation for wall mounting, as shown in the following figures.
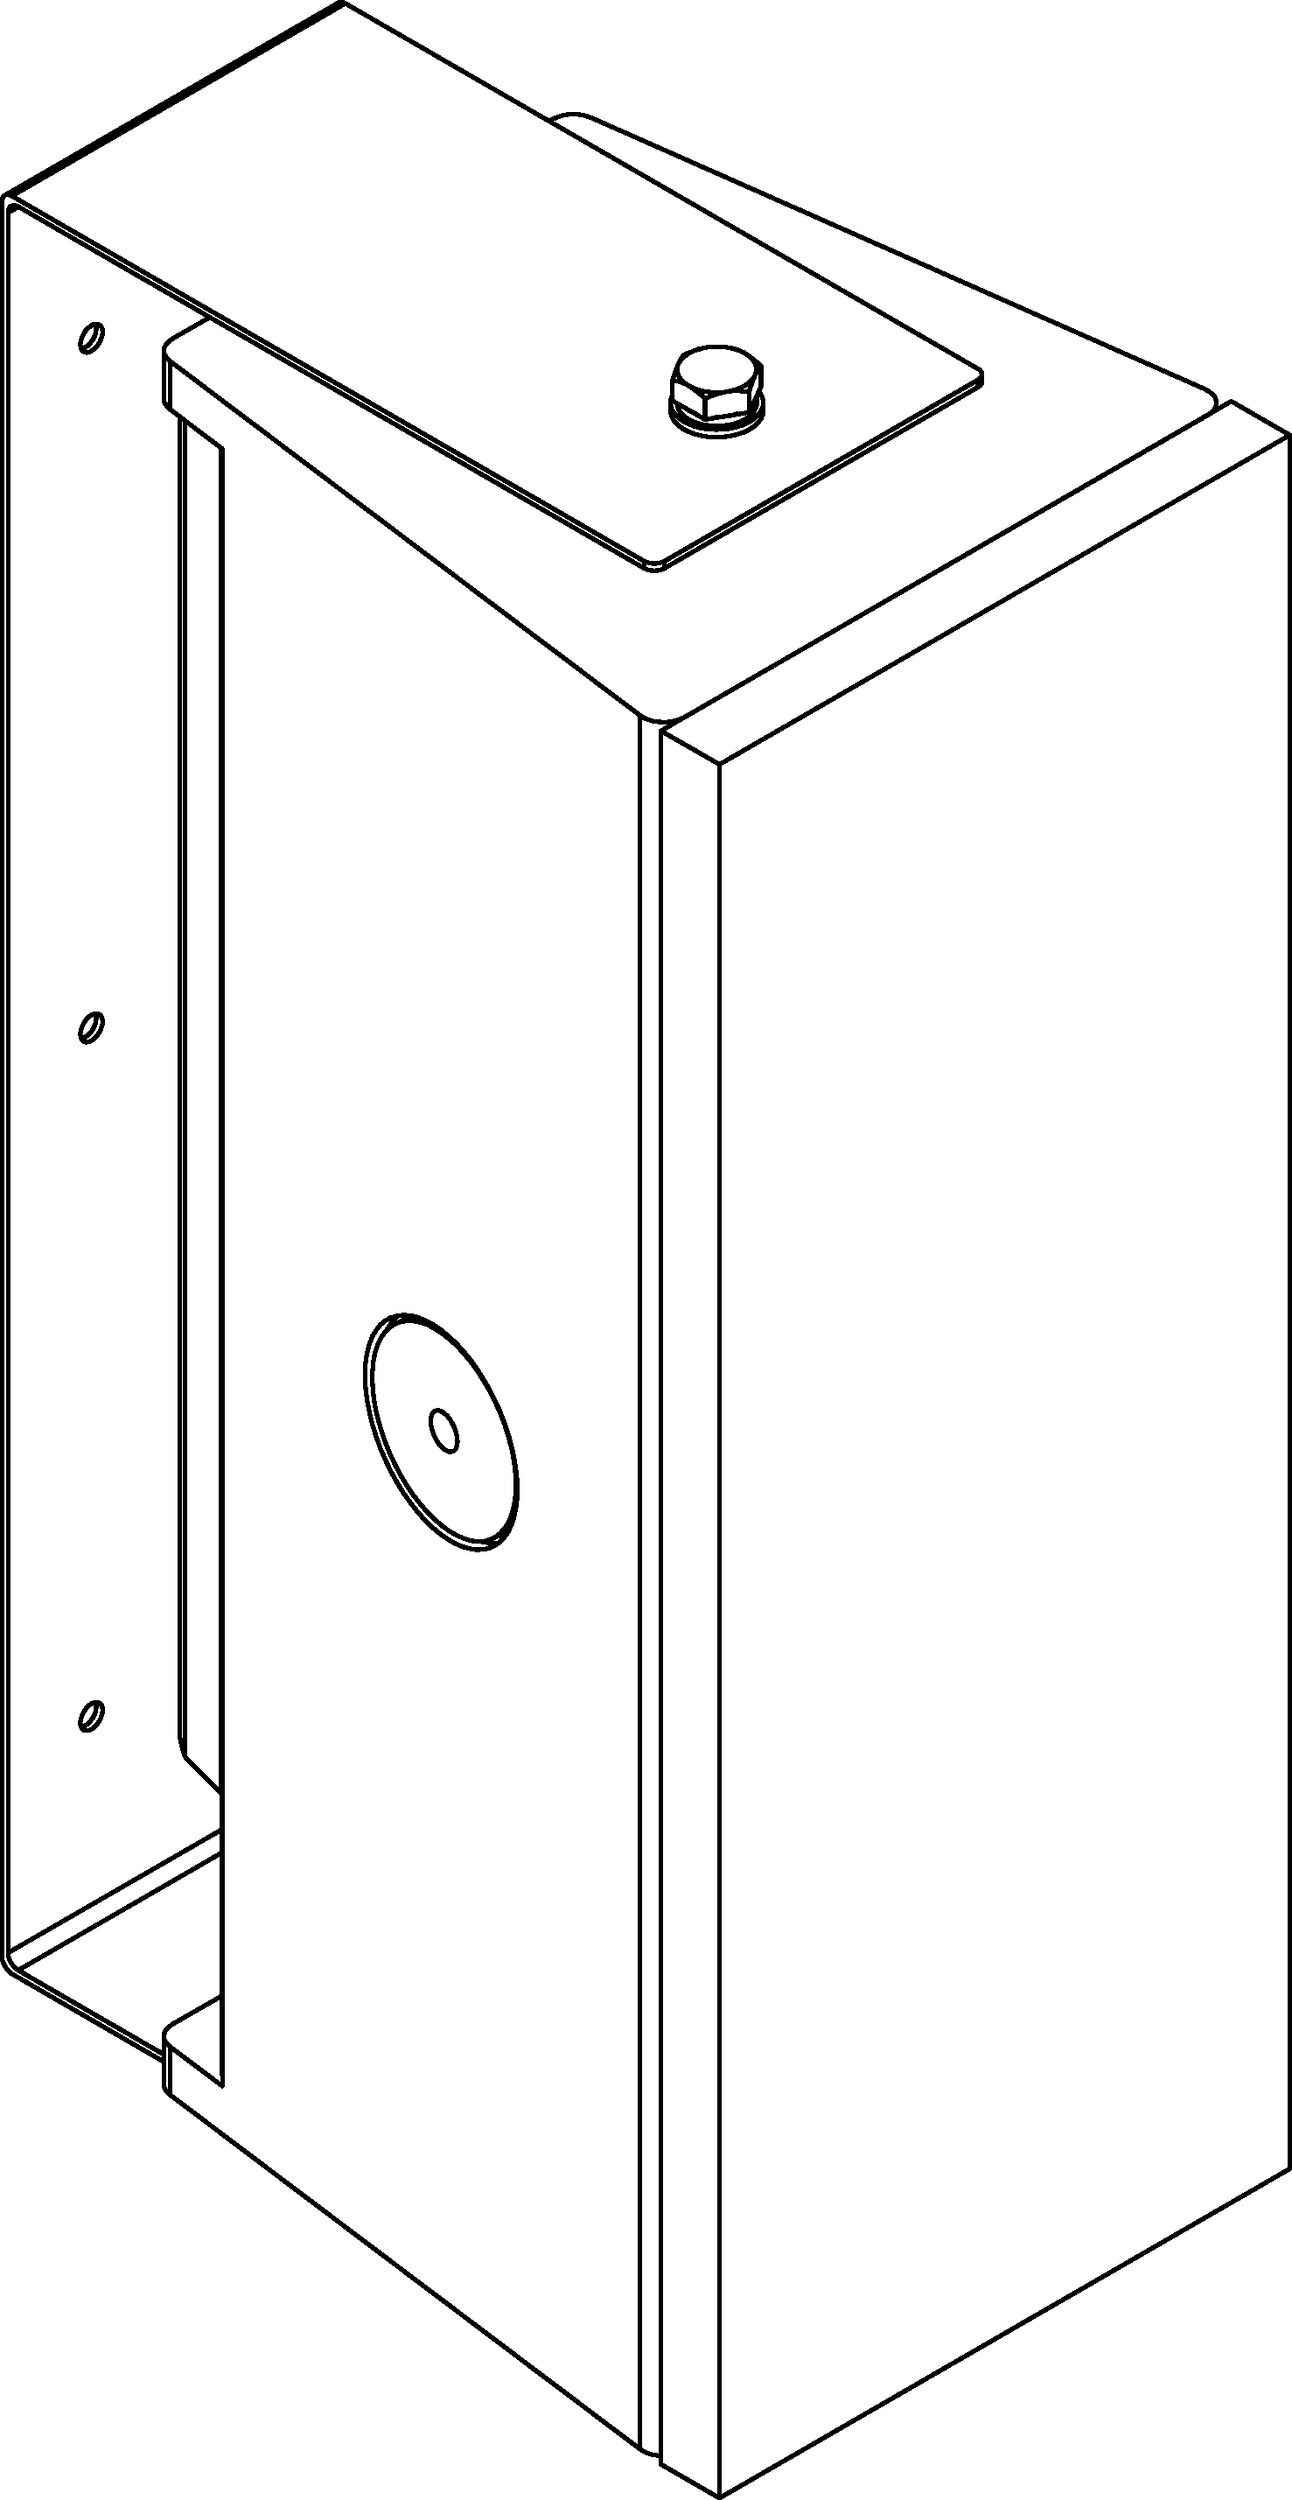
Vertically wall-mounting the UPM-1P
Horizontally wall-mounting the UPM-1P
Ceiling Mount
For mounting the UPM-1P or UPM-2P loudspeaker on a ceiling, under-balcony or canopy area, the MUB-UPM U-bracket is effective and stable, as shown in the figure below.
Ceiling-mounting the UPM-1P
Floor Mount
The MUB-UPM can also be used to mount the UPM-1P or UPM-2P on the floor or stage lip, which is useful for monitoring or front-fill applications, as shown in the figure below.
Floor-mounting the UPM-1P
Caution
Always use mounting hardware appropriate for the construction of the surface where the MUB-UPM will be installed.
Always use mounting and rigging hardware that has been rated to meet or exceed the weight being hung.