User Guide — Galileo GALAXY AVB Extreme Switch Configuration
Network platform
When building an AVB network with one or more Meyer Sound AVB products, use an AVB-compliant device, preferably one certified by the Avnu Alliance. Click the following link to see the Avnu-certified Extreme Networks Summit Family switches: http://www.extremenetworks.com/
Note
Meyer Sound cannot guarantee the performance of switches not certified by the Avnu Alliance.
To determine the exact number of switches required to meet your application requirements, contact Meyer Sound Technical Support.
The procedures in this guide use a web browser and require a second-generation Extreme Networks Summit Family switch. To make sure you have the latest firmware in your switch, click the link below and follow the instructions:
https://gtacknowledge.extremenetworks.com/articles/How_To/How-to-upgrade-EXOS-on-a-Summit-Stack
Extreme Networks AVB Feature Pack
Extreme Networks switches do not perform AVB functions out of the box. First purchase and install an Extreme Networks Audio Video Bridging Feature Pack. The AVB Feature Pack includes a voucher that will generate an AVB license key when redeemed. The license key enables AVB functionality in the switch. This task need only be performed once.
Purchase the Extreme Networks Audio Video Bridging Feature Pack from a third-party retailer.
Click the following link to register for an Extreme Networks Support Portal account: https://extremeportal.force.com/ExtrSupportHome
When you submit the form, you will receive an activation link via email.
To activate your account, click the link below and log in to the Support Portal using your email address and the password you just created.
https://extremeportal.force.com/ExtrLogin?startURL=%2FExtrLicenseLanding
Locate the serial number of your switch.
You will use this in conjunction with your voucher to generate a license.
Click Generate License and follow the instructions.
The voucher ID will be added as a link in a list at the bottom of the page.
Click the link and copy the AVB license key.
Extreme Networks Switch Quick Start
The network ports on the G2 Extreme Networks switches do not have an associated IPv4 address.
Note
This method may not work if a switch has already been configured. If that is the case, program the Management VLAN with the same IPv4 address and subnet as the default VLAN.
If you cannot access the switch via a web browser, you may need to reset your switch from a terminal window. To do so, follow the steps in Resetting the Switch from a Terminal Window.
Disable WiFi on your computer.
Set your computer's wired network interface controller to DHCP.
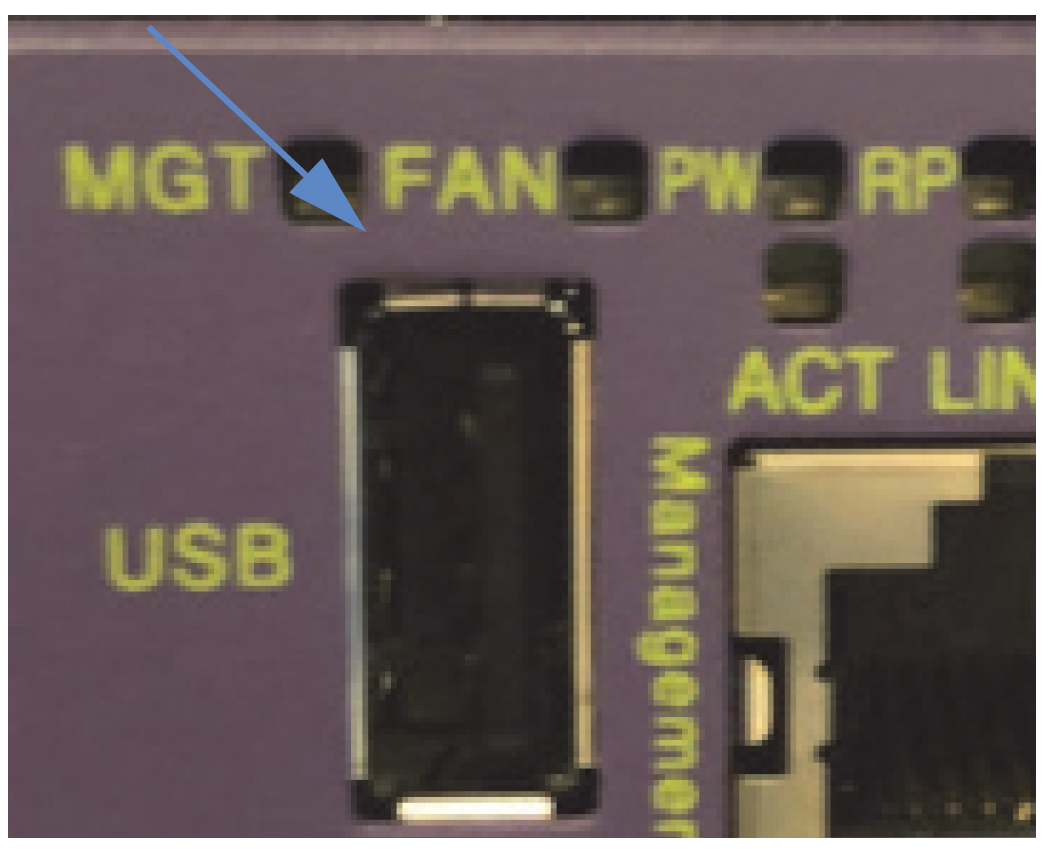
Connect a network cable to the USB Management port on the Extreme Networks switch.

Locate the last four digits of your switch’s MAC address (printed on a label on the switch).
Open a web browser and type the following URL into the address bar:
http://0xa9fe followed by the last four digits of the MAC address (e.g., http://0xa9fedx17).
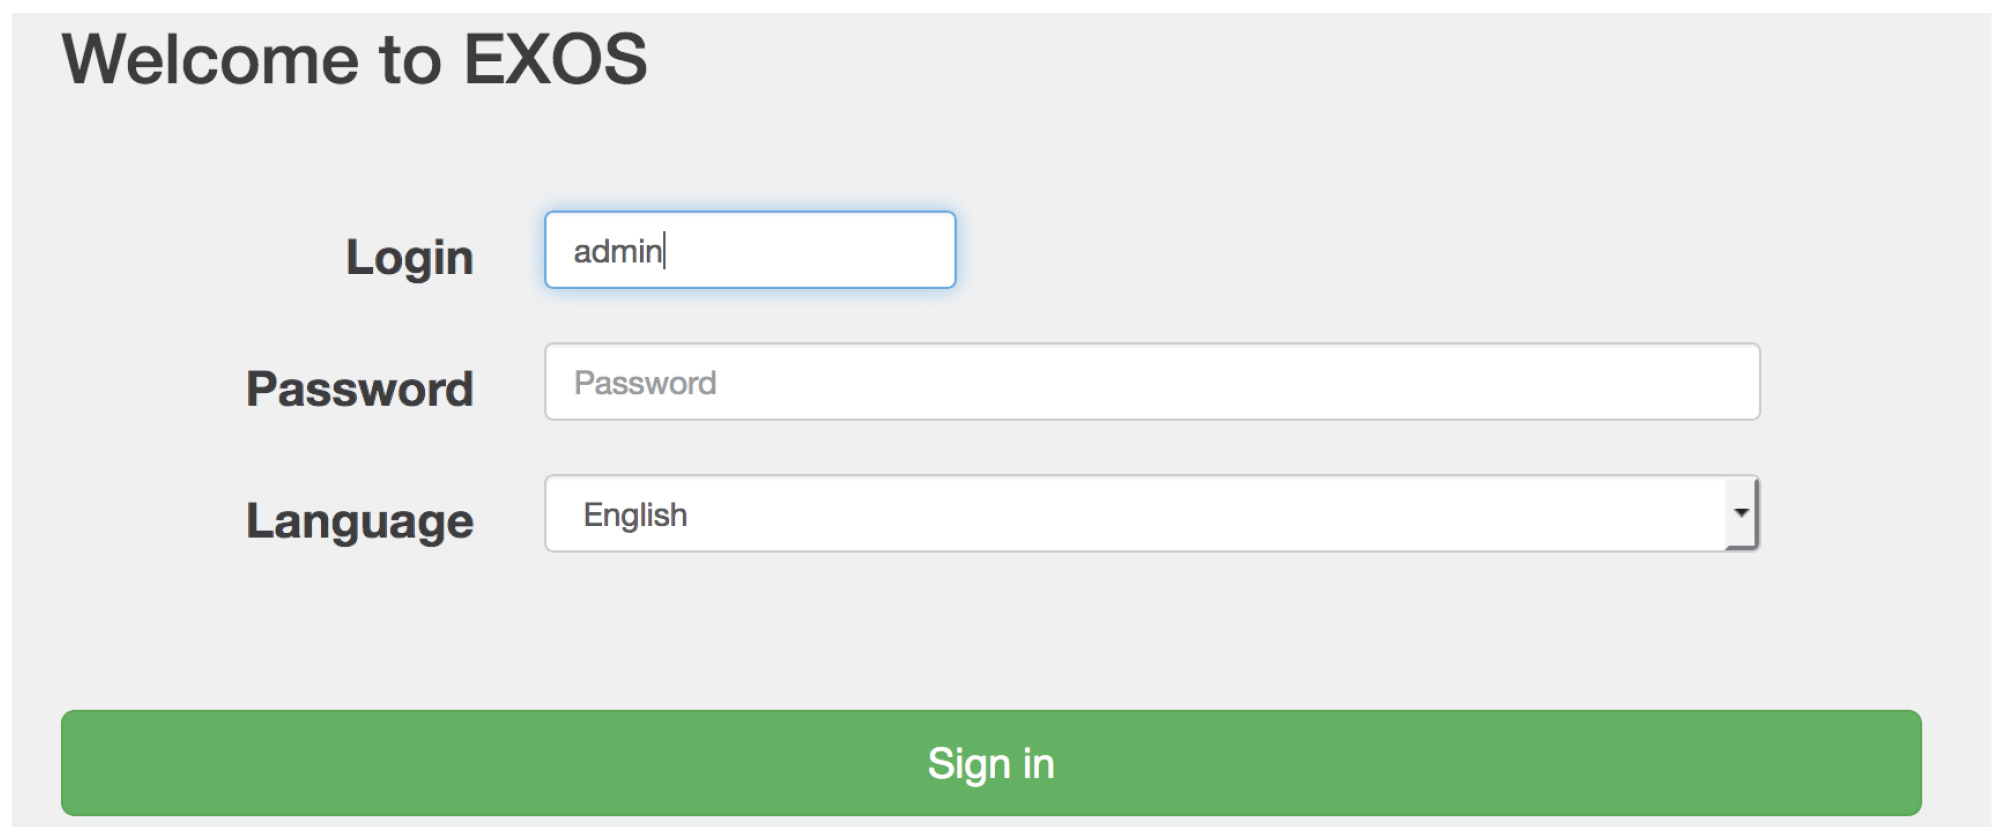
When you are prompted to log in, type admin as the user name and leave the password field blank.

Click Sign in.
From the Dashboard, click Next to continue unless you wish to create custom login settings. In that case, click Configure > Quick Setup Account, update your login settings, and then click Next.
In the Device section, enter a name for your switch, and then click Next.
In the IP Address section, enter an IPv4 address for your switch in the Default VLAN field.
Enter a Default Gateway, and then click Next.
In the Security section, click Next.
In the Summary section, click Apply.
From the Dashboard, select the System Text box, and then click Reboot Switch at the bottom-right. Respond Yes to the confirmation dialog and your switch will restart.
Enabling the AVB Feature Pack
If you are not already logged in, connect to a network port, and set the user IP to a compatible subnet of the switch.
When prompted to log in, type
adminfor the user Login and leave the Password field blankClick Sign in (or press Enter).

In Dashboard, click Apps , and then select CLI Terminal.
You will be asked several questions about Security settings. We recommend accepting the standard settings (indicated by the capital letter).
For example, for these options [y/N/q], type
Nfor no.To accept all standard settings without seeing additional questions, type
q. This can be done for the first or any subsequent question.Type
enable licensefollowed by your AVB license key, and then press Enter.For example:
enable license 3632-1463-ae05-c780-f57fTo verify that your license is enabled, type
show licenseand then press Enter.
Configuring the AVB Feature Pack
If you are not already logged in, connect to a network port, and set the user IP to a compatible subnet of the switch.
When prompted to log in, type
adminfor the user Login, and leave the Password field blankClick Sign in (or press Enter).

From Dashboard, select Apps > CLI Terminal.
Type
enable avband then press Enter.Type
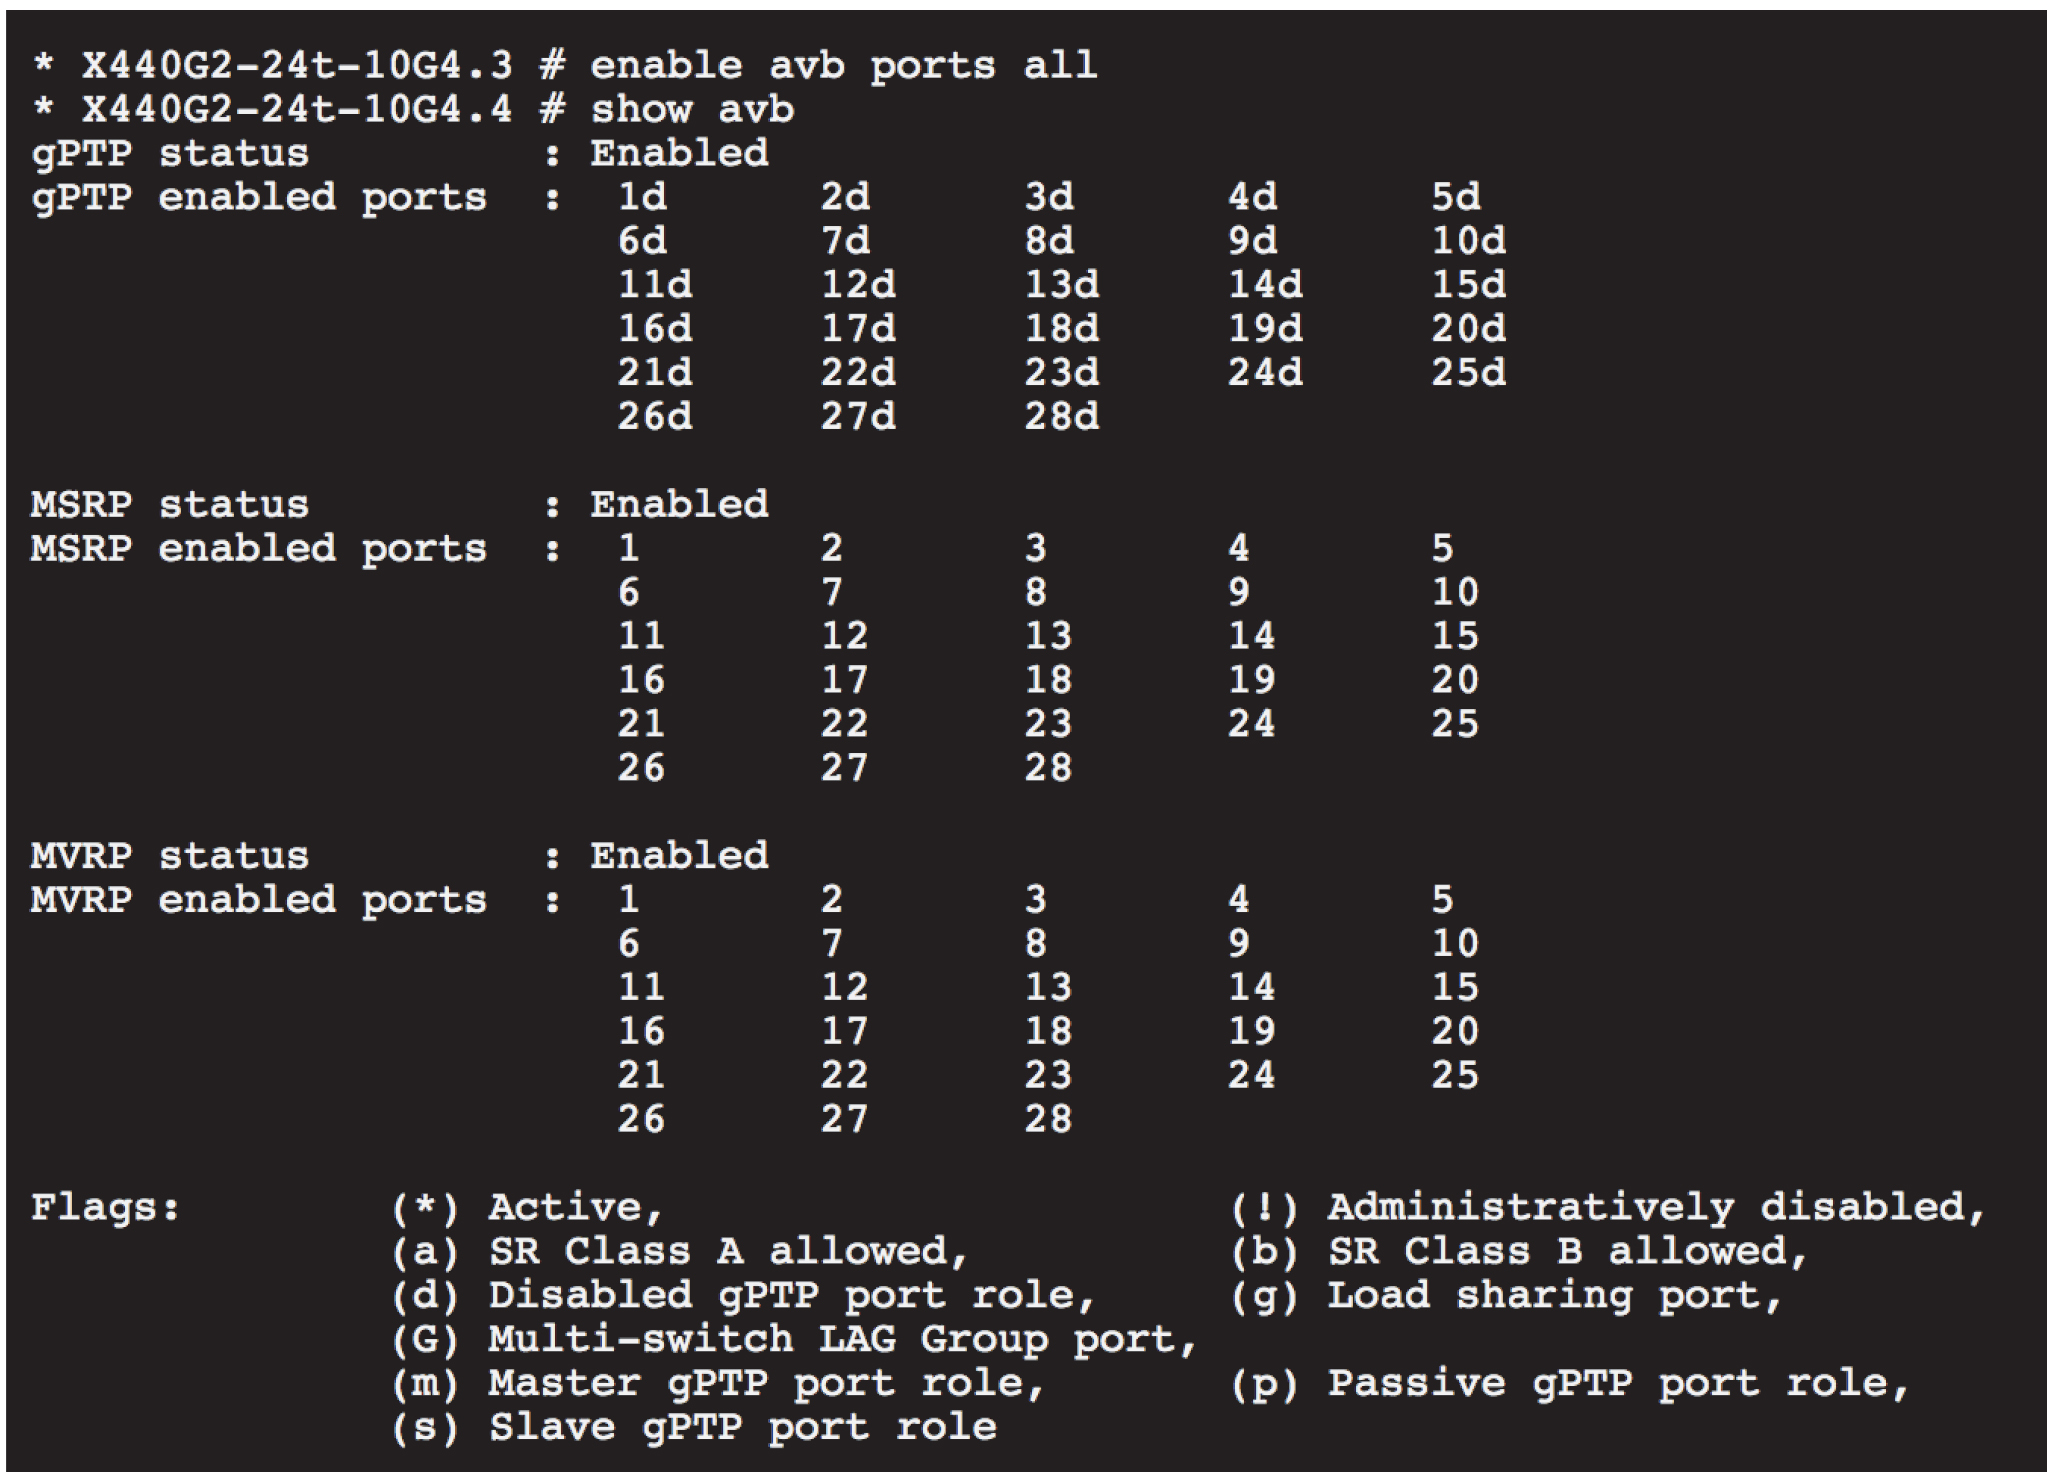
enable avb ports alland then press Enter.This action enables gPTP, MSRP, and MVRP across all configurable switch ports. These protocols are critical to AVB performance.
To verify that all ports are enabled, type
show avband then press Enter.All AVB-enabled ports on your switch will display as shown in the figure below.

Enabling AVB ports and displaying status
Type the following commands in the order listed:
enable snmp accessconfigure snmp add community readonly publicconfigure vlan "Default" ipaddress ipv6-link-localconfigure lldp ports all advertise all-tlvsenable lldp ports allenable telnetTo write this configuration file to the switch, type
save configuration MSLI-AVB-GALAXYand then press Enter.The result of the previous two steps are shown in the figure below.

Configuring and enabling ports
When prompted to overwrite the file
MSLI-AVB-GALAXY, typeYfor yes, and then press Enter.To rename the file, type
Nfor no, type a new name, and then press Enter.When prompted to make this the default database, type Y for yes, N for no, then press Enter.
Resetting the AVB switch
You may want to reset the switch to factory default settings in some circumstances. The following procedure removes the user settings from the switch, including the IPv4 address, but does not remove the AVB license.
If you are not already logged in, connect to a network port, and set the user IP to a compatible subnet of the switch.
When prompted to log in, type admin for the user Login, leave the Password field blank and click Sign in (or press Enter).
In Dashboard click Apps, and then select CLI Terminal.
In the terminal window, type the command
unconfigure switch all.Type
yto confirm and then press Enter.When the switch reboot is complete, you must log in again to reconnect to the switch.
You will be asked several questions about security settings. We recommend accepting the standard settings (indicated by the capital letter).
For example, type
Nfor no for these options [y/N/q].To accept all standard settings without seeing additional questions, type
q. This can be done for the first or any subsequent question.
Resetting the switch from a terminal window
In some cases, you may need to reset the switch from a terminal window. To do so, you will need:
USB-to-serial adapter
Serial-to-RJ45 adapter (this should come with your Extreme switch)
serial cable
Connect the USB-to-serial adapter to your computer.
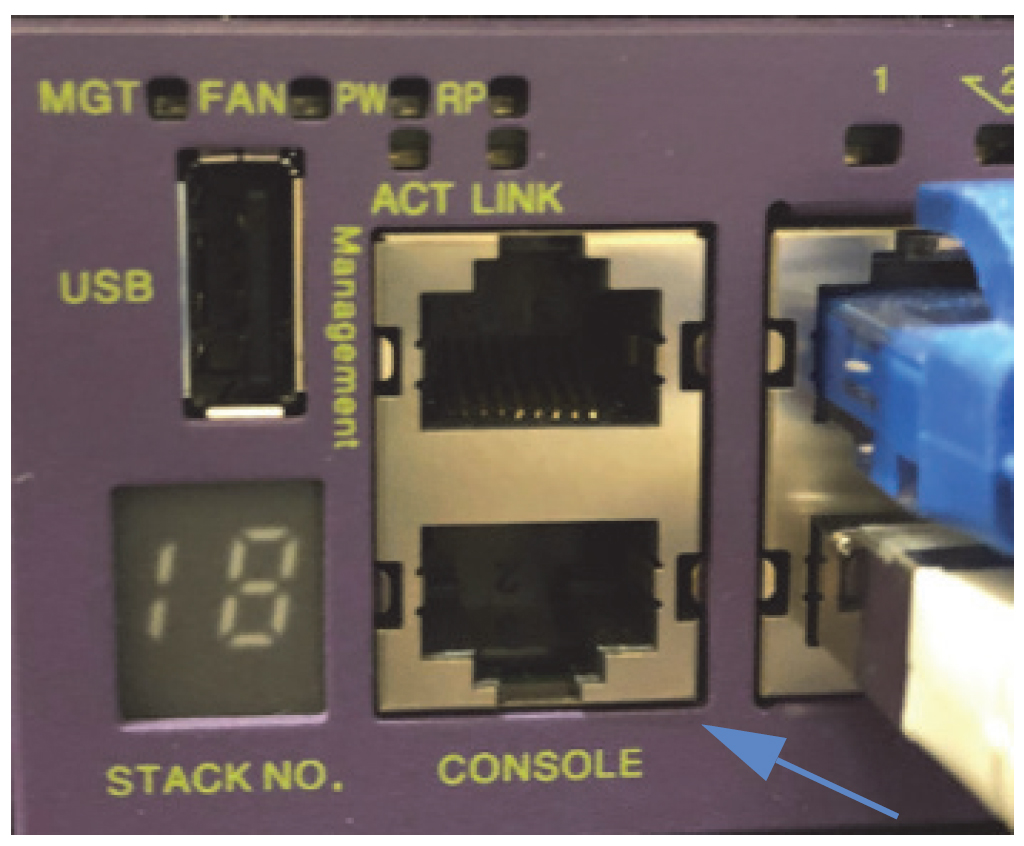
Insert the serial-to-RJ45 adapter into the console port of the switch.

Use the serial cable to connect both adapters.
Login into the switch via a terminal window.
Note
The default username is admin and the default password is empty.
Press Enter twice.
When connected, type the command
unconfigure switch all, and then press Enter.
These steps will reset the switch and restore it to factory defaults, after which you should be able to configure the switch via the steps outlined in Extreme networks switch quick start.
Note
For additional information, see the following resources available from the Extreme Portal: