Mounting
Strategically placed 3/8-inch threaded points on the side corners of the Acheron cabinet allow the unit to be secured to floors with uptilt or downtilt using the optional mounting brackets. The Acheron can also be mounted on top of the AcheronLF loudspeaker, also with uptilt or downtilt, using the optional stacking brackets. Both brackets are available for purchase from Meyer Sound.
Important Safety Considerations
When installing Meyer Sound loudspeakers and subwoofers, the following precautions should always be observed:
All Meyer Sound products must be used in accordance with local, state, federal, and industry regulations. It is the owner’s and user’s responsibility to evaluate the reliability of any mounting and rigging method for their application. Mounting and rigging should only be carried out by experienced professionals.
Use mounting and rigging hardware that has been rated to meet or exceed the weight being hung.
Make sure to attach mounting hardware to the building's structural components (studs or joists), and not just to the wall surface. Verify that the building's structure and the anchors used for the installation will safely support the total weight of the mounted loudspeakers.
Use mounting hardware appropriate for the surface where the loudspeaker will be installed.
Make sure bolts and eyebolts are tightened securely. Meyer Sound recommends using Loctite® on eyebolt threads and safety cables.
Inspect mounting and rigging hardware regularly. Immediately replace any worn or damaged components.
Acheron and Acheron LF side screws
The Acheron and Acheron LF ship with four 3/8-16 x 1.5- inch screws installed on each loudspeaker side (eight total). These screws and threaded points are used to secure the floor mount and stacking brackets to the loudspeakers.
Caution
If the Acheron side screws are removed to install the brackets, make sure to always reinstall the screws, and tighten them securely. If the side screws are not present when using the loudspeakers, air leakage will result, which will adversely affect frequency response.
Acheron Floor Mount Brackets
The Acheron floor mount brackets secure Acheron loudspeakers to floors with downtilt and uptilt angles of 0–18 degrees (in 3-degree increments). The floor mount
brackets should also be used with Acheron LF loudspeakers when stacking an Acheron on top of the Acheron LF.
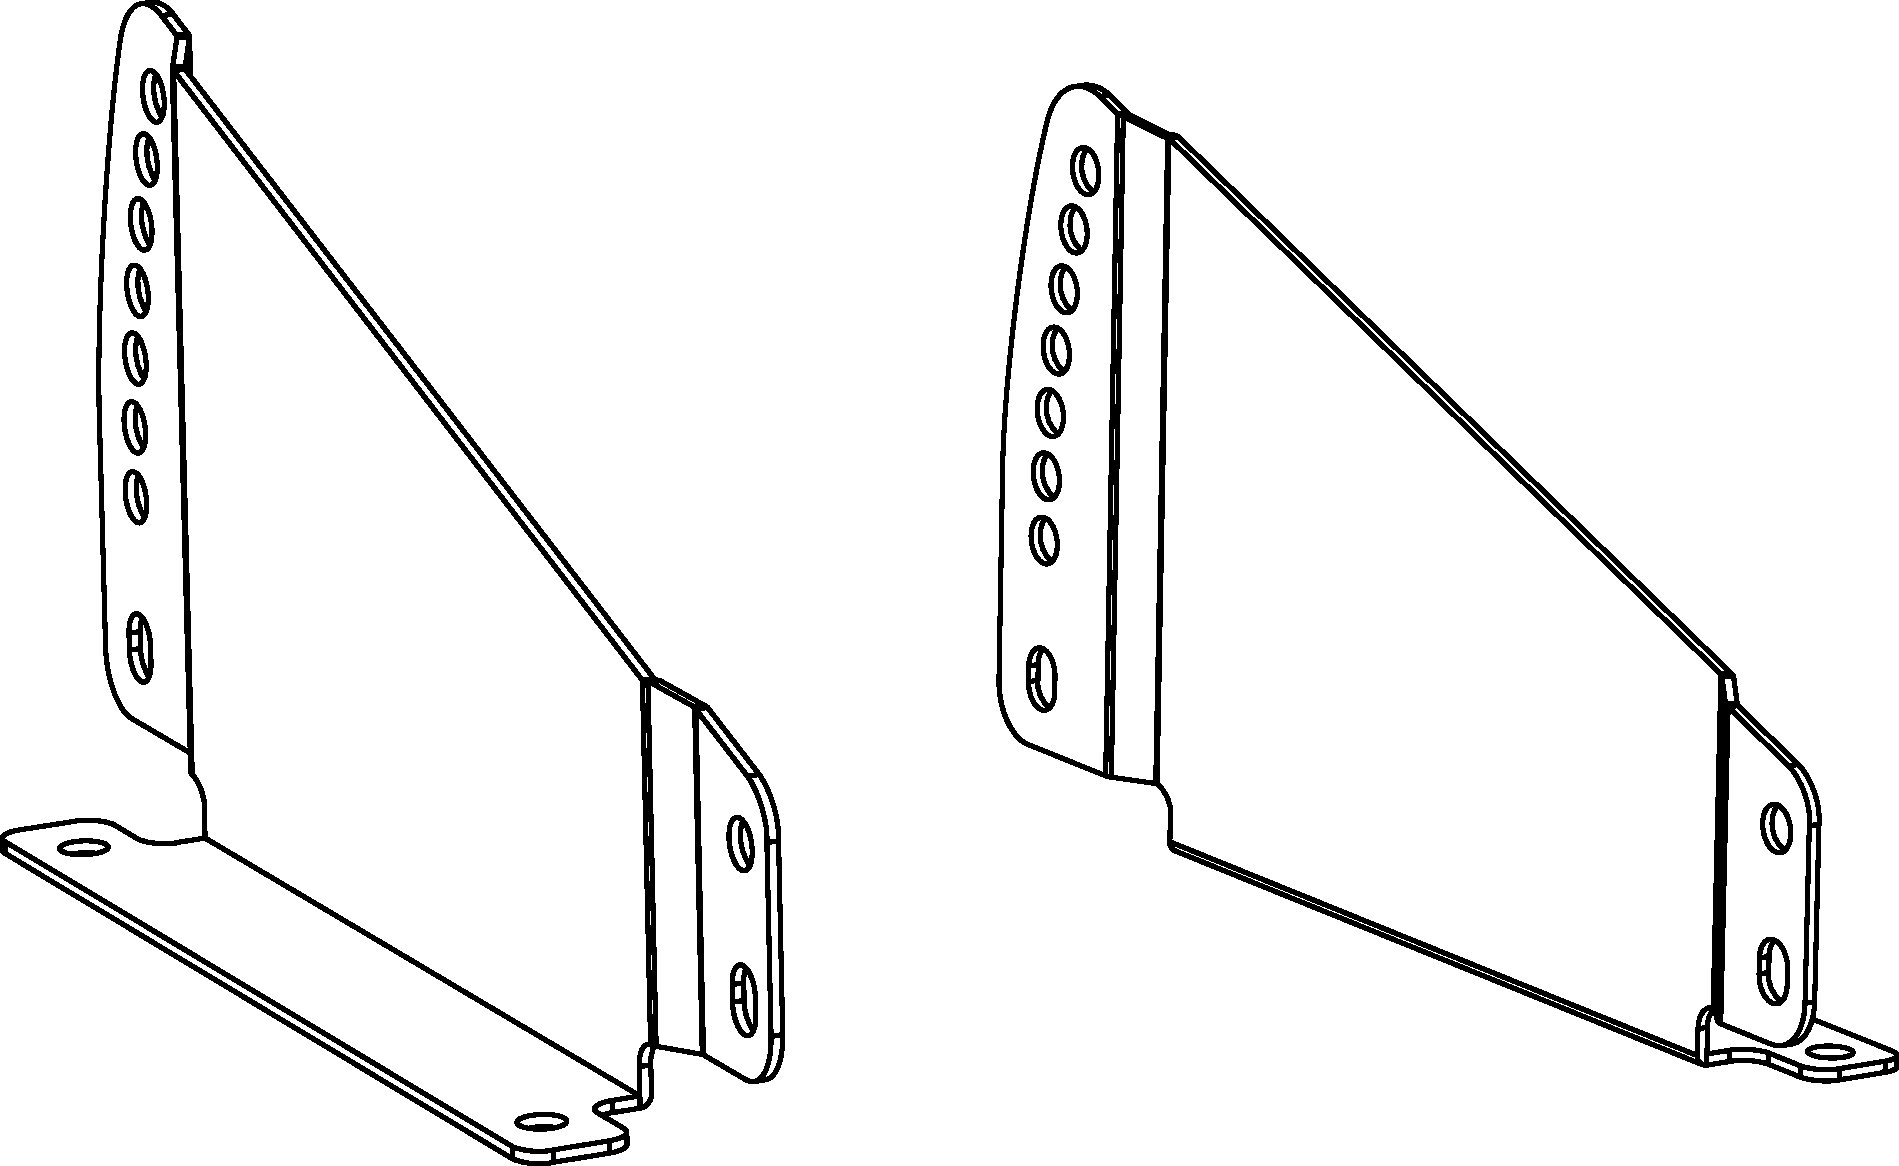 |
Acheron Floor Mount Brackets
 |
Acheron with Floor Mount Brackets
Acheron Floor Mount Bracket Kit Contents
The Acheron floor mount kit (PN 40.188.026.01) includes the following parts.
Part | Part number | Quantity |
|---|---|---|
Acheron floor mount bracket (left) | 64.188.042.01 | 1 |
Acheron floor mount bracket (right) | 64.188.043.01 | 1 |
Flat washers | 113.509 | 4 |
Note
The 3/8-16 x 1.5-inch screws required for securing the floor mount brackets to the Acheron are shipped with the loudspeaker installed in the two bottom screw holes on each side (four total).
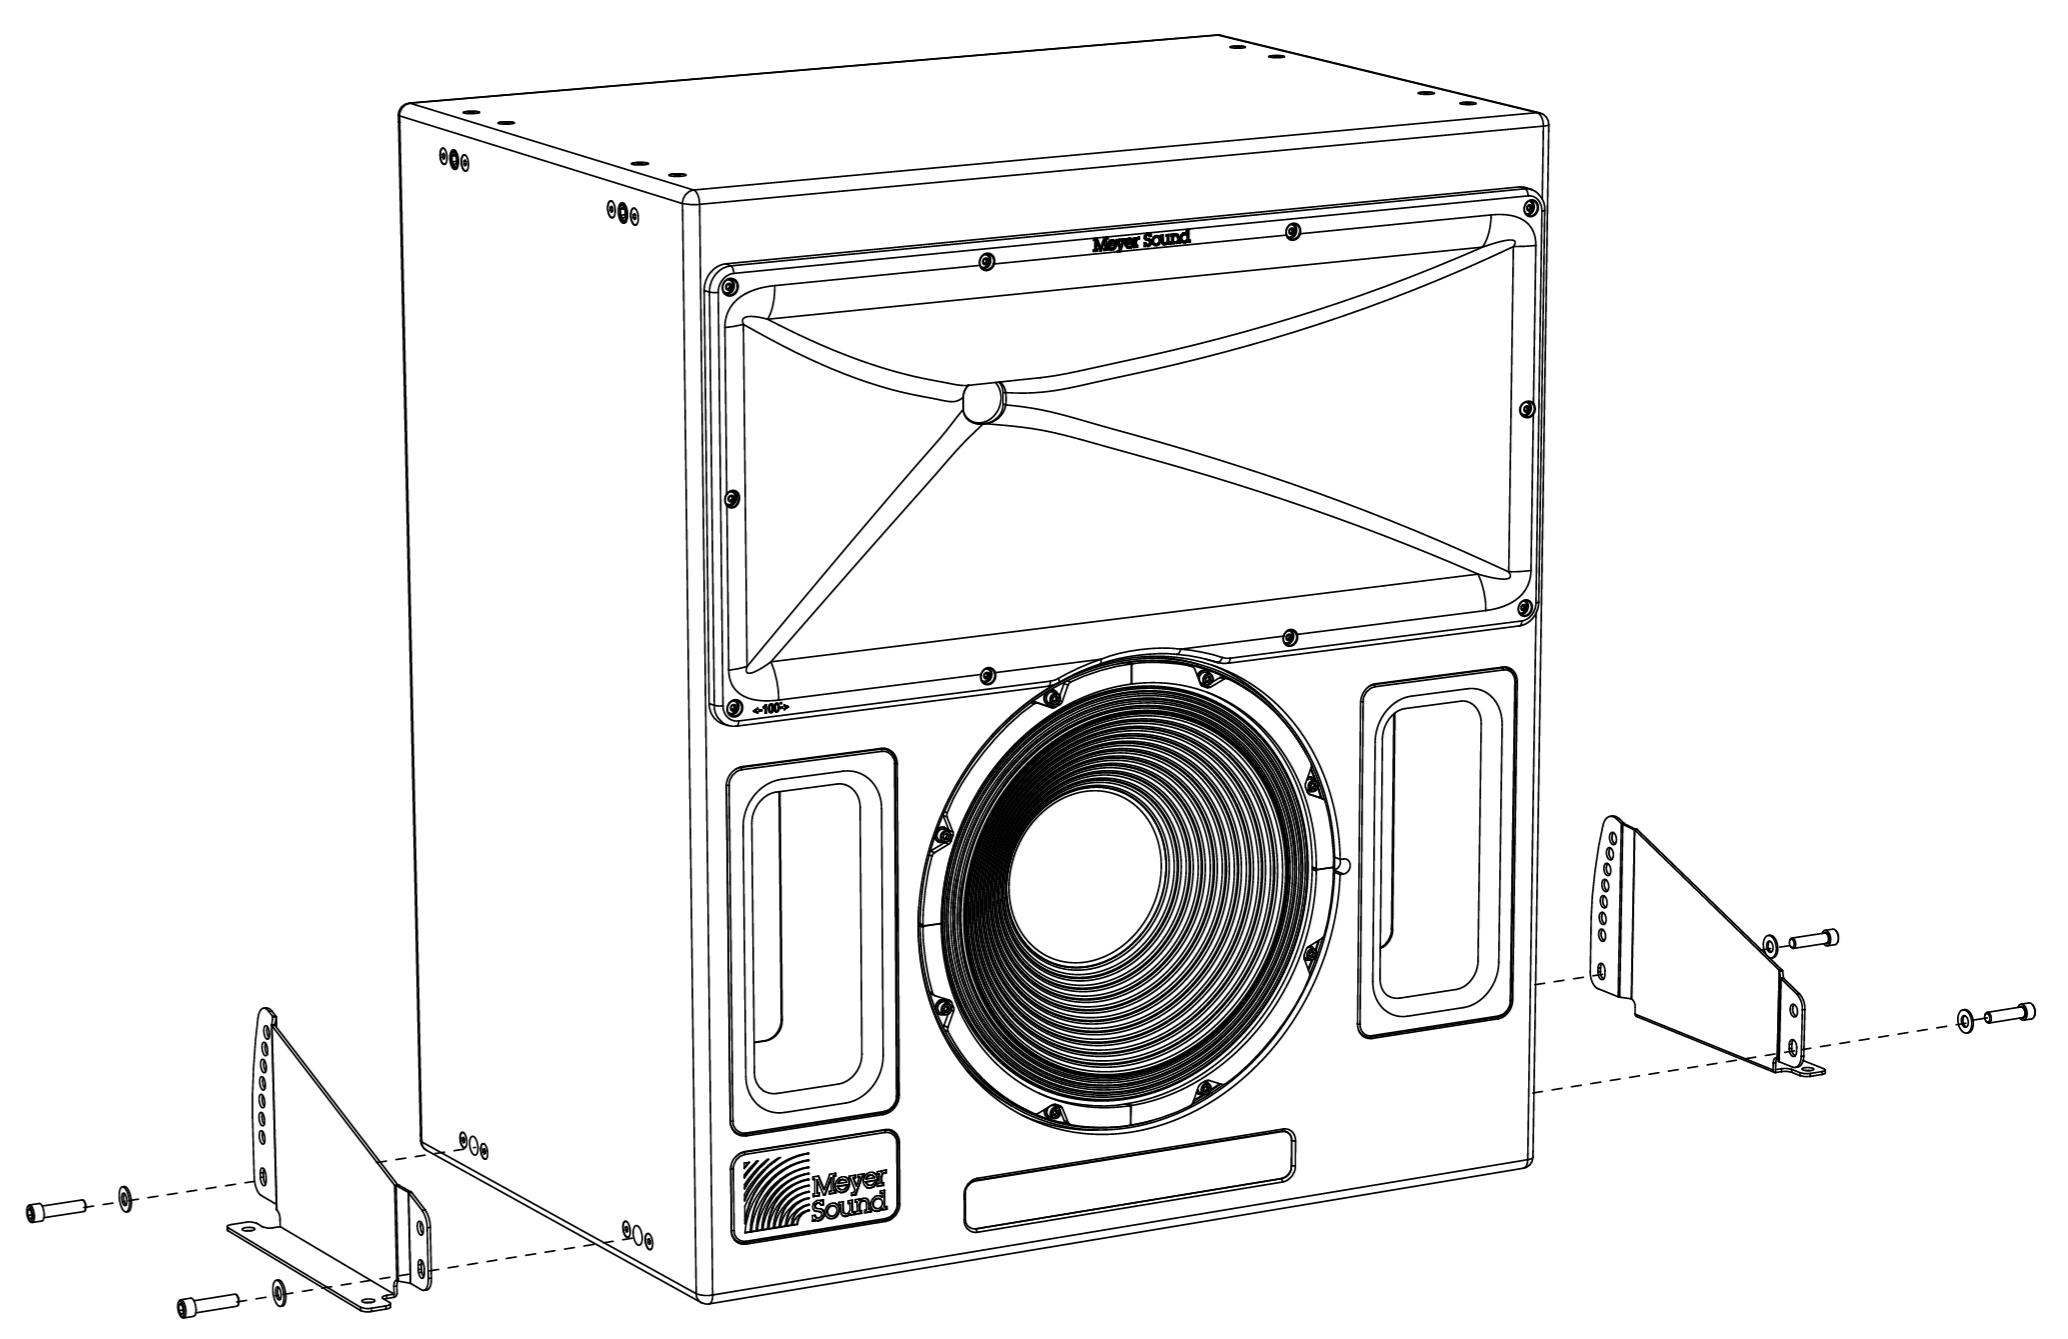
Floor Mounting Acherons and Acheron LFs
Remove the two 3/8-16 x 1.5-inch screws at the bottom of each loudspeaker side (four total).
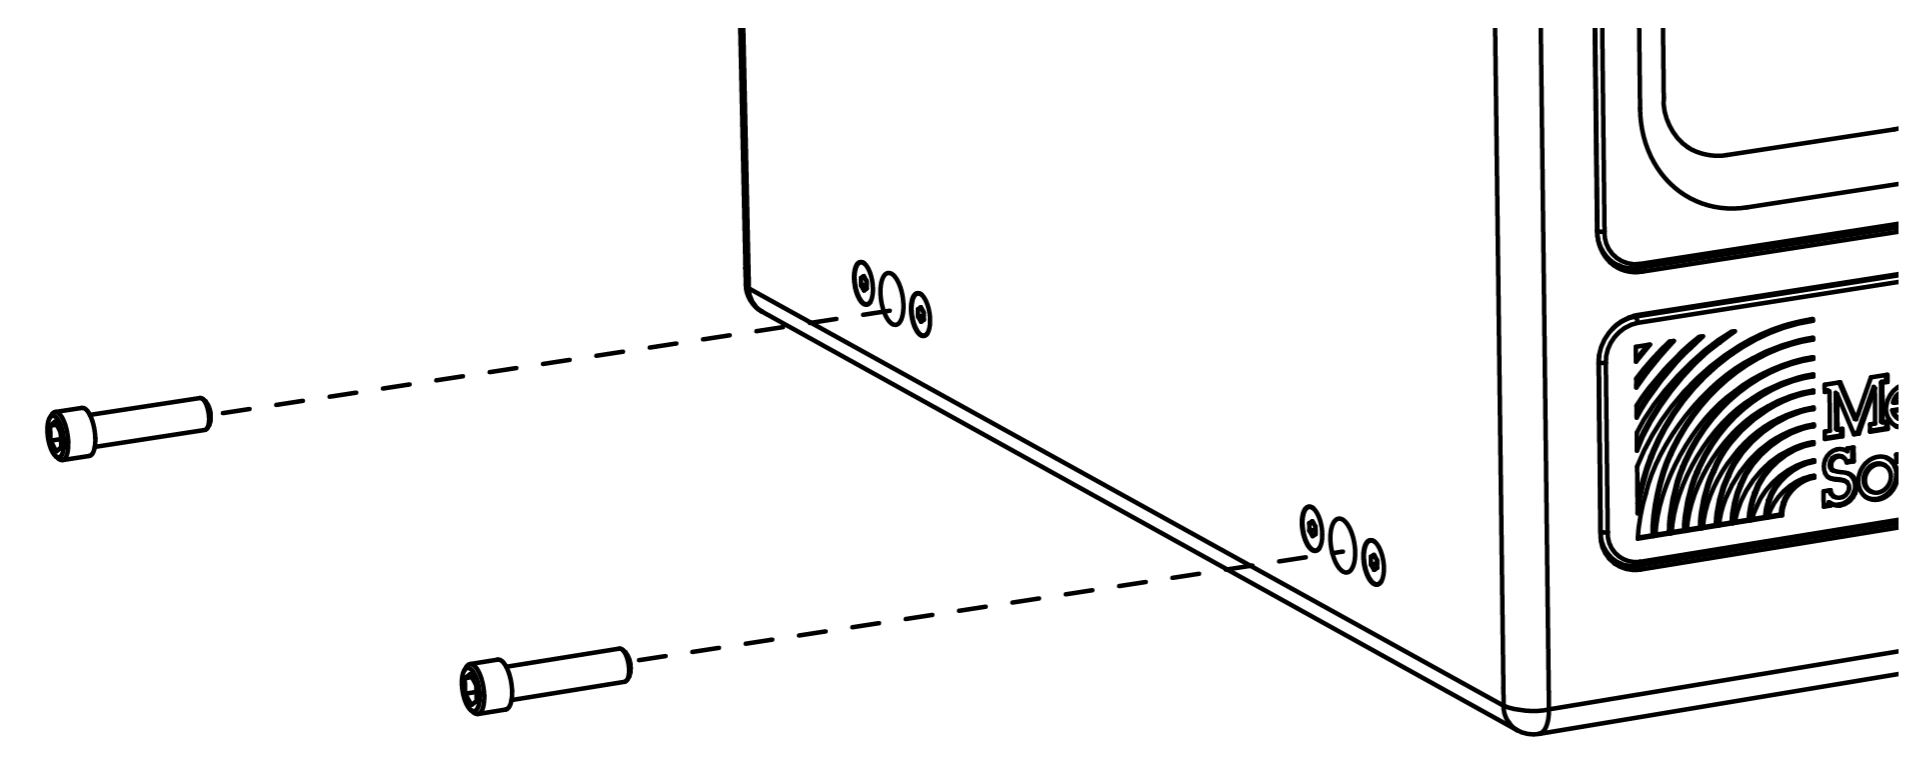
Secure the left bracket to the left side of the loudspeaker with two of the removed screws and two of the included flat washers.
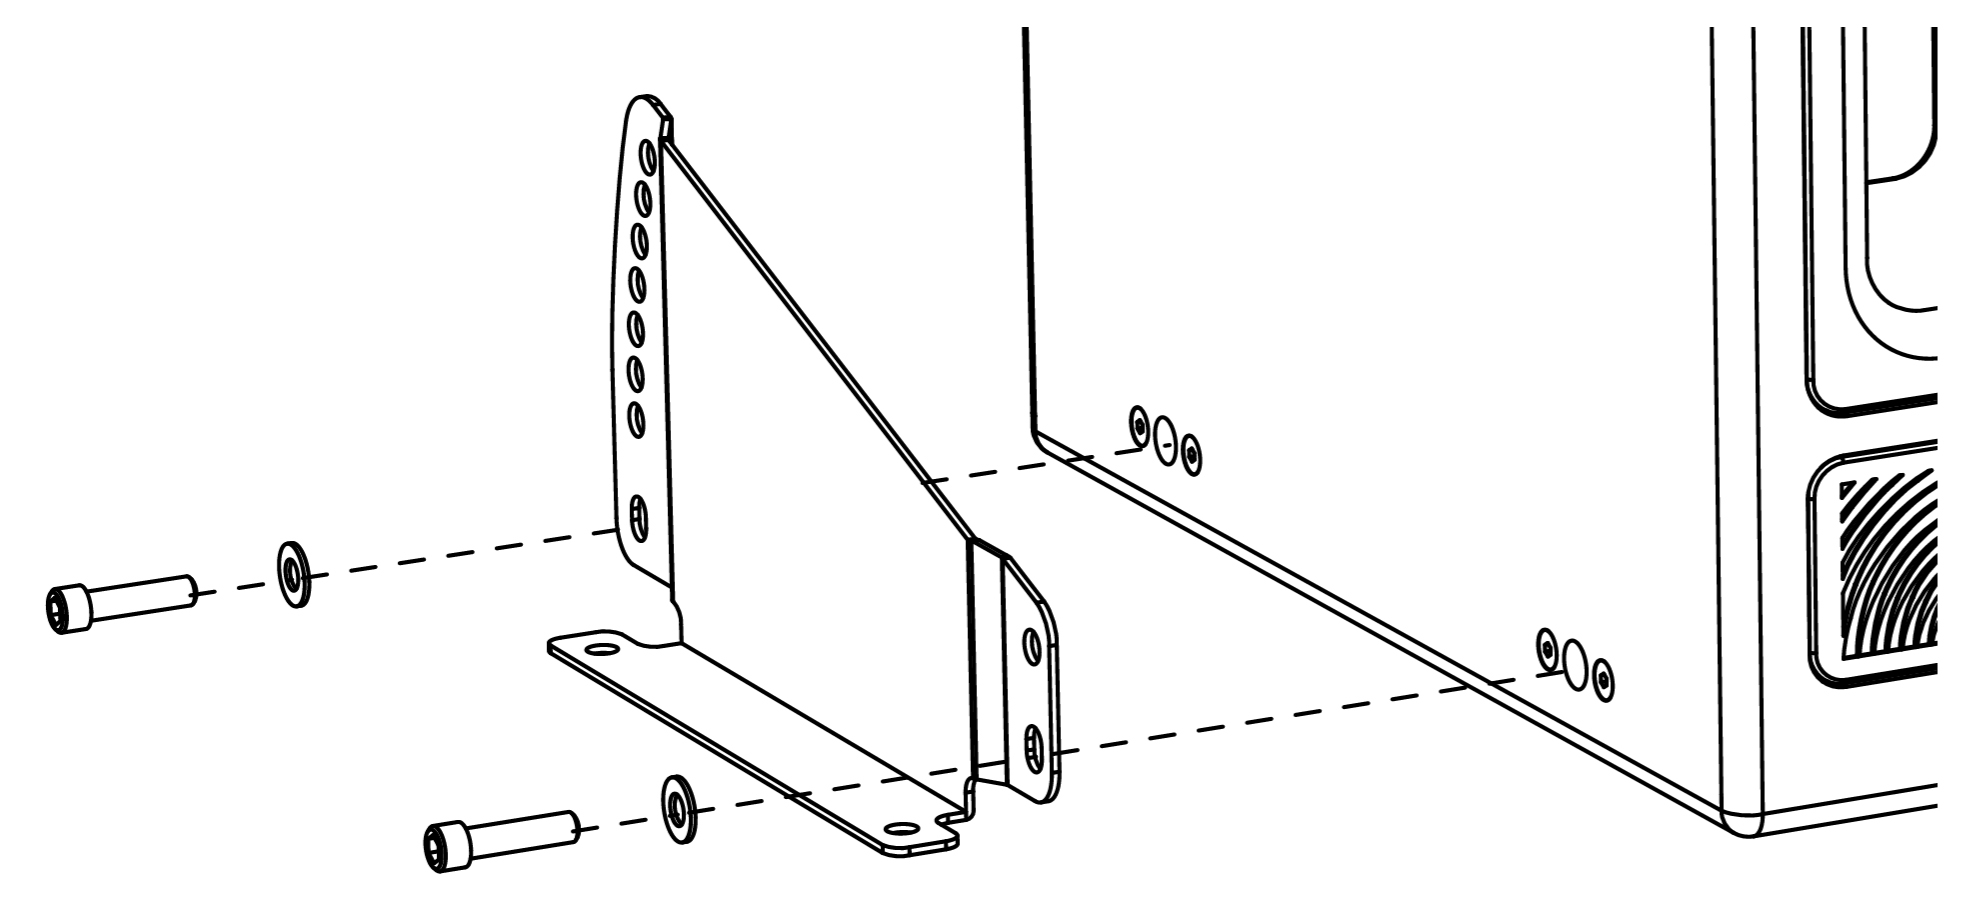
To mount the loudspeaker at 0 degrees with no downtilt or uptilt, use the bottom bracket holes.
To mount the loudspeaker with a downtilt, orient the bracket with the large end toward the rear of the loudspeaker. For available downtilt angles, see Floor Mount Downtilt Angles.
To mount the loudspeaker with uptilt, orient the bracket with the large end toward the front of the loudspeaker. For available uptilt angles, see Floor Mount Uptilt Angles.
Repeat the previous step with the right bracket and the remaining two screws and washers.
Secure the brackets to the floor with fasteners (not included) appropriate for the floor surface.
Floor Mounting Acherons with Downtilt and Uptilt
The Acheron floor mount brackets can mount loudspeakers with a downtilt or uptilt. Available angles are 3-18 degrees in 3-degree increments. The direction in which the brackets are oriented determines whether the loudspeaker can be mounted with downtilt or uptilt.
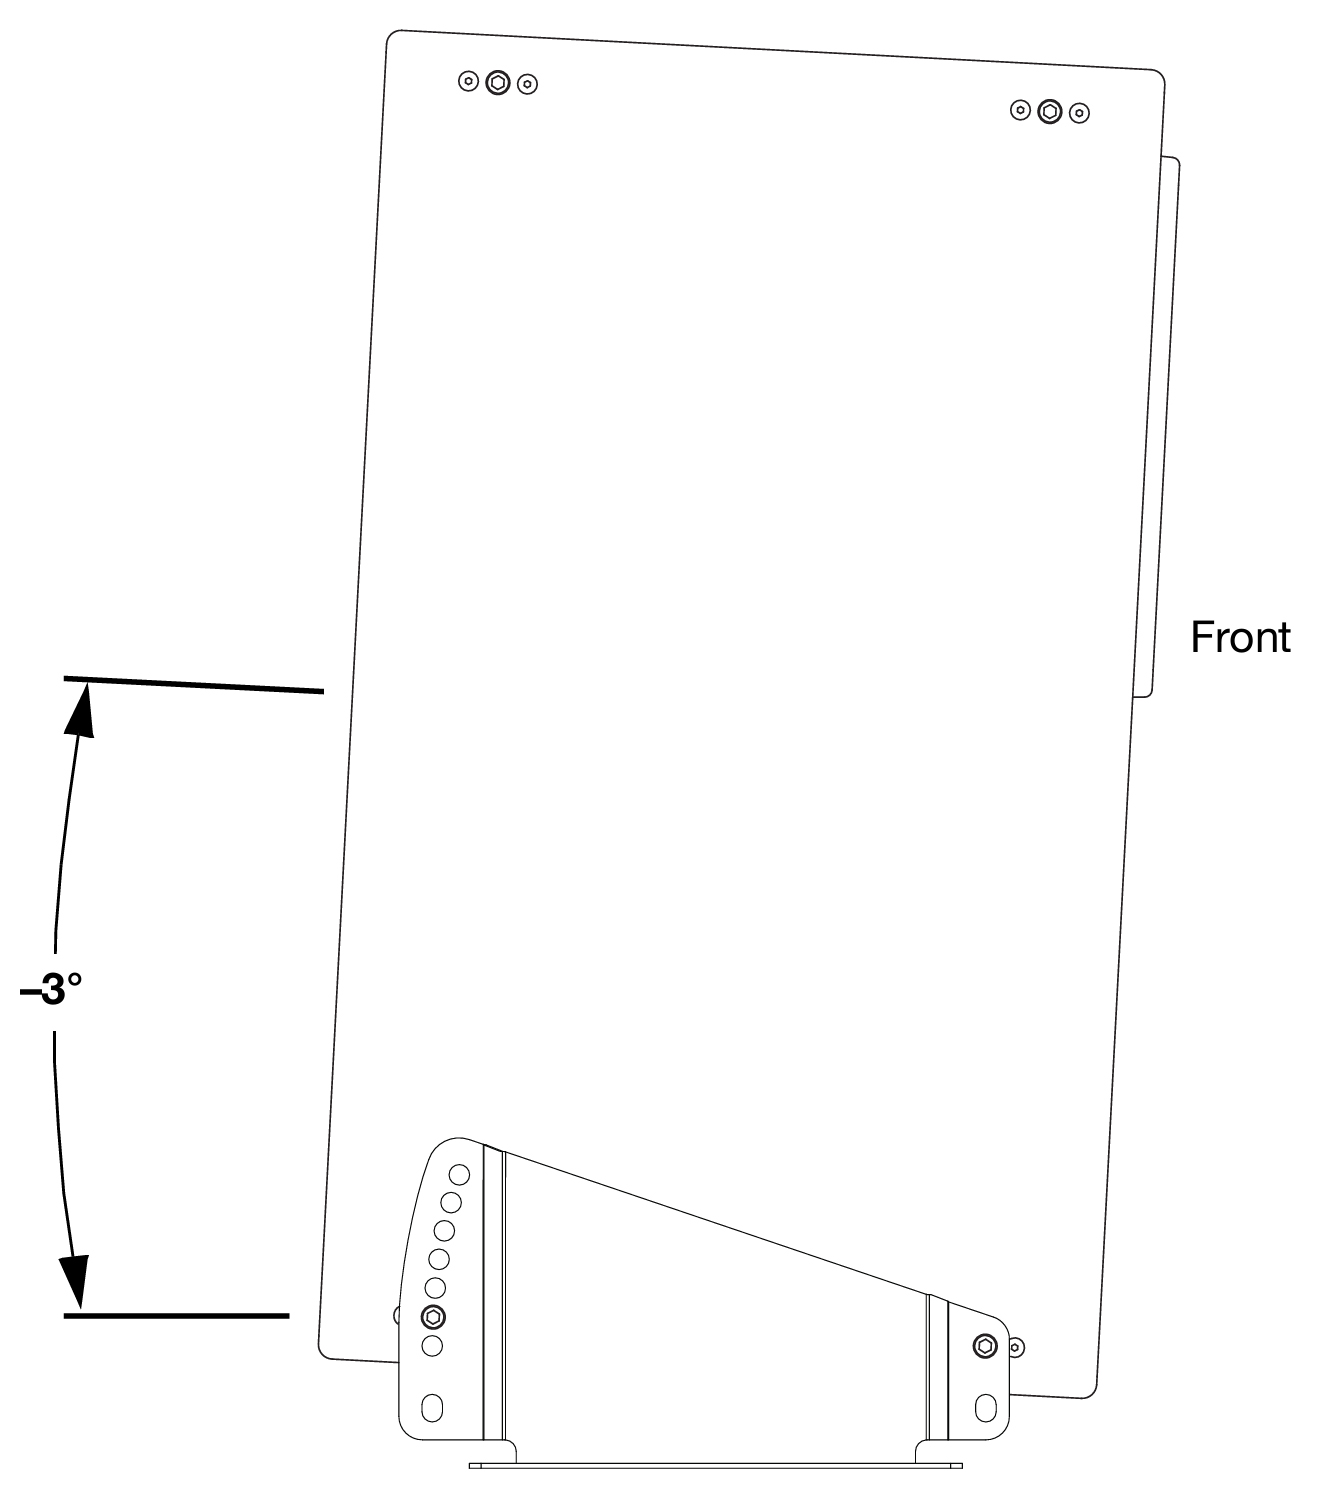 |
Acheron Floor Mounted with 3-Degree Downtilt
Caution
When using the floor mount brackets with an AcheronLF that will also have an Acheron stacked on top of it, mount the AcheronLF at 0 degrees using the bottom bracket holes.
Floor Mount Downtilt Angles
When the floor mount brackets are oriented with the bracket’s large end toward the rear of the loudspeaker, the Acheron can be mounted with downtilt angles of 3-18 degrees in 3-degree increments.
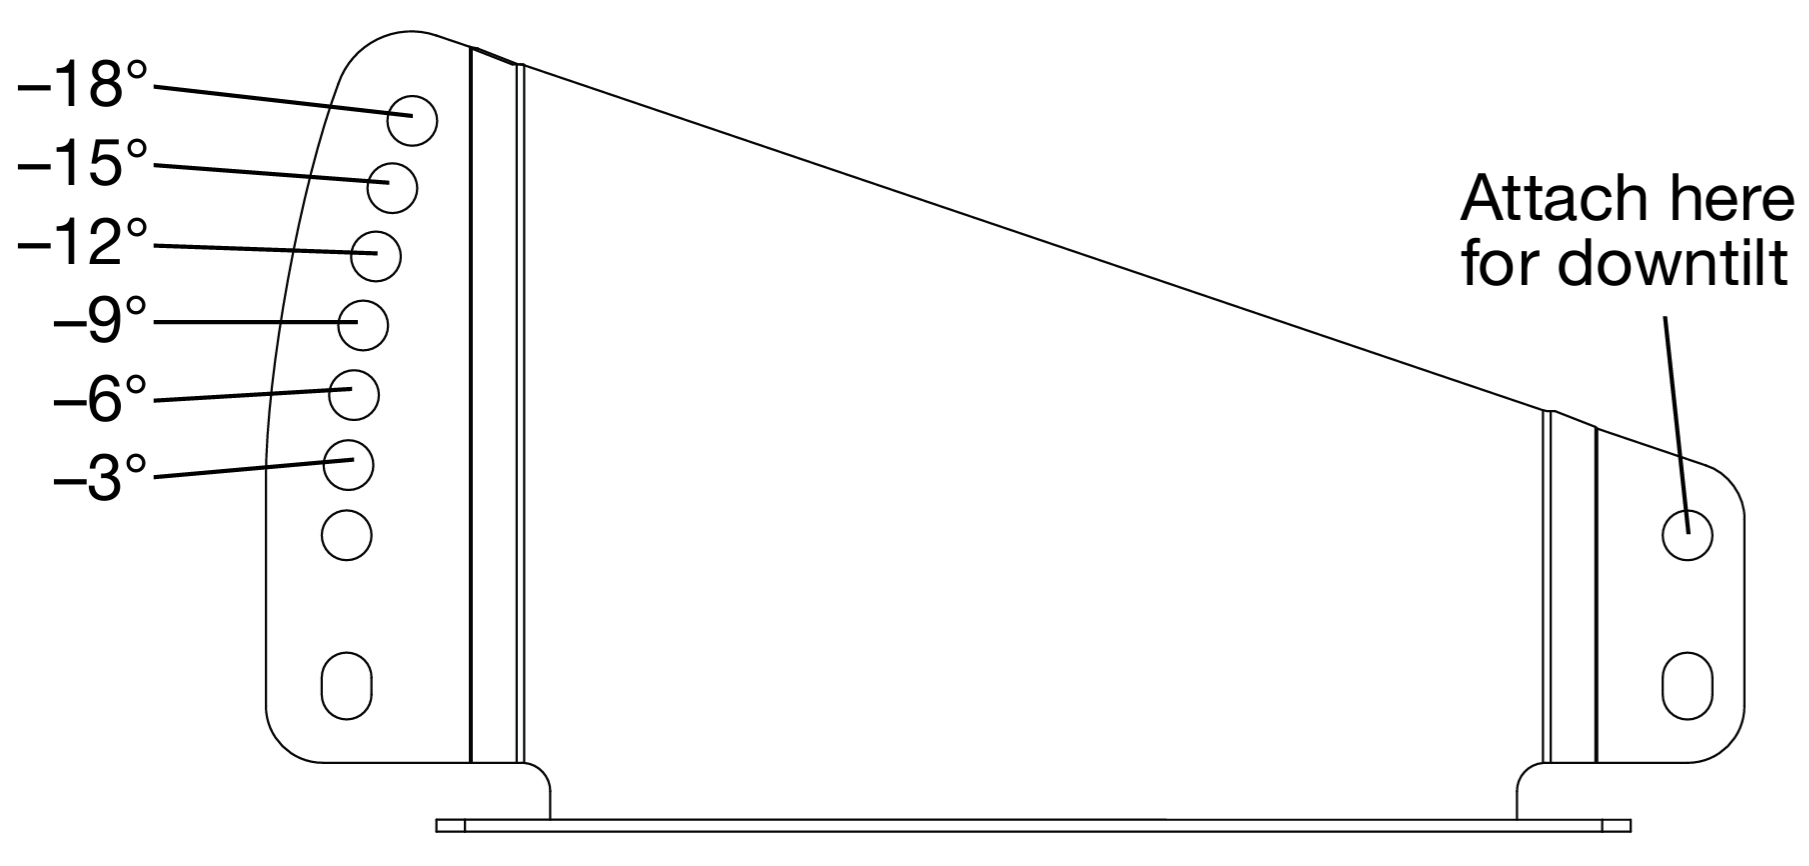 |
Acheron Floor Mount Bracket Oriented for Downtilt
The small end of the bracket attaches to the loudspeaker using the top hole. The large end of the bracket attaches to the loudspeaker with one of the angled holes.
Figure 1. –3°
| Figure 2. –6°
| ||
Figure 3. –12°
| Figure 4. –18°
|
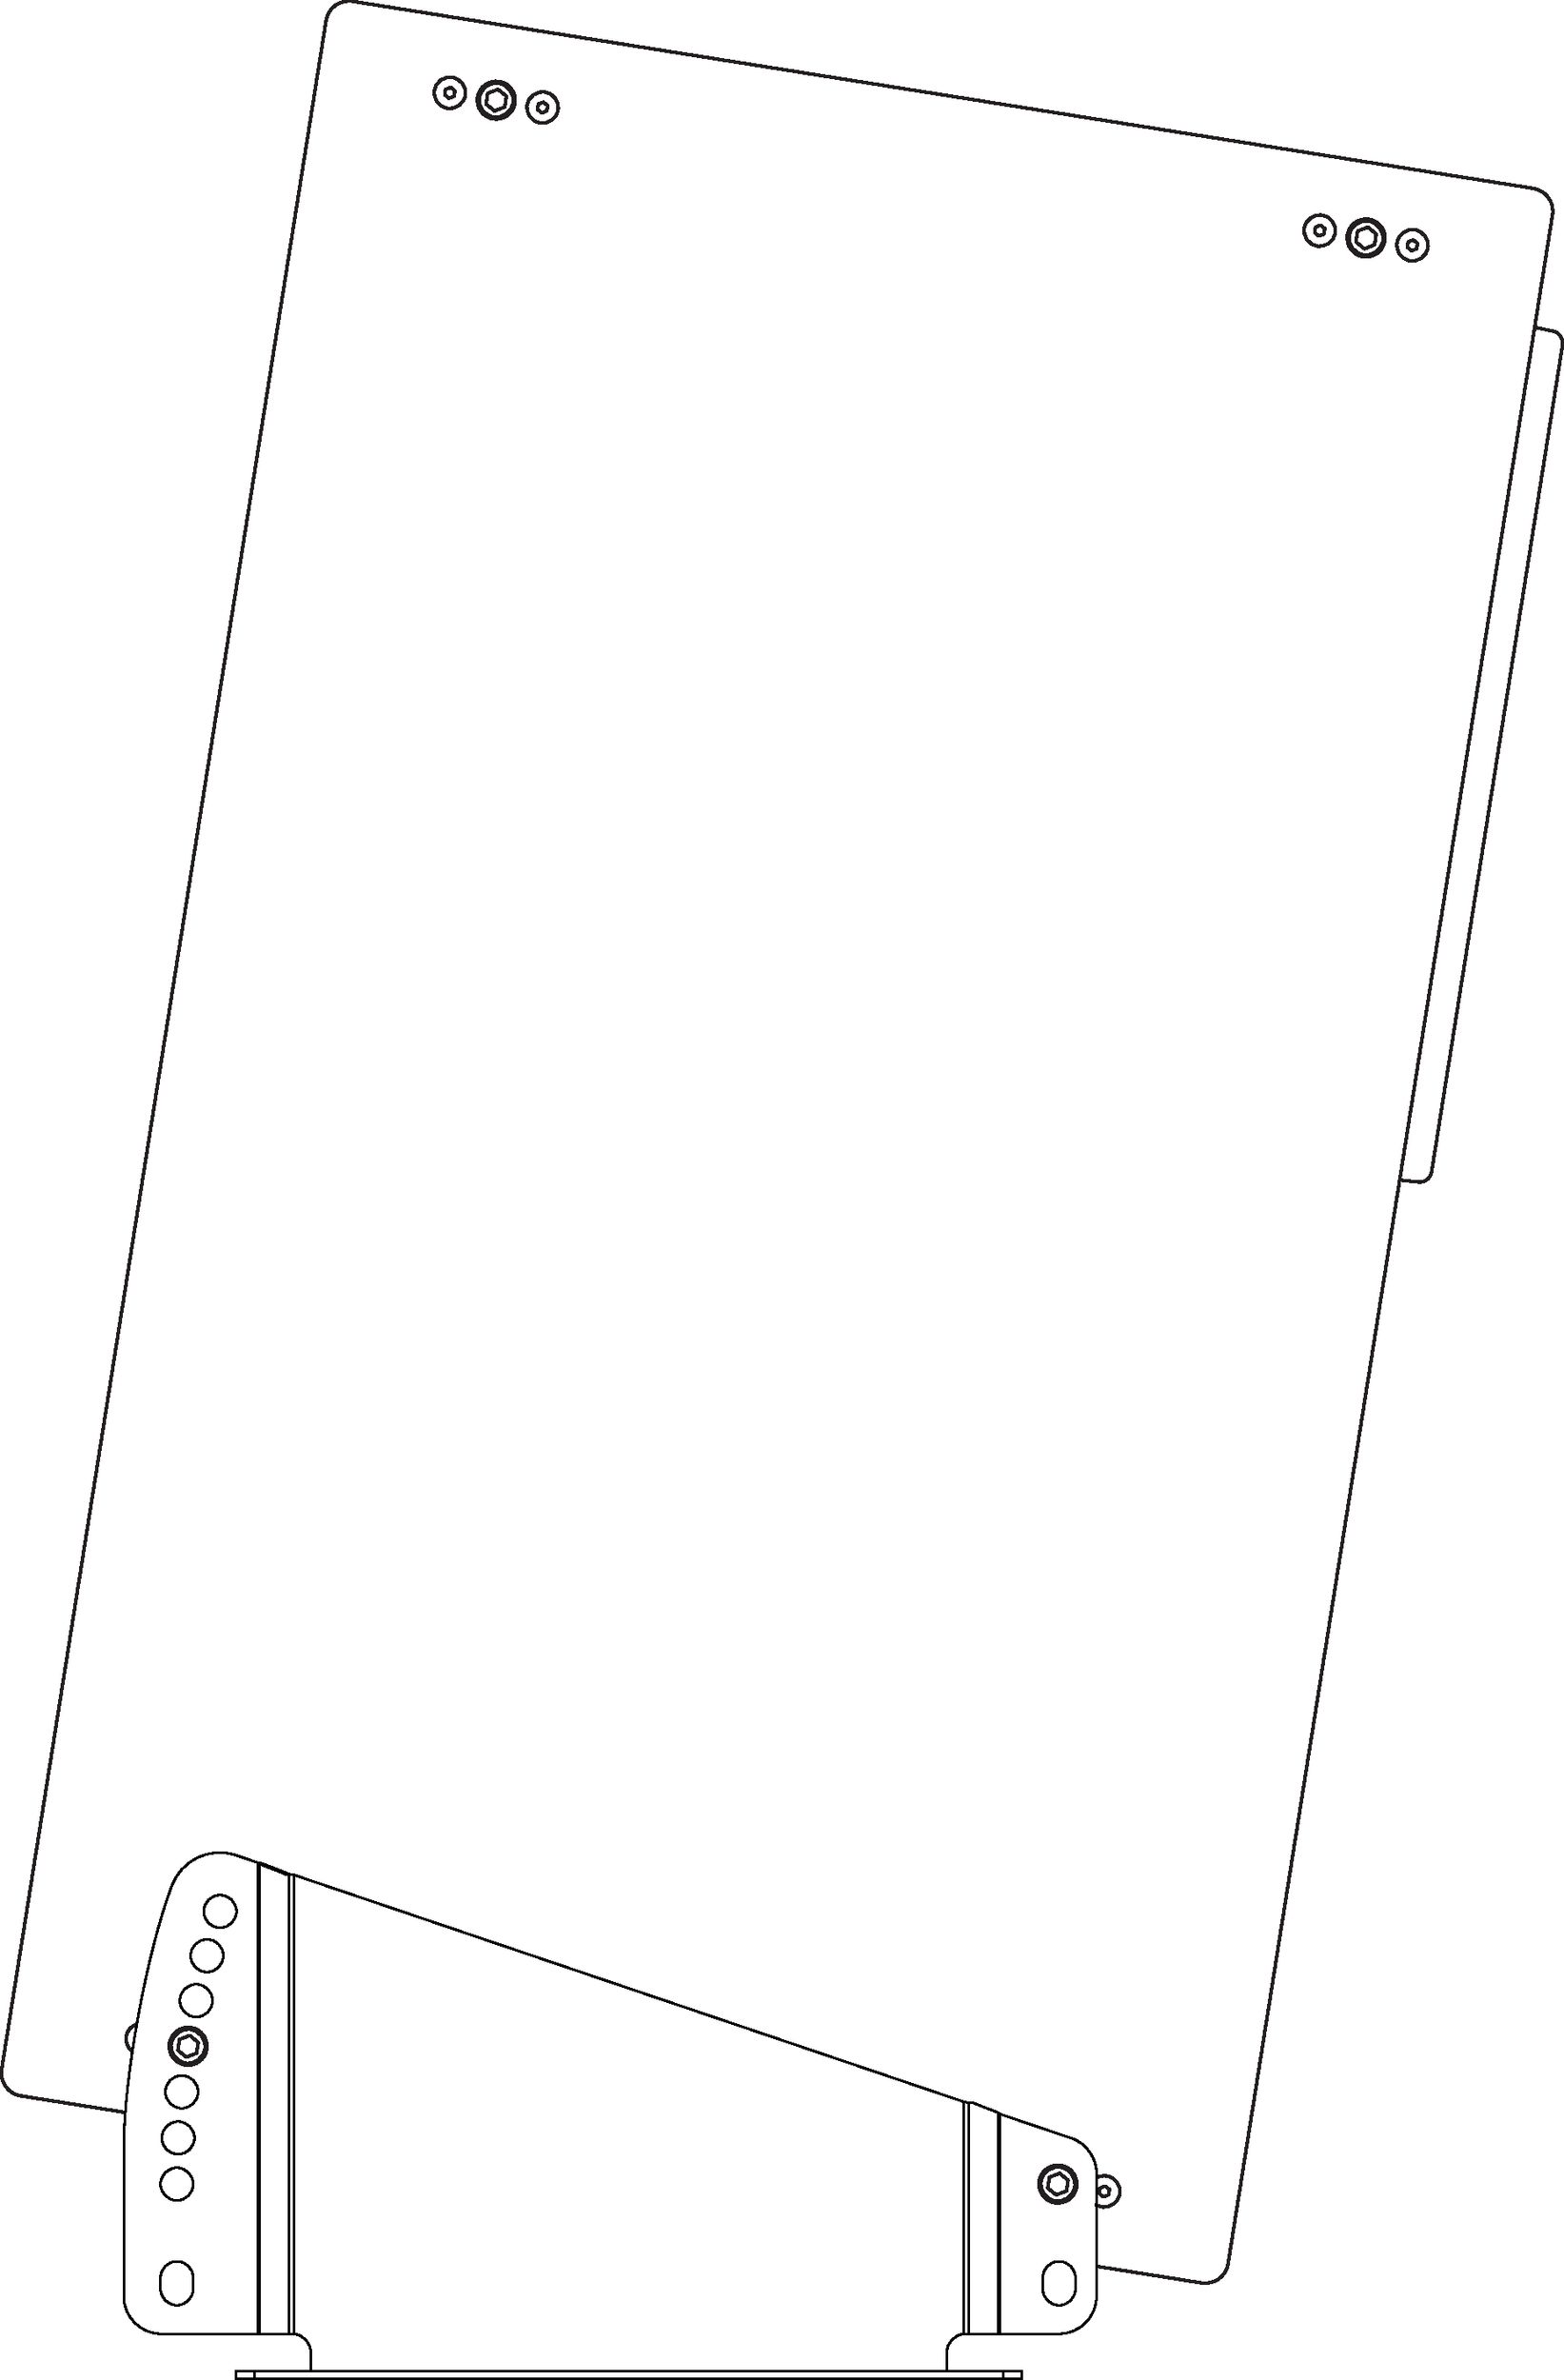
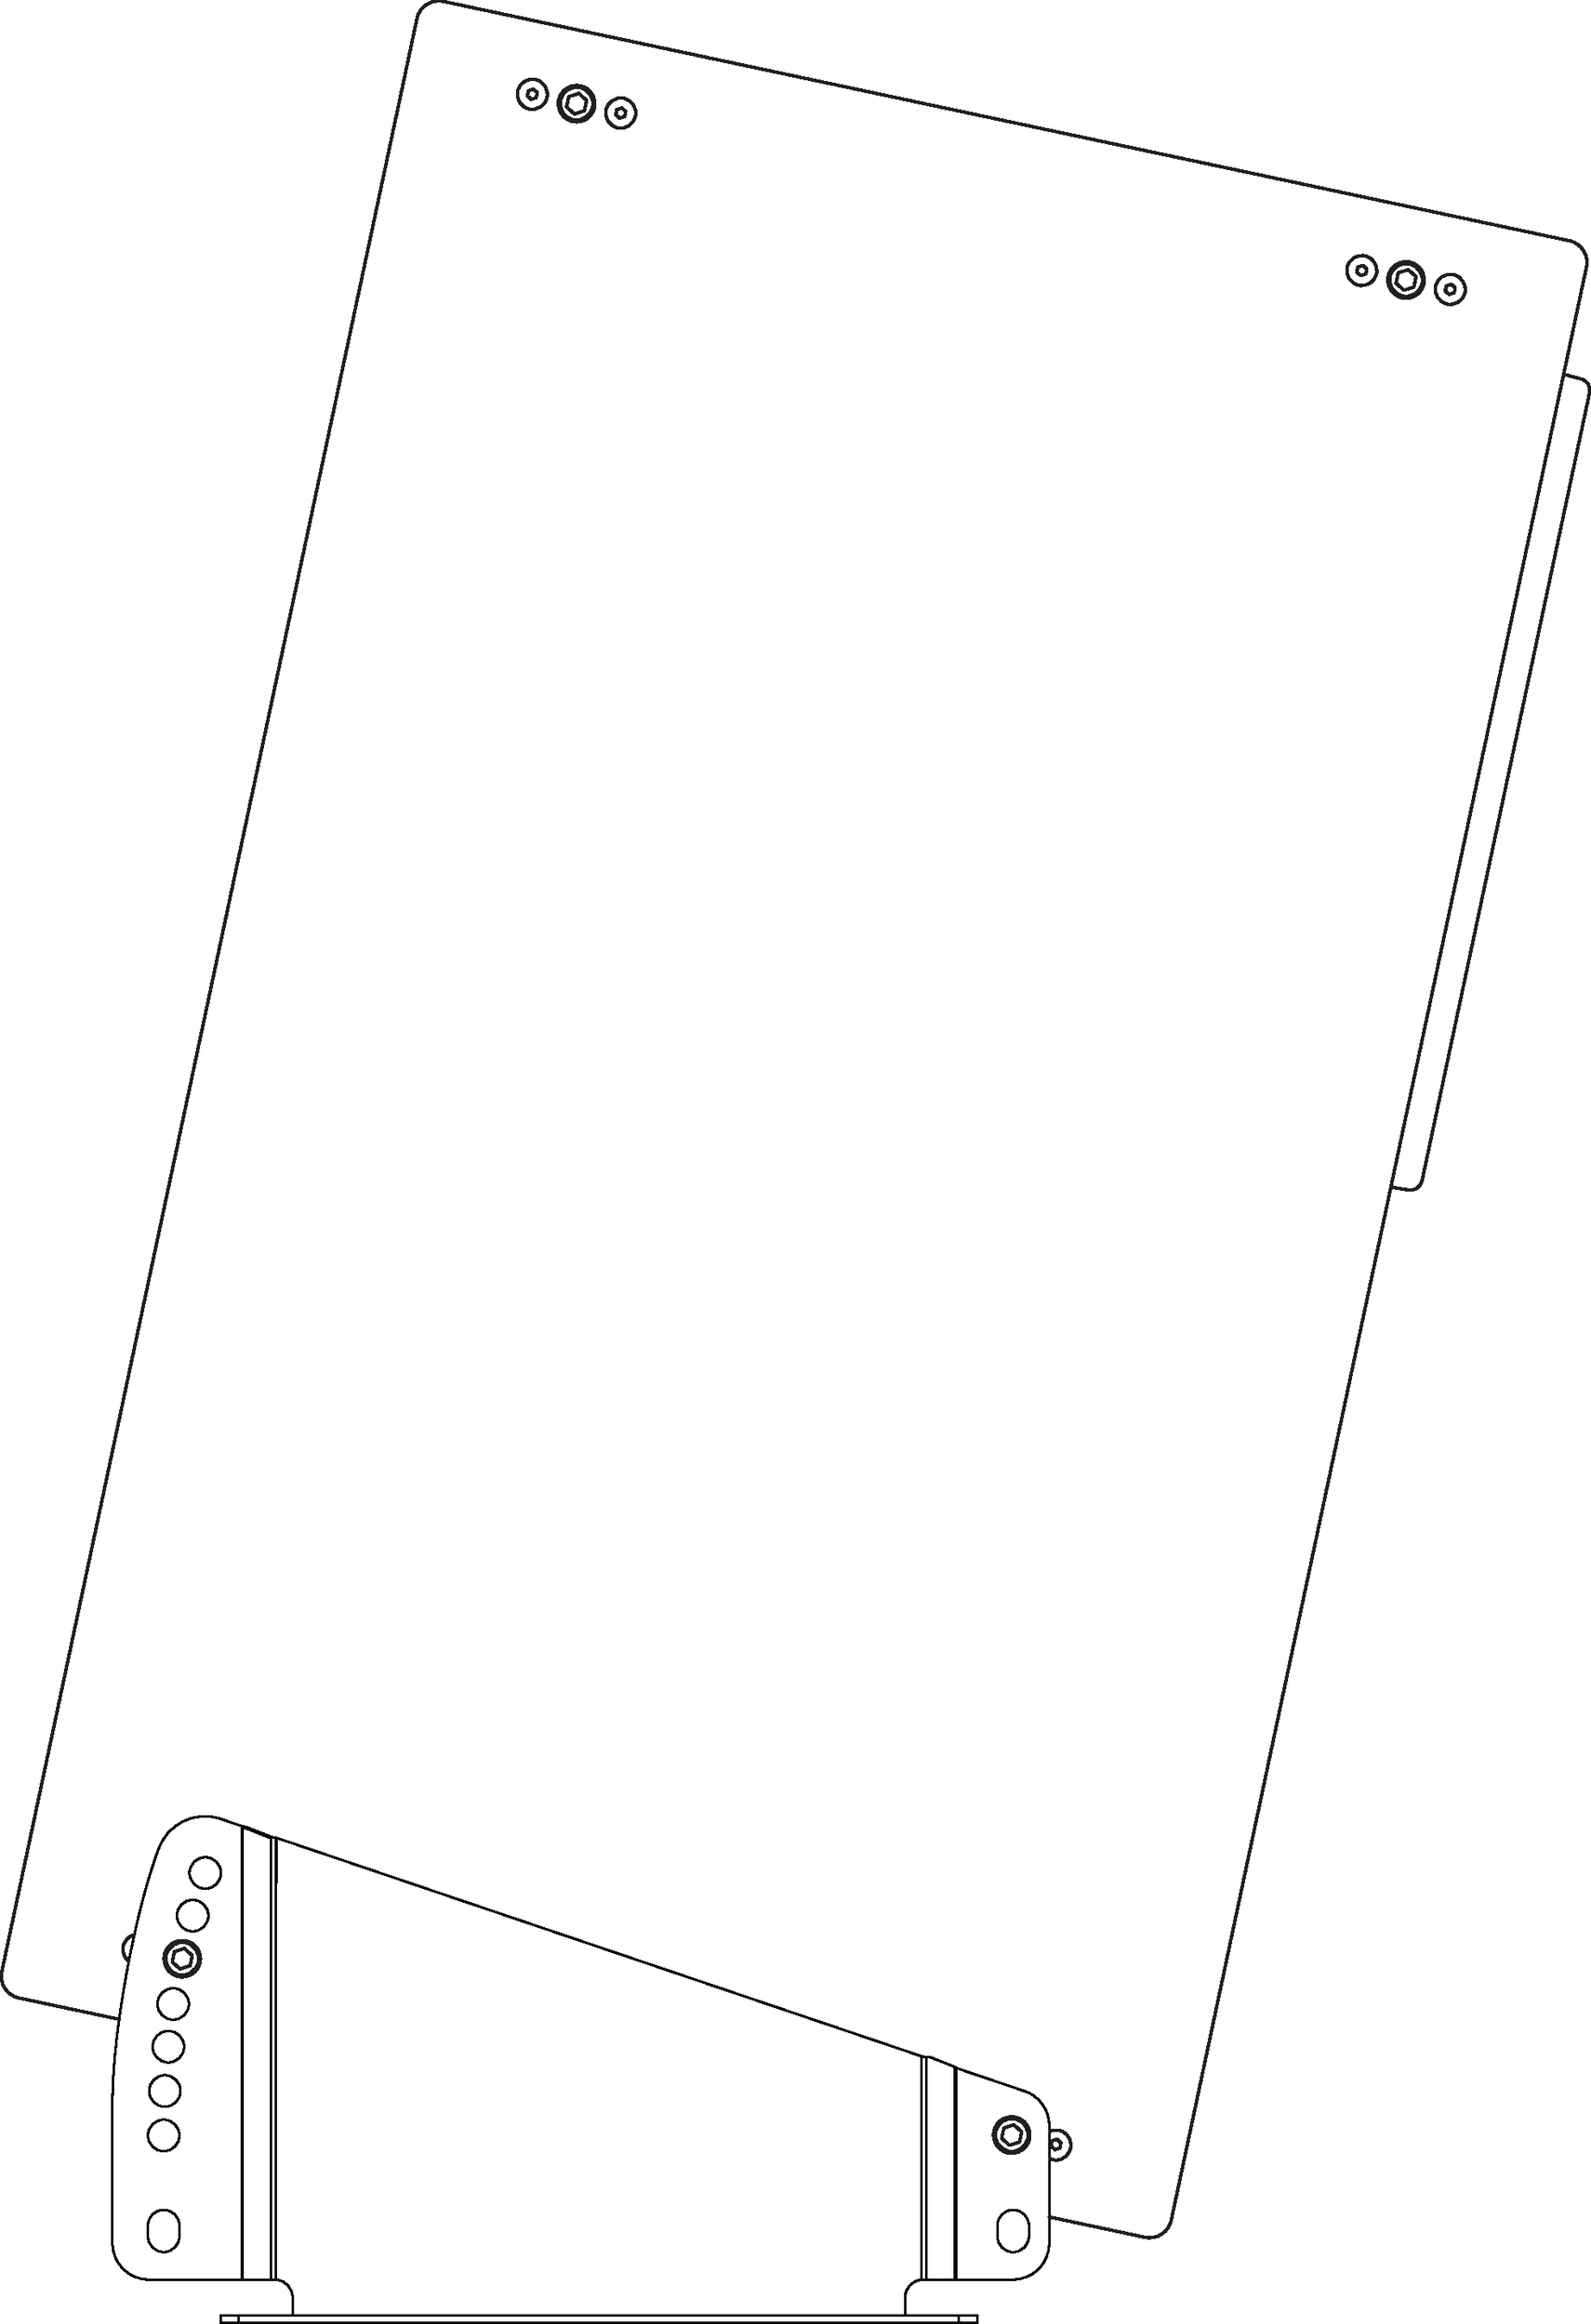
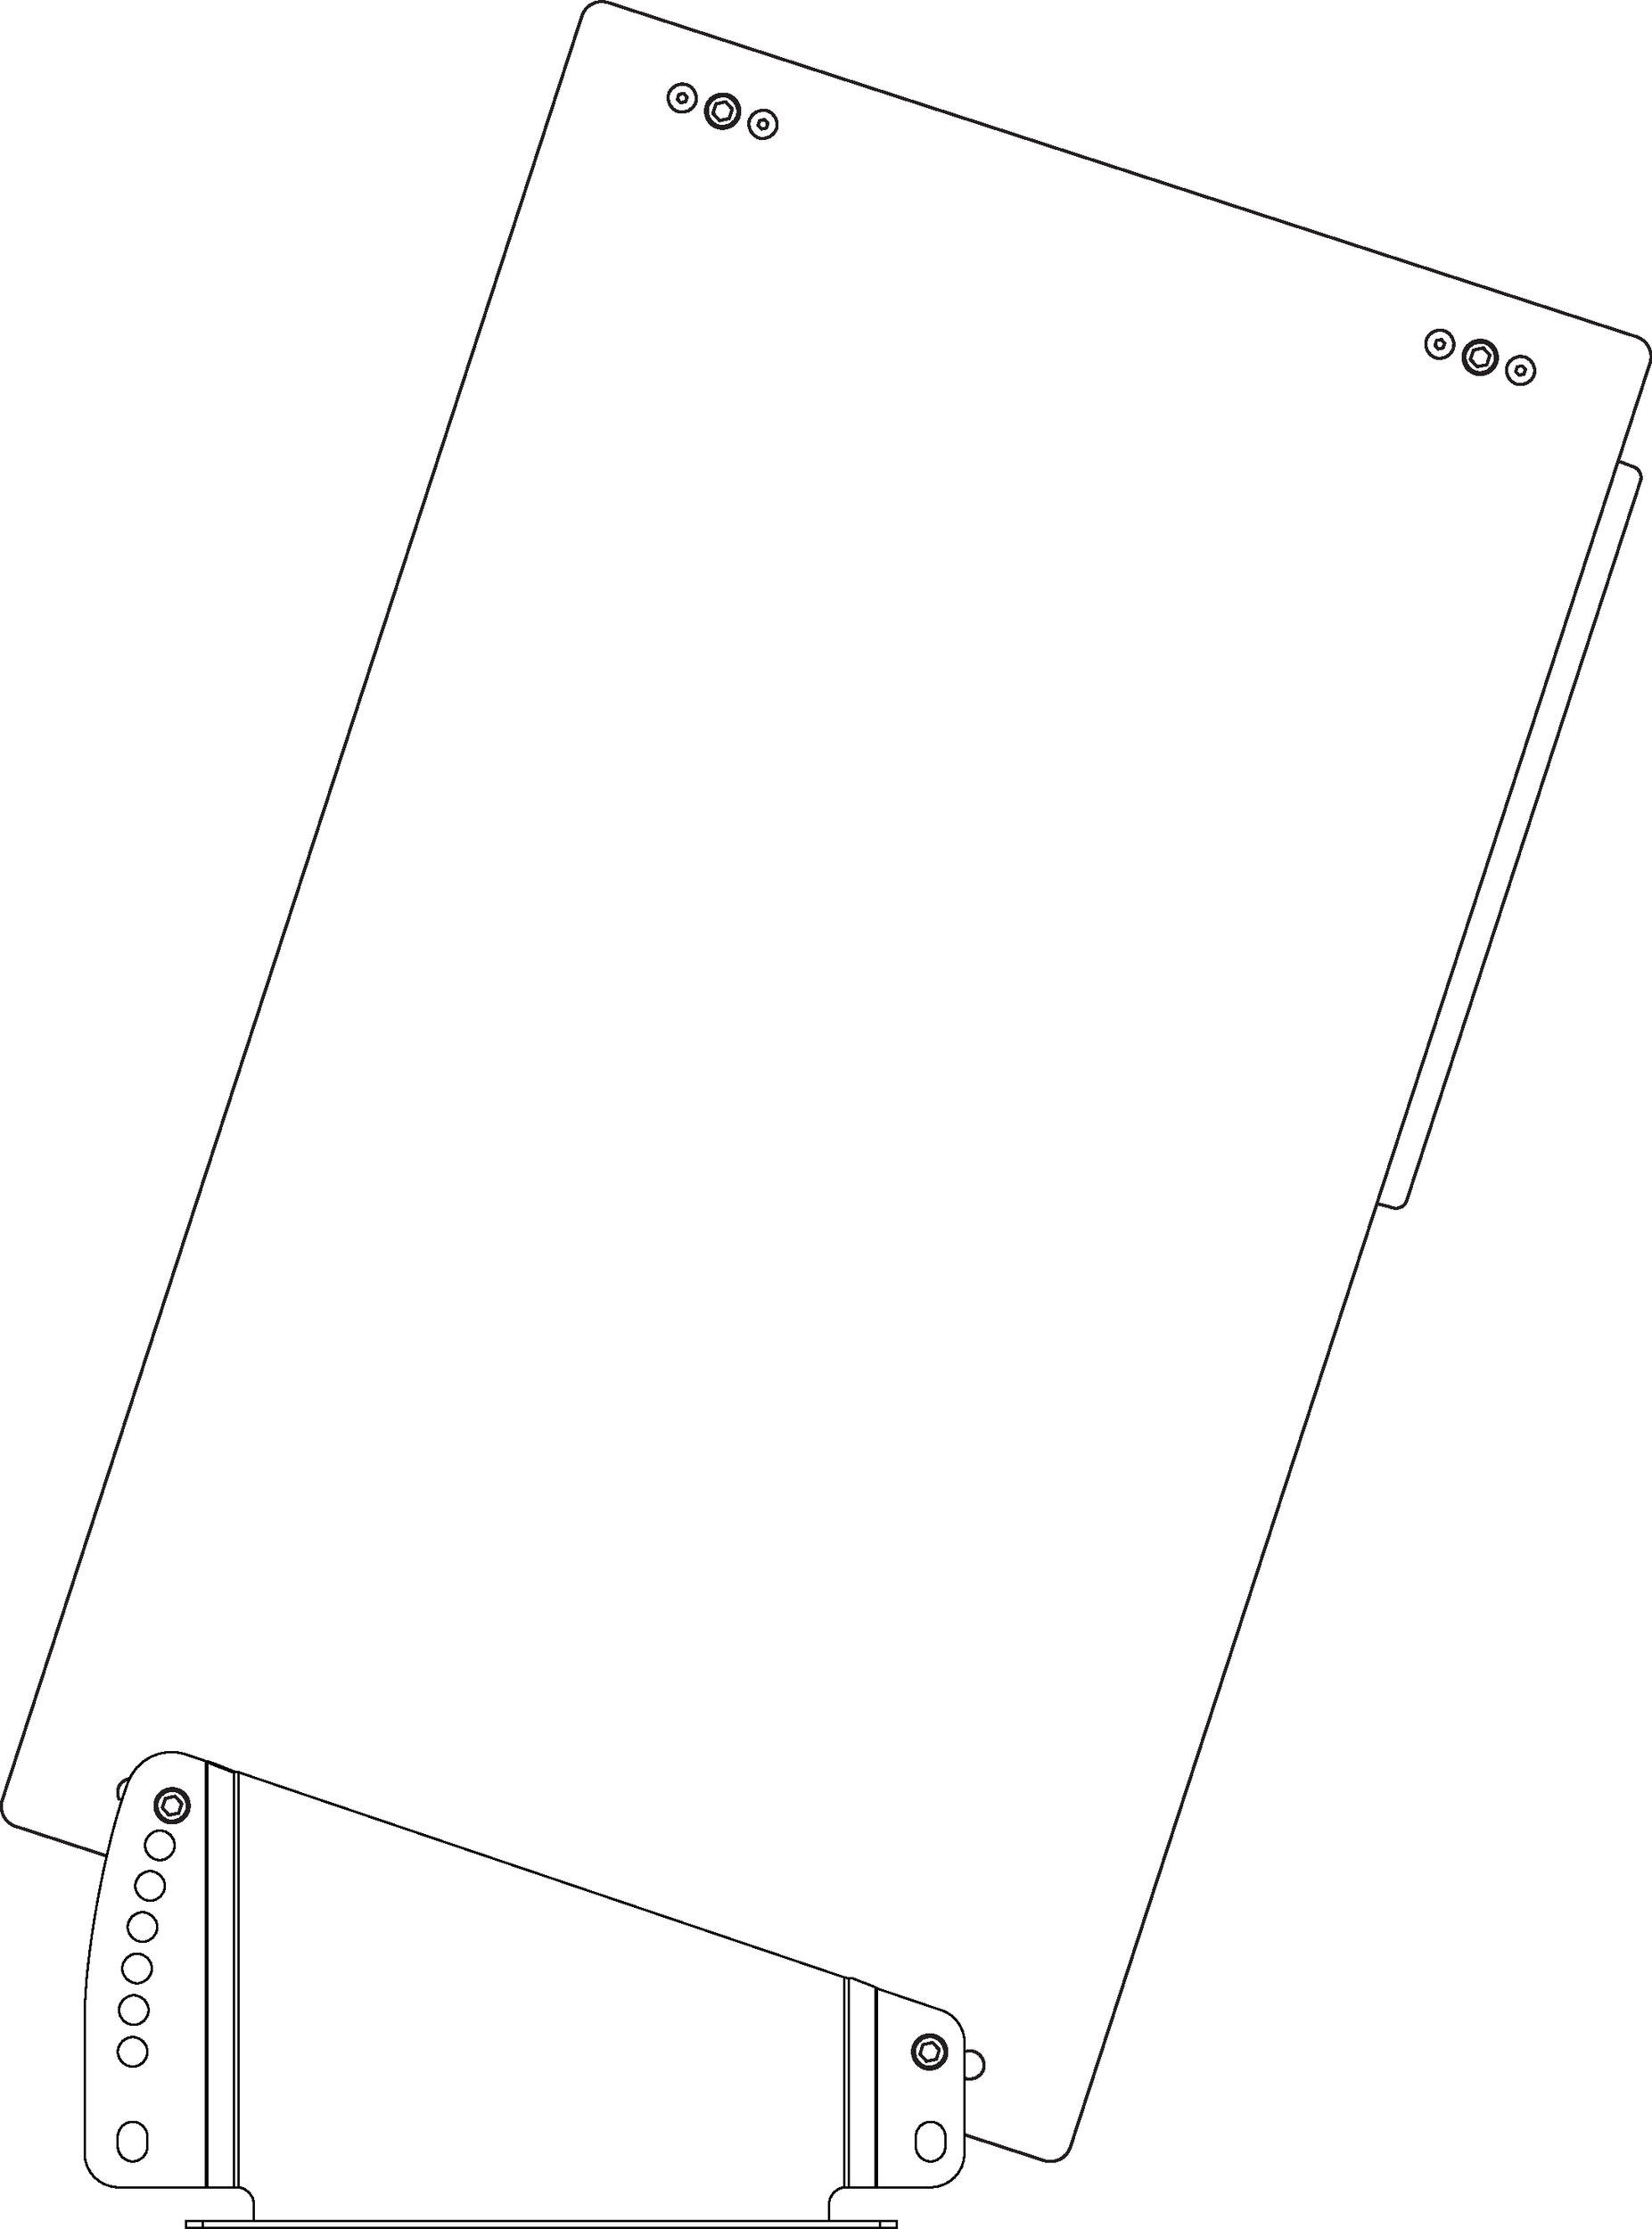
Floor Mount Uptilt Angles
When the floor mount brackets are oriented with the bracket’s large end toward the front of the loudspeaker, the Acheron can be mounted with uptilt angles of 3-18 degrees in 3-degree increments.
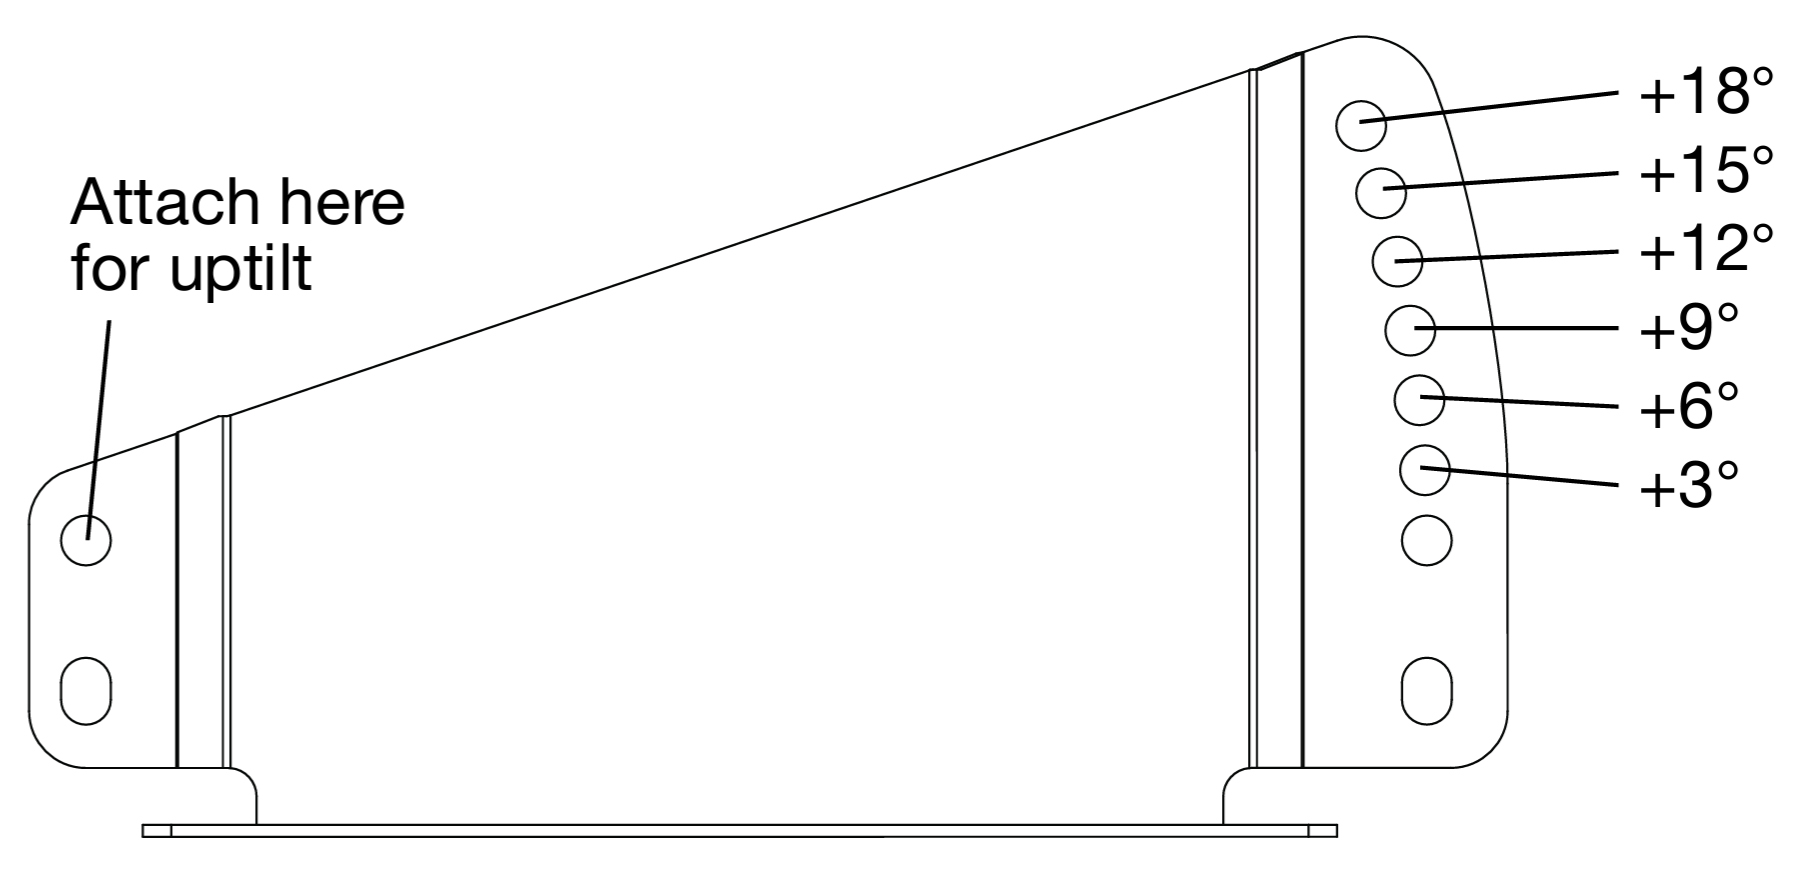 |
Acheron Floor Mount Bracket Oriented for Uptilt
The small end of the bracket attaches to the loudspeaker using the top hole. The large end of the bracket attaches to the loudspeaker with one of the angled holes.
Figure 5. +3°
| Figure 6. +6°
| ||
Figure 7. +9°
| Figure 8. +12°
|
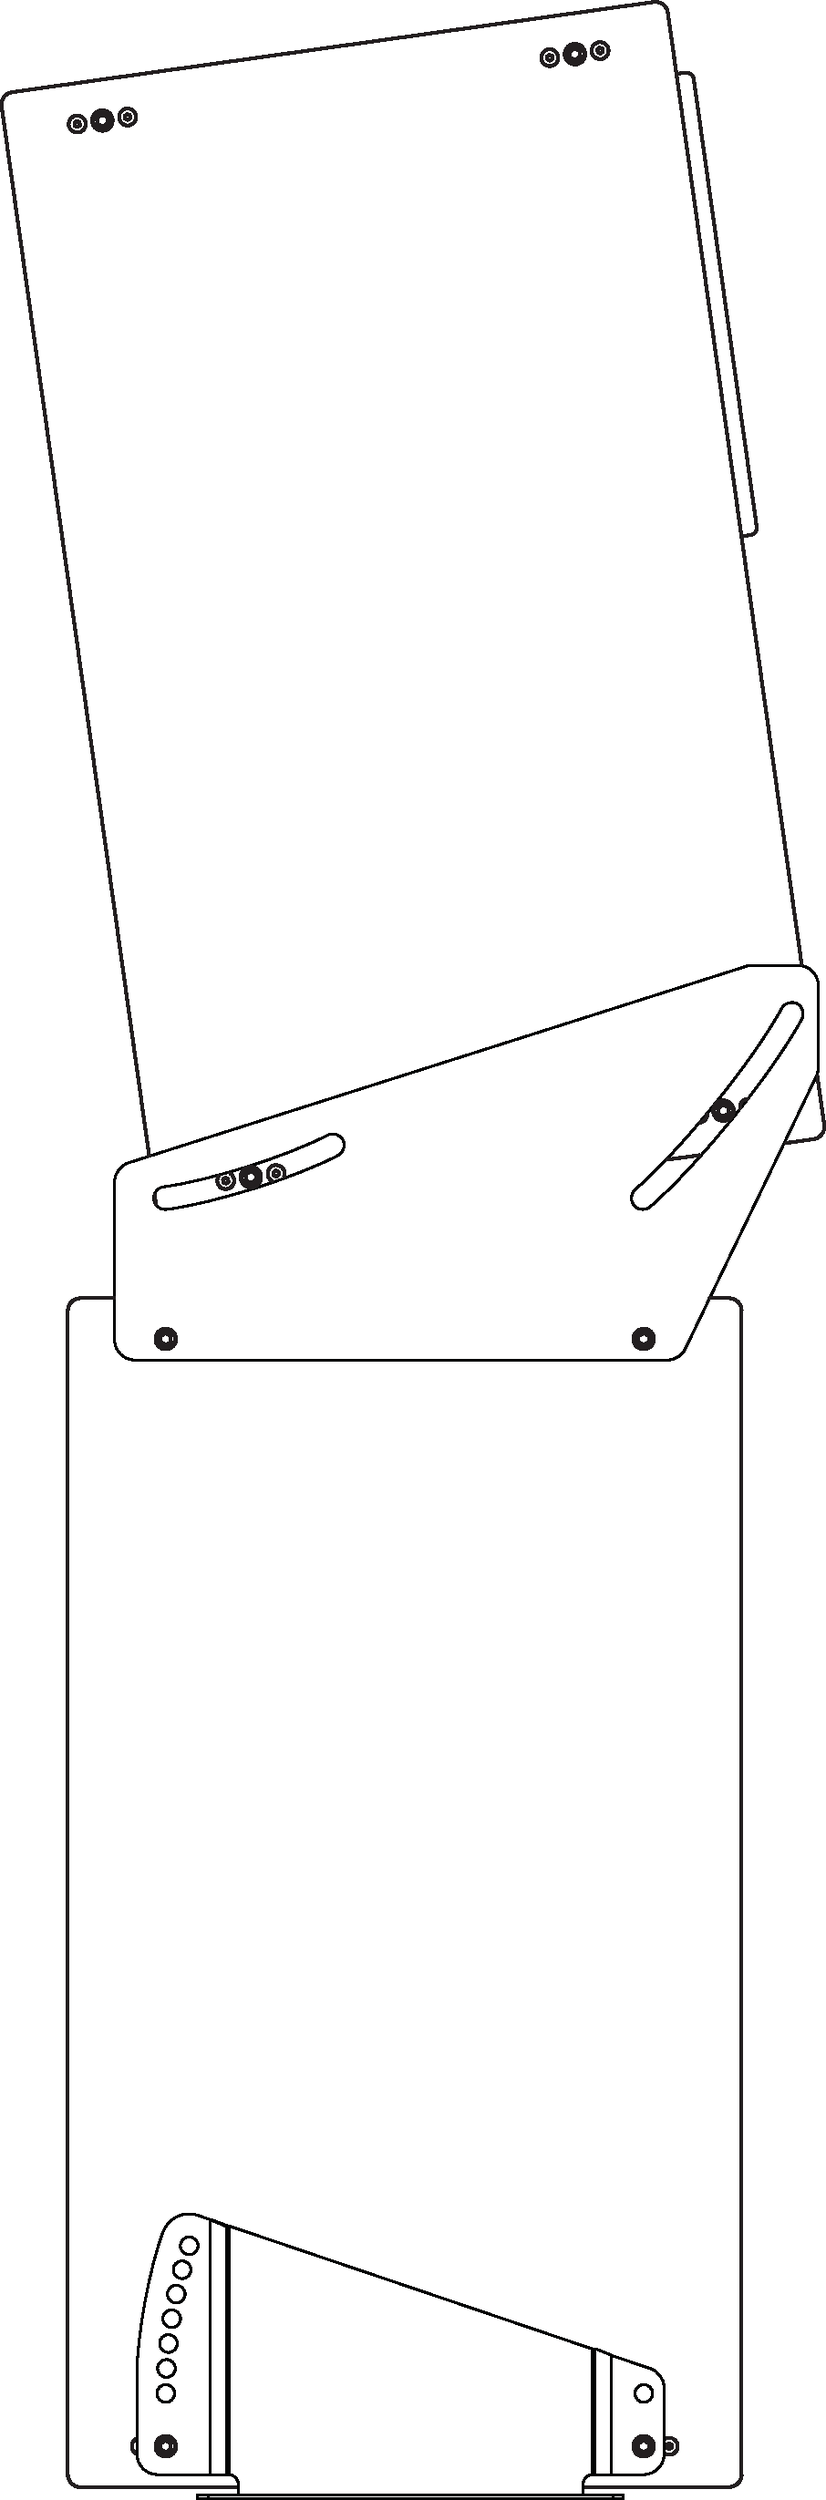
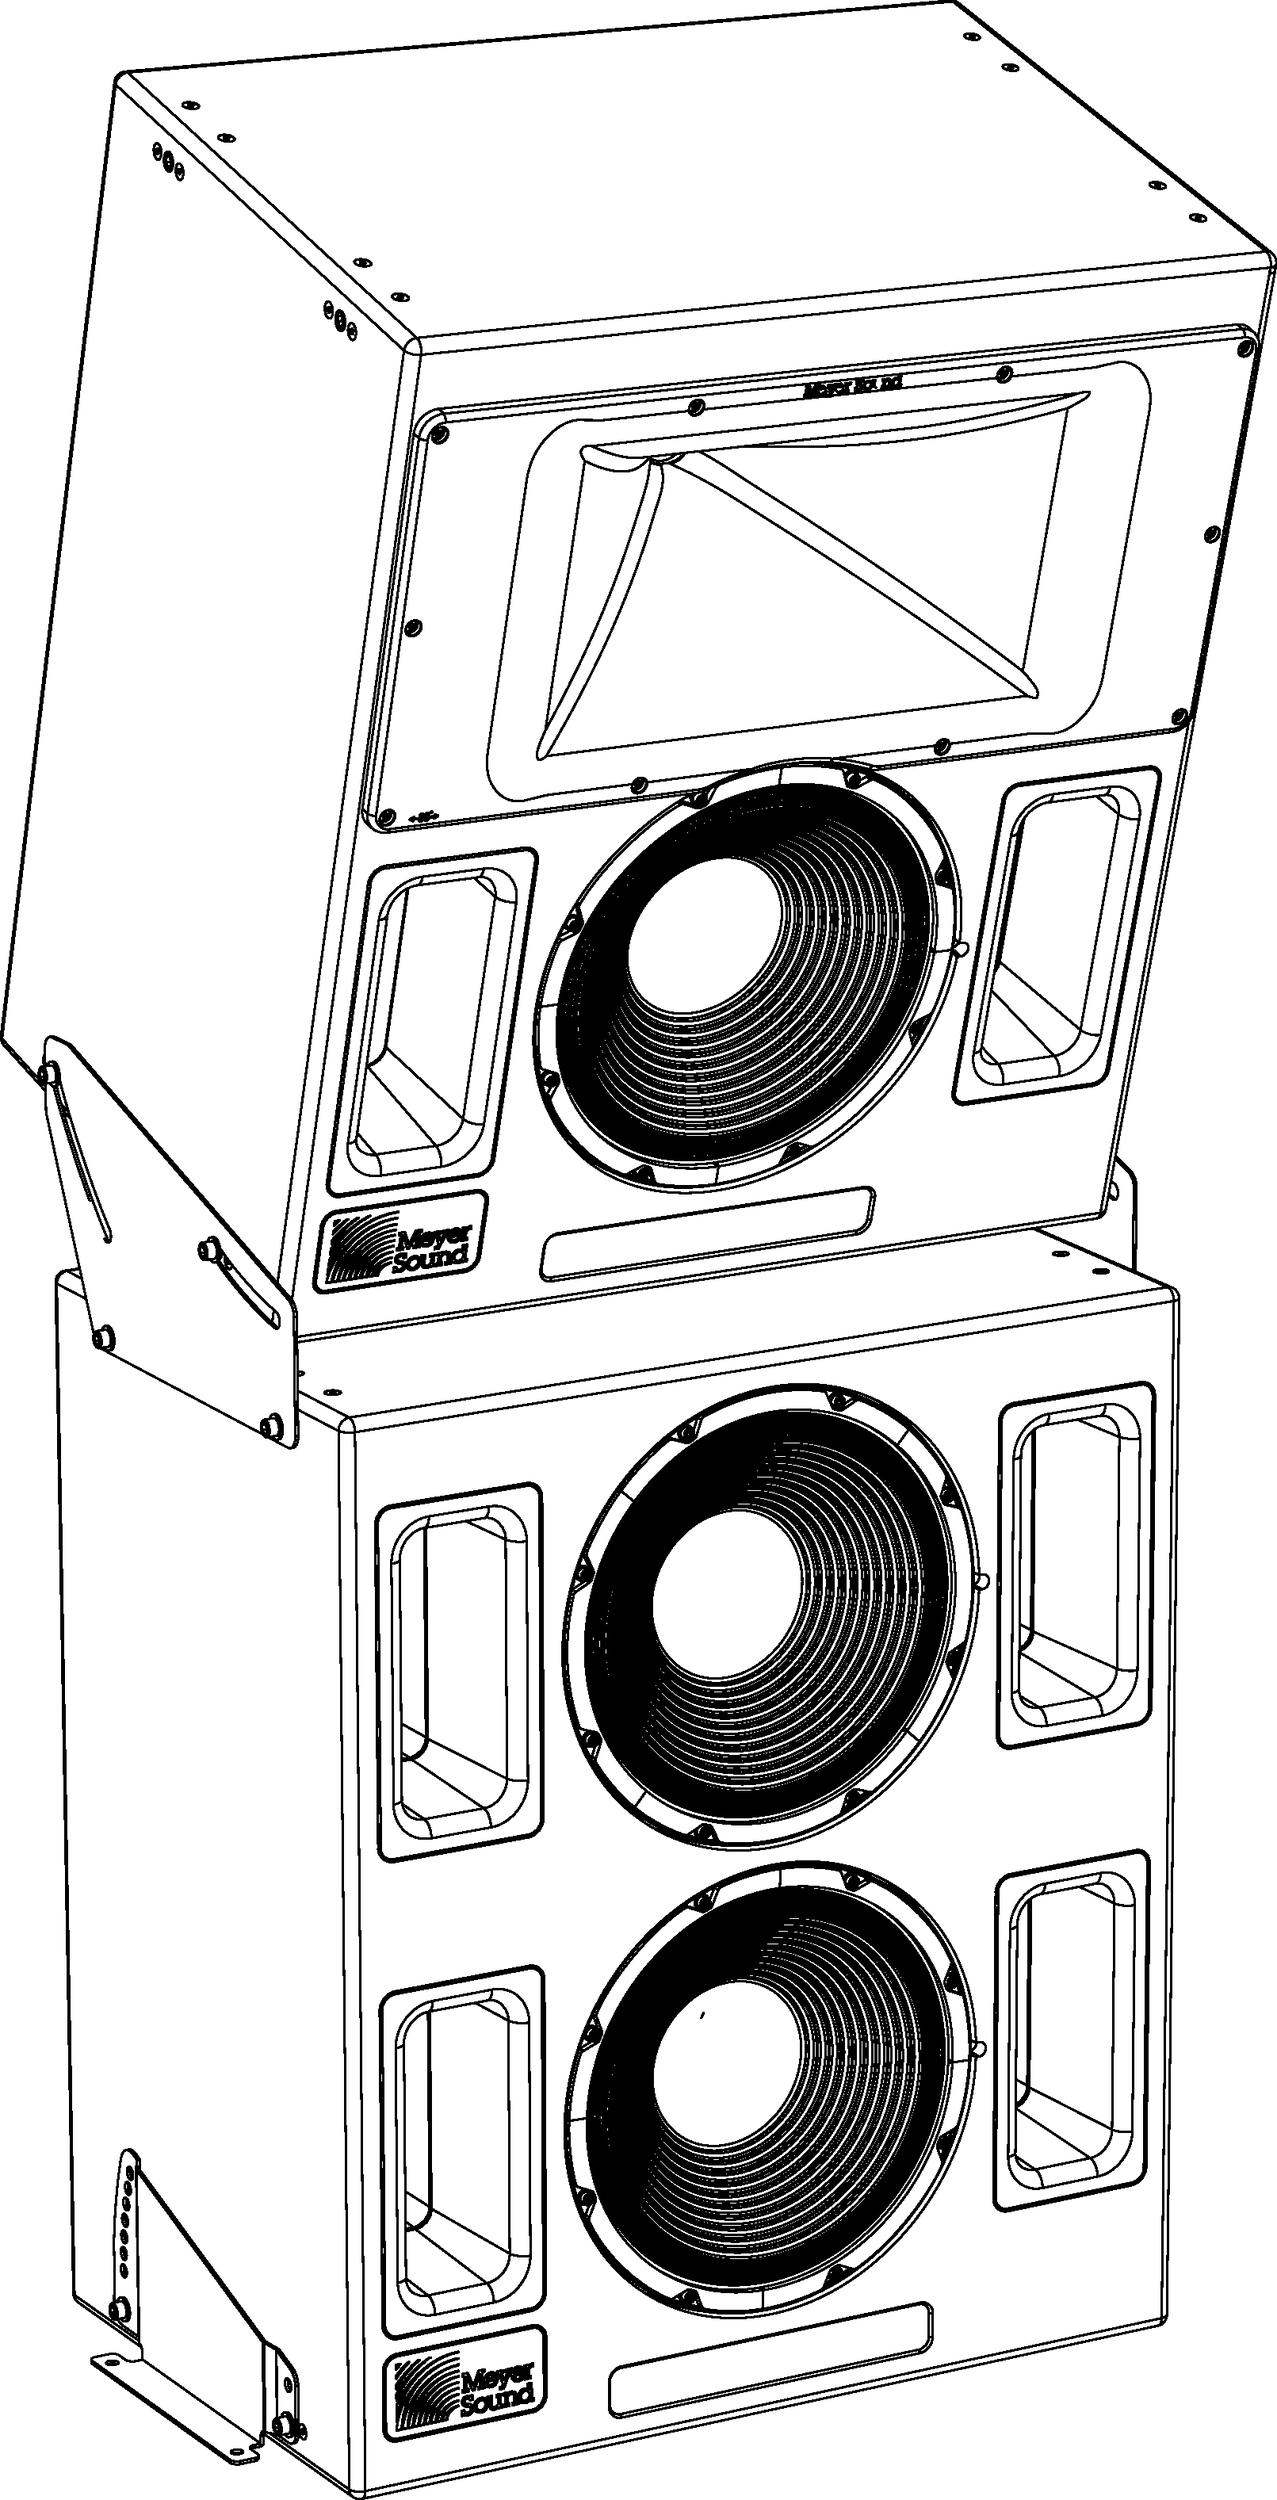
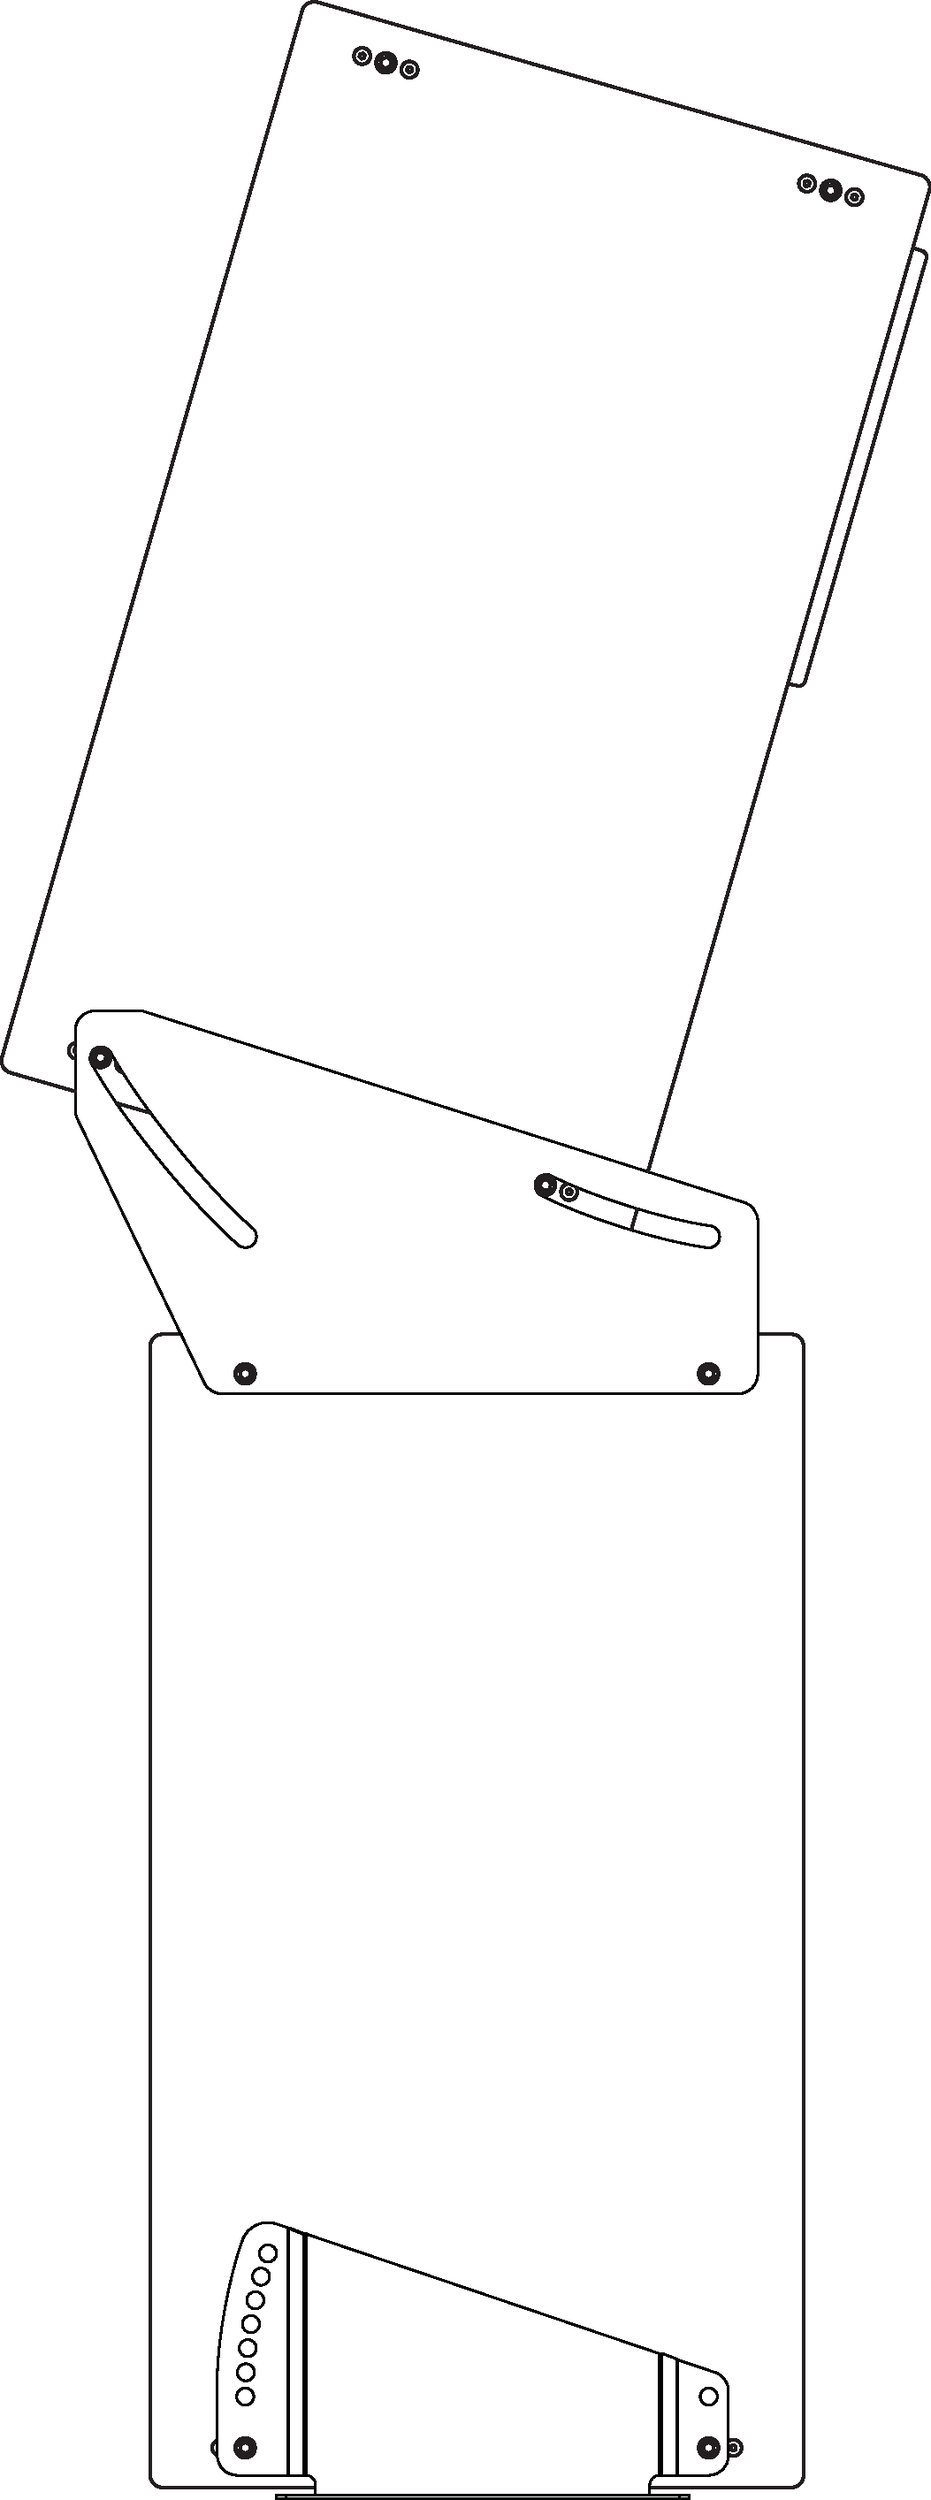
Acheron Stacking Bracket
One Acheron can be stacked on top of the Acheron LF and secured with the Acheron stacking brackets. The stacked Acheron can be mounted with downtilt and uptilt angles of 0–16 degrees.
Note
The orientation of the Acheron to the Acheron LF with the stacking bracket was carefully optimized to minimize any acoustical artifacts between the loudspeakers, as well as between the loudspeakers and baffle walls.
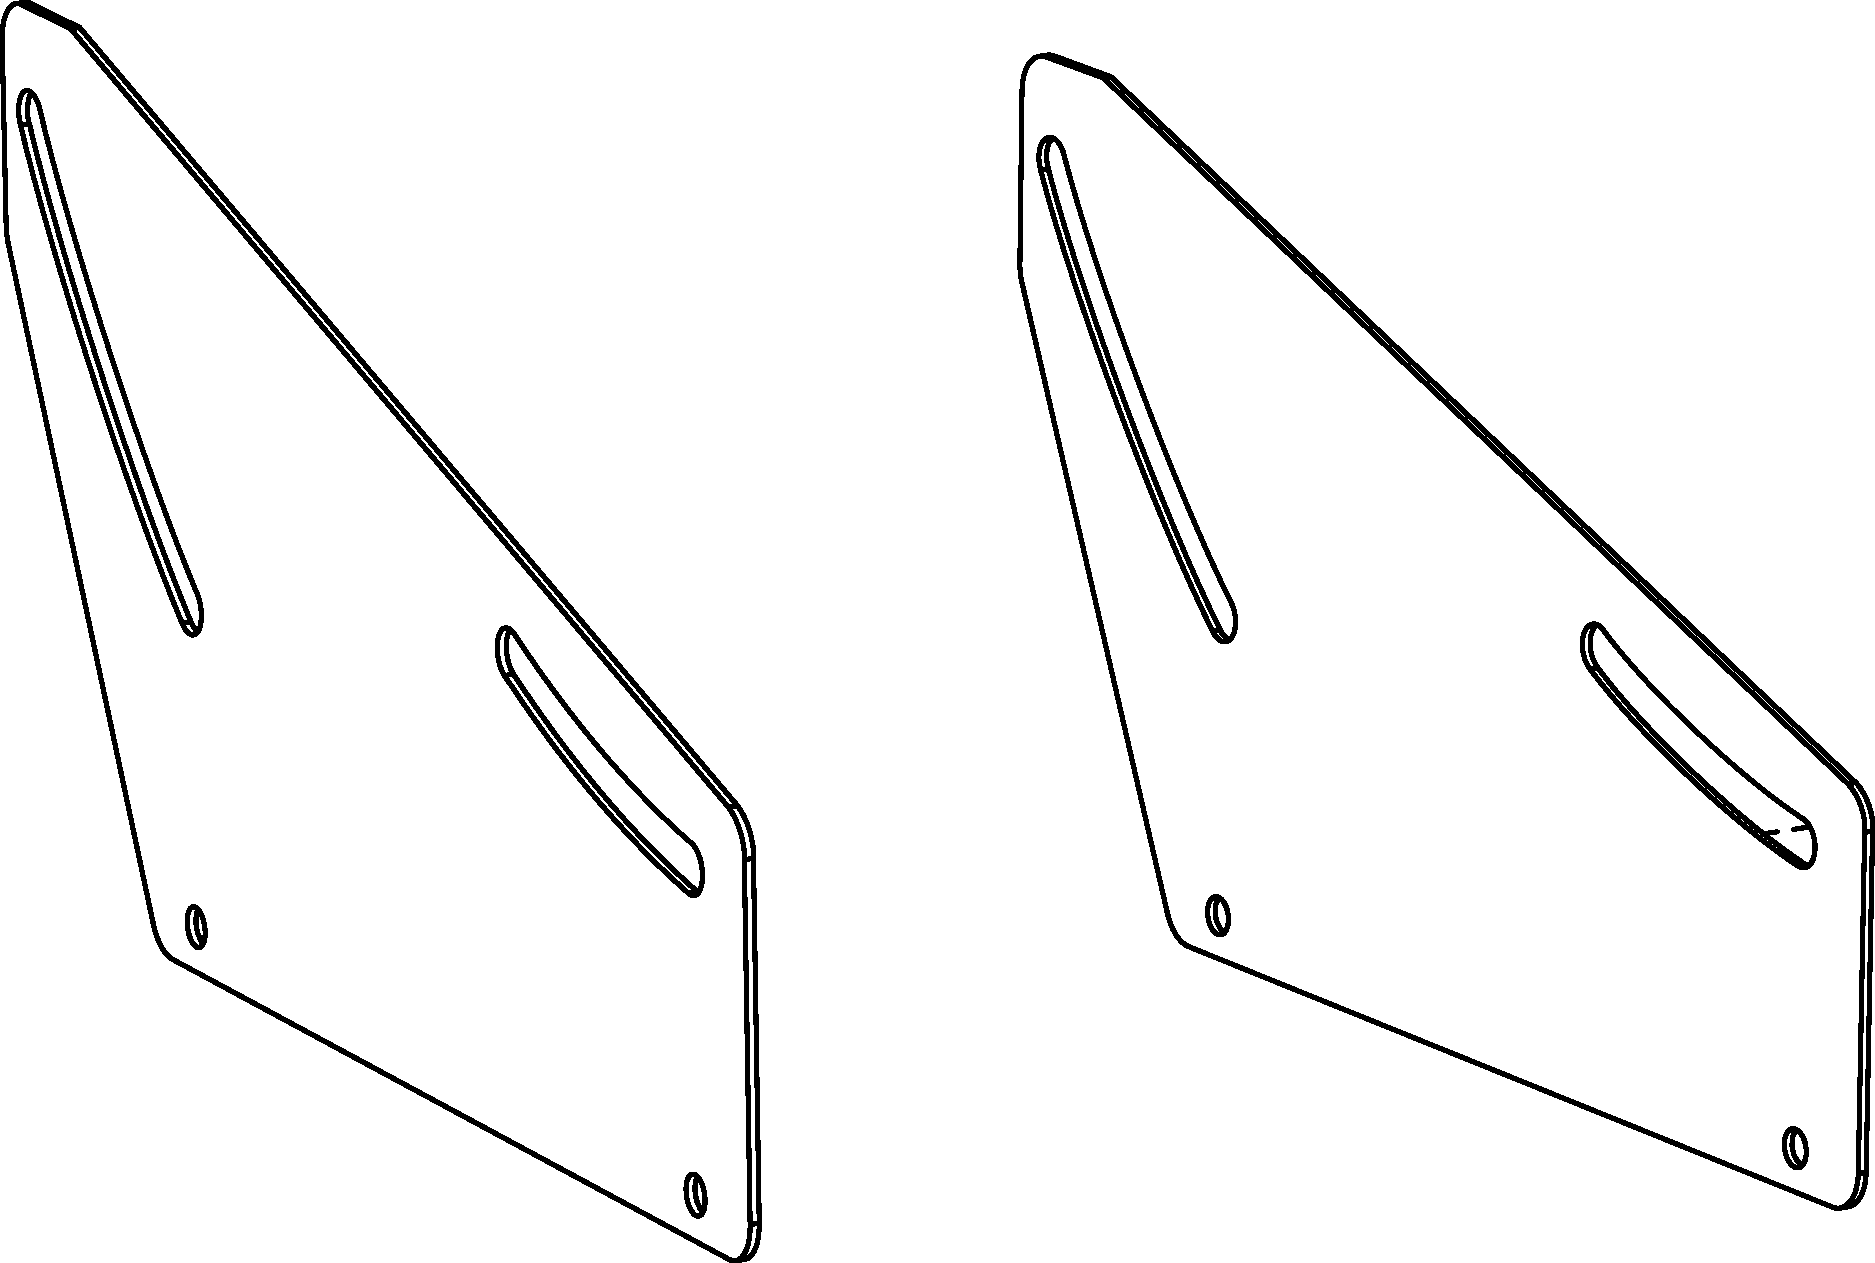 |
Acheron Stacking Brackets
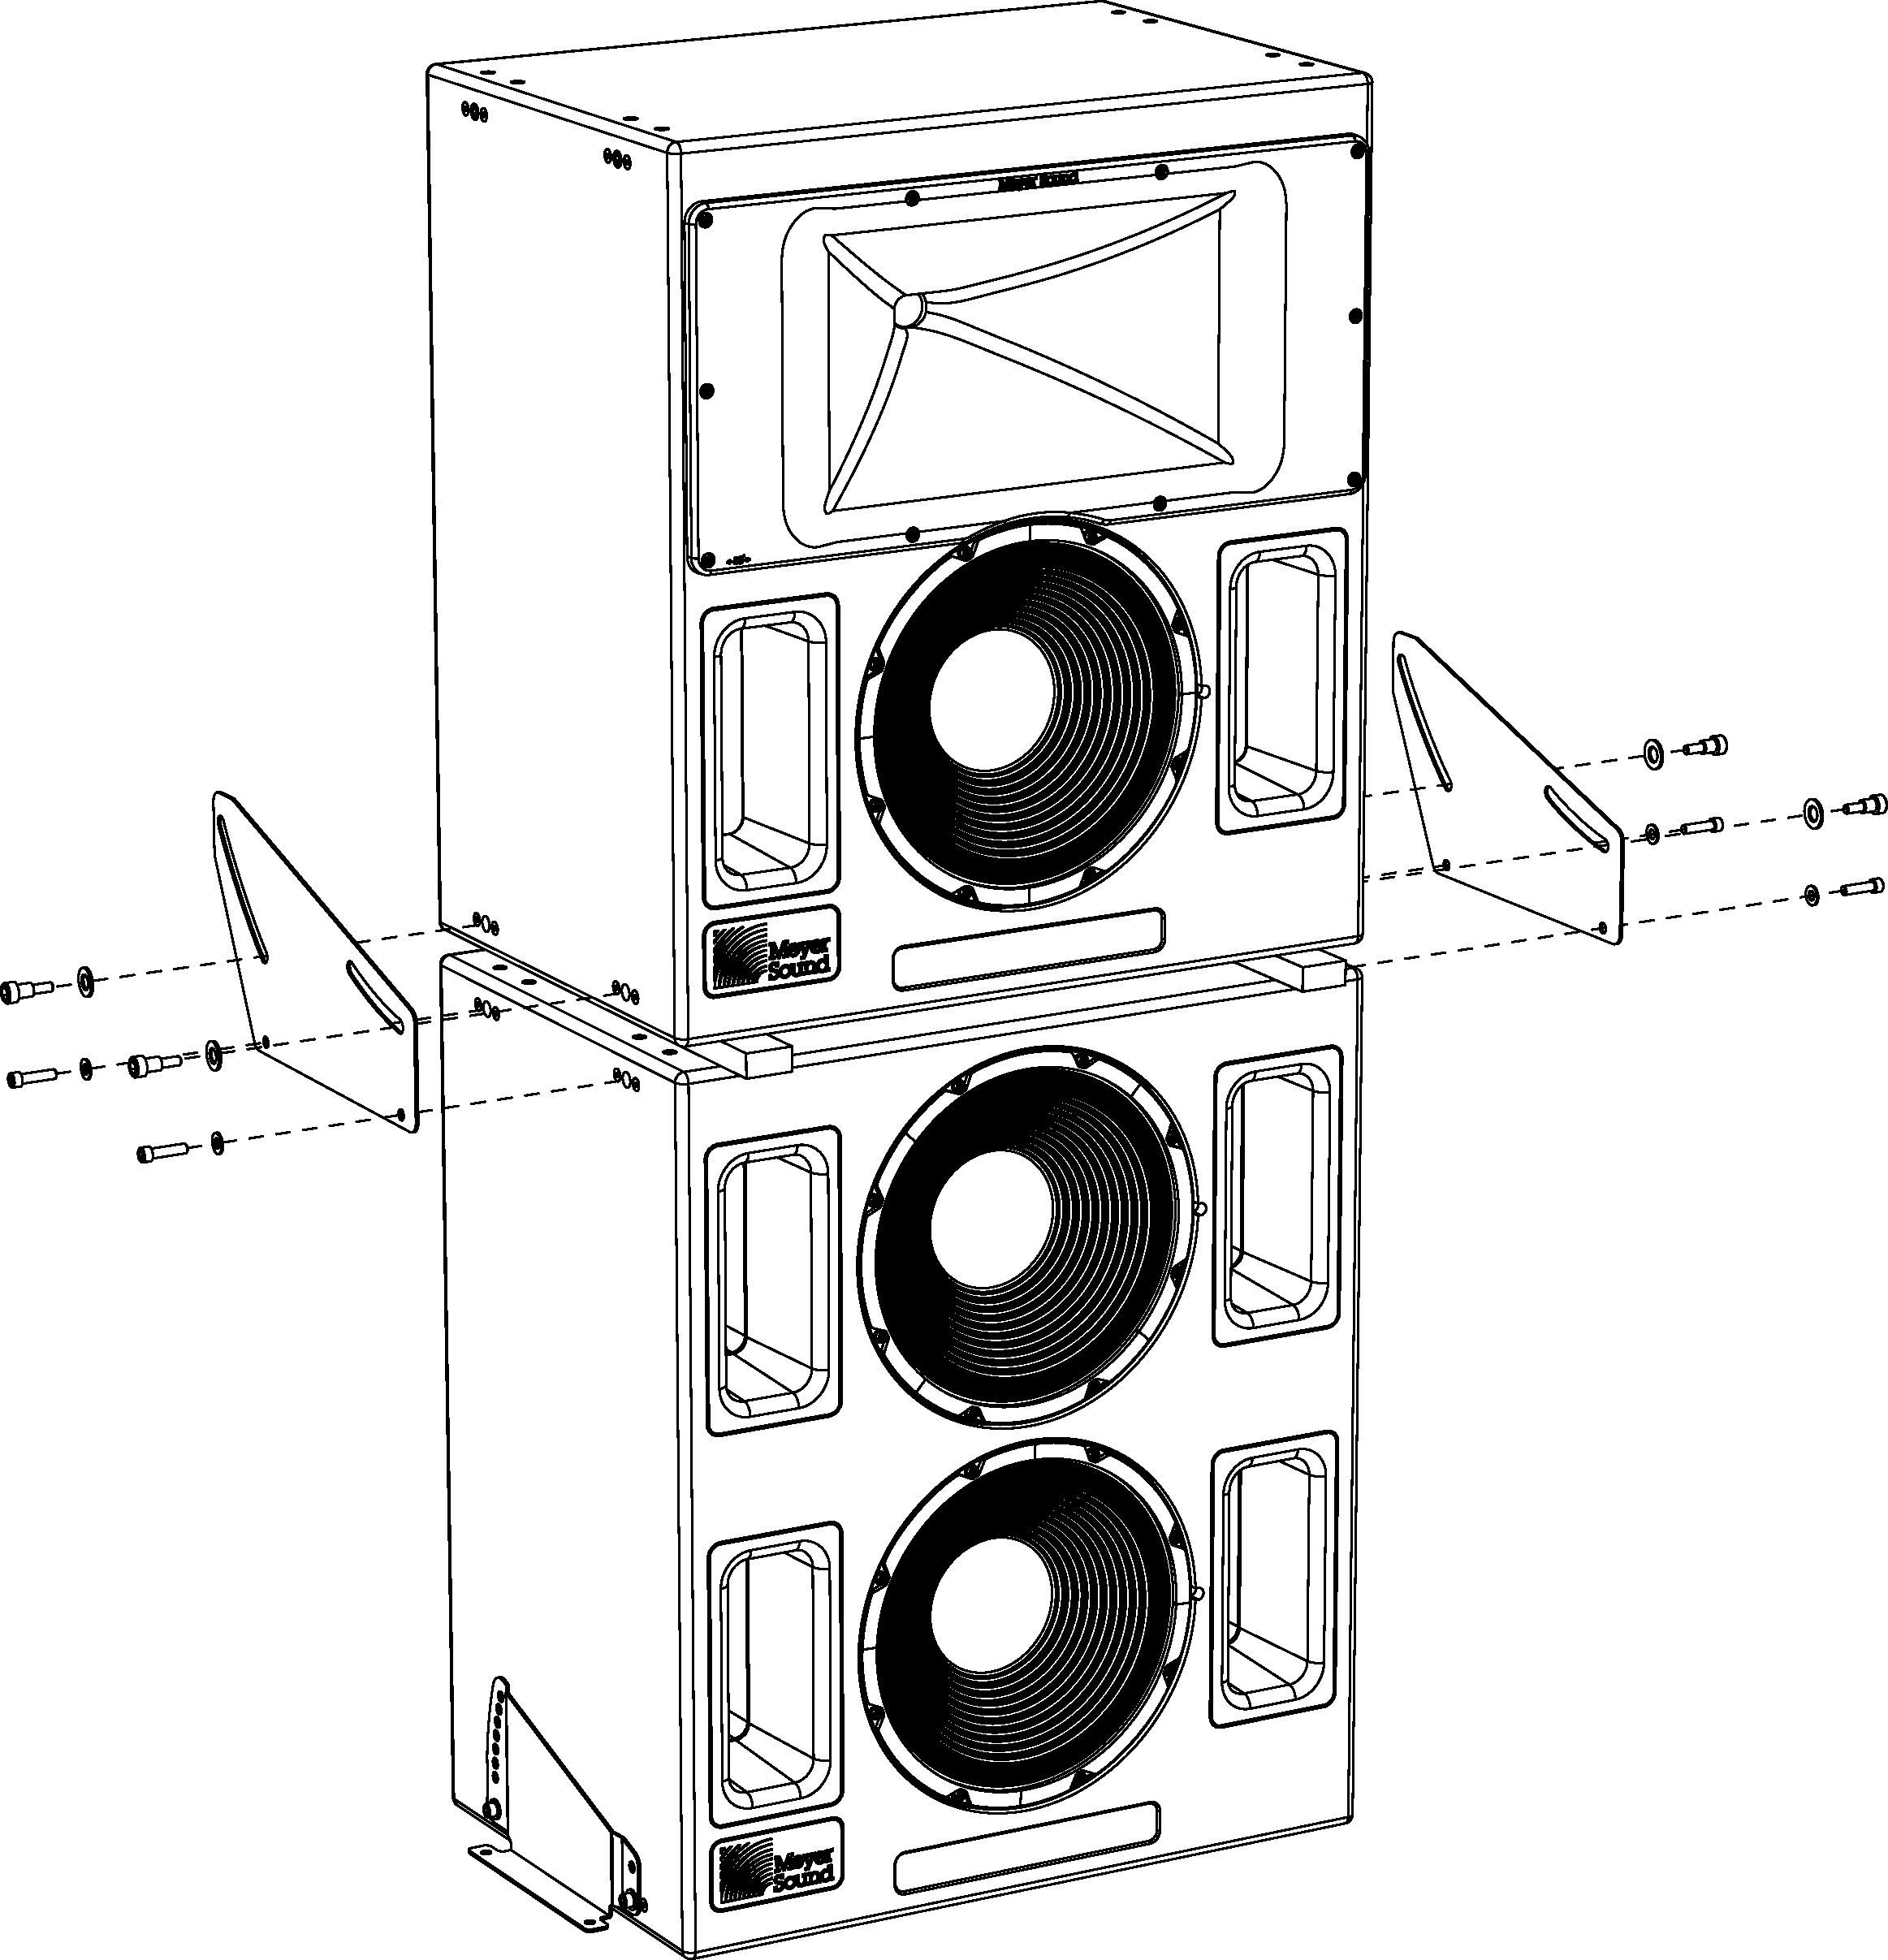 |
Acheron and Acheron LF with Stacking Brackets
Caution
When stacking an Acheron on top of an Acheron LF, the Acheron LF must be secured to the floor with the floor mount brackets. Floor-mount the Acheron LF at 0 degrees using the bottom bracket holes.
Acheron Stacking Bracket Kit Contents
The Acheron stacking bracket kit (PN 40.188.025.01) includes the following parts.
Part | Part number | Quantity |
|---|---|---|
Acheron stacking bracket (left) | 45.188.043.01 | 1 |
Acheron stacking bracket (right) | 45.188.044.01 | 1 |
3/8-16 x 1.5” shoulder screws | 101.507 | 4 |
Large 1/2” flat washers | 113.531 | 4 |
Small Flat washers | 113.509 | 4 |
Note
The 3/8-16 x 1.5-inch screws required for securing the stacking bracket to the Acheron LF are shipped with the Acheron LF installed in the top two screw holes on each side of the unit (four total).
Stacking Acherons on Acheron LFs
Secure the Acheron LF to the floor with the floor mount brackets at 0 degrees using the bottom bracket holes. For more information, see Floor Mounting Acherons and Acheron LFs
Stack the Acheron on top of the Acheron LF.
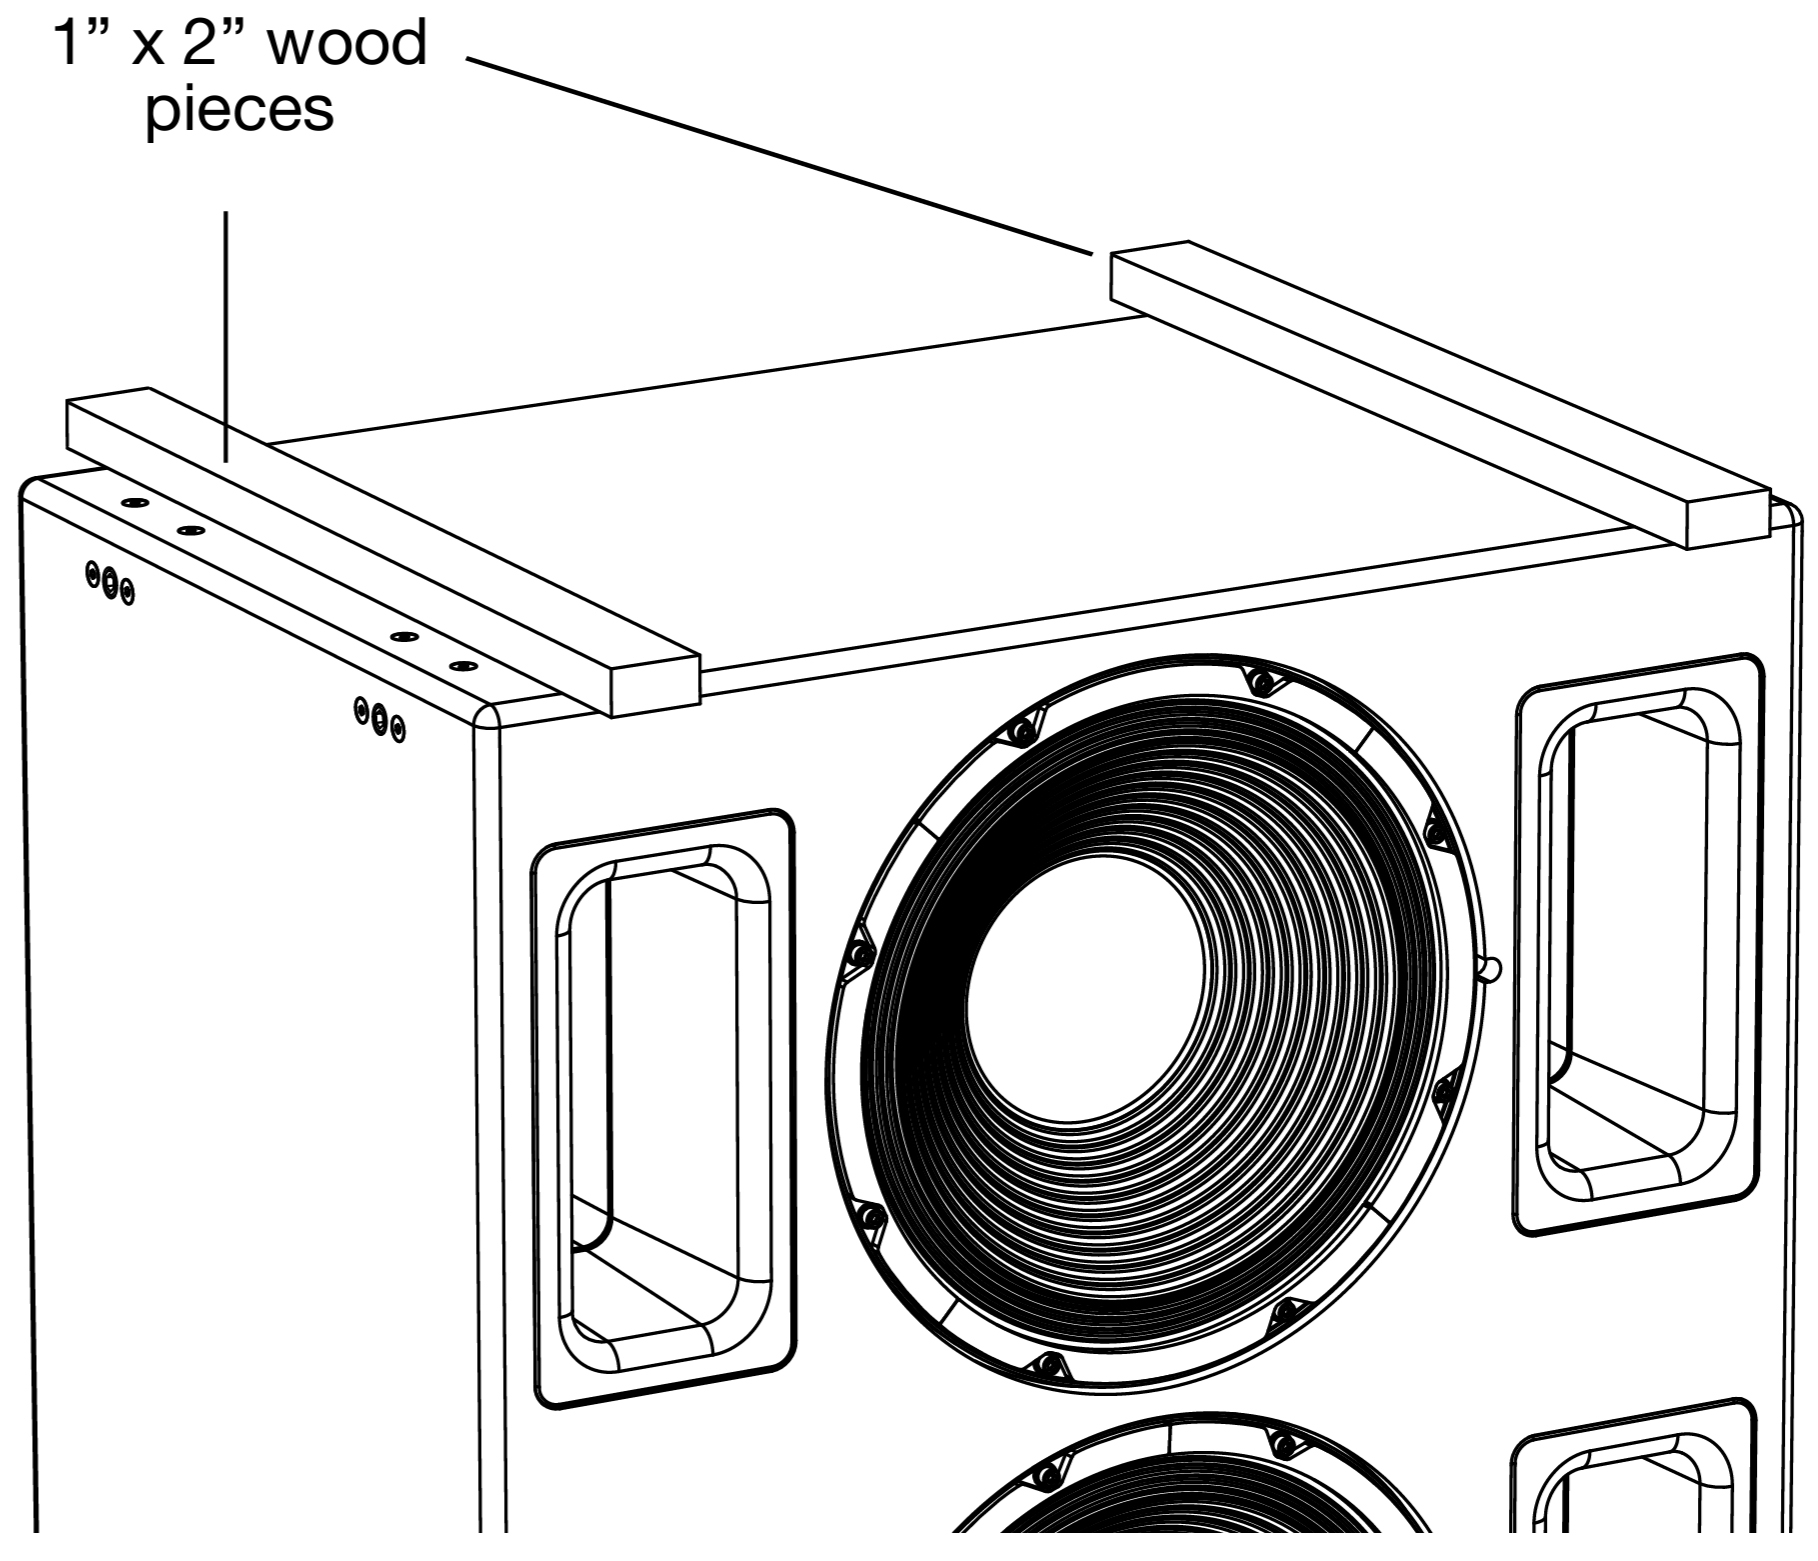
Tip
Optionally place two 1 x 2-inch wood pieces (not included) across the top of the Acheron LF, between it and the Acheron. The resulting extra space between the loudspeakers will make it easier to align the Acheron screw holes with the brackets.
Remove the two 3/8-16 x 1.5-inch screws at the top of each side of the Acheron LF (four total). These screws will be used to secure the stacking bracket to the Acheron LF.

Remove the two 3/8-16 x 1.5-inch screws at the bottom of each side of the Acheron (four total). These screws will not be needed for installing the stacking bracket.
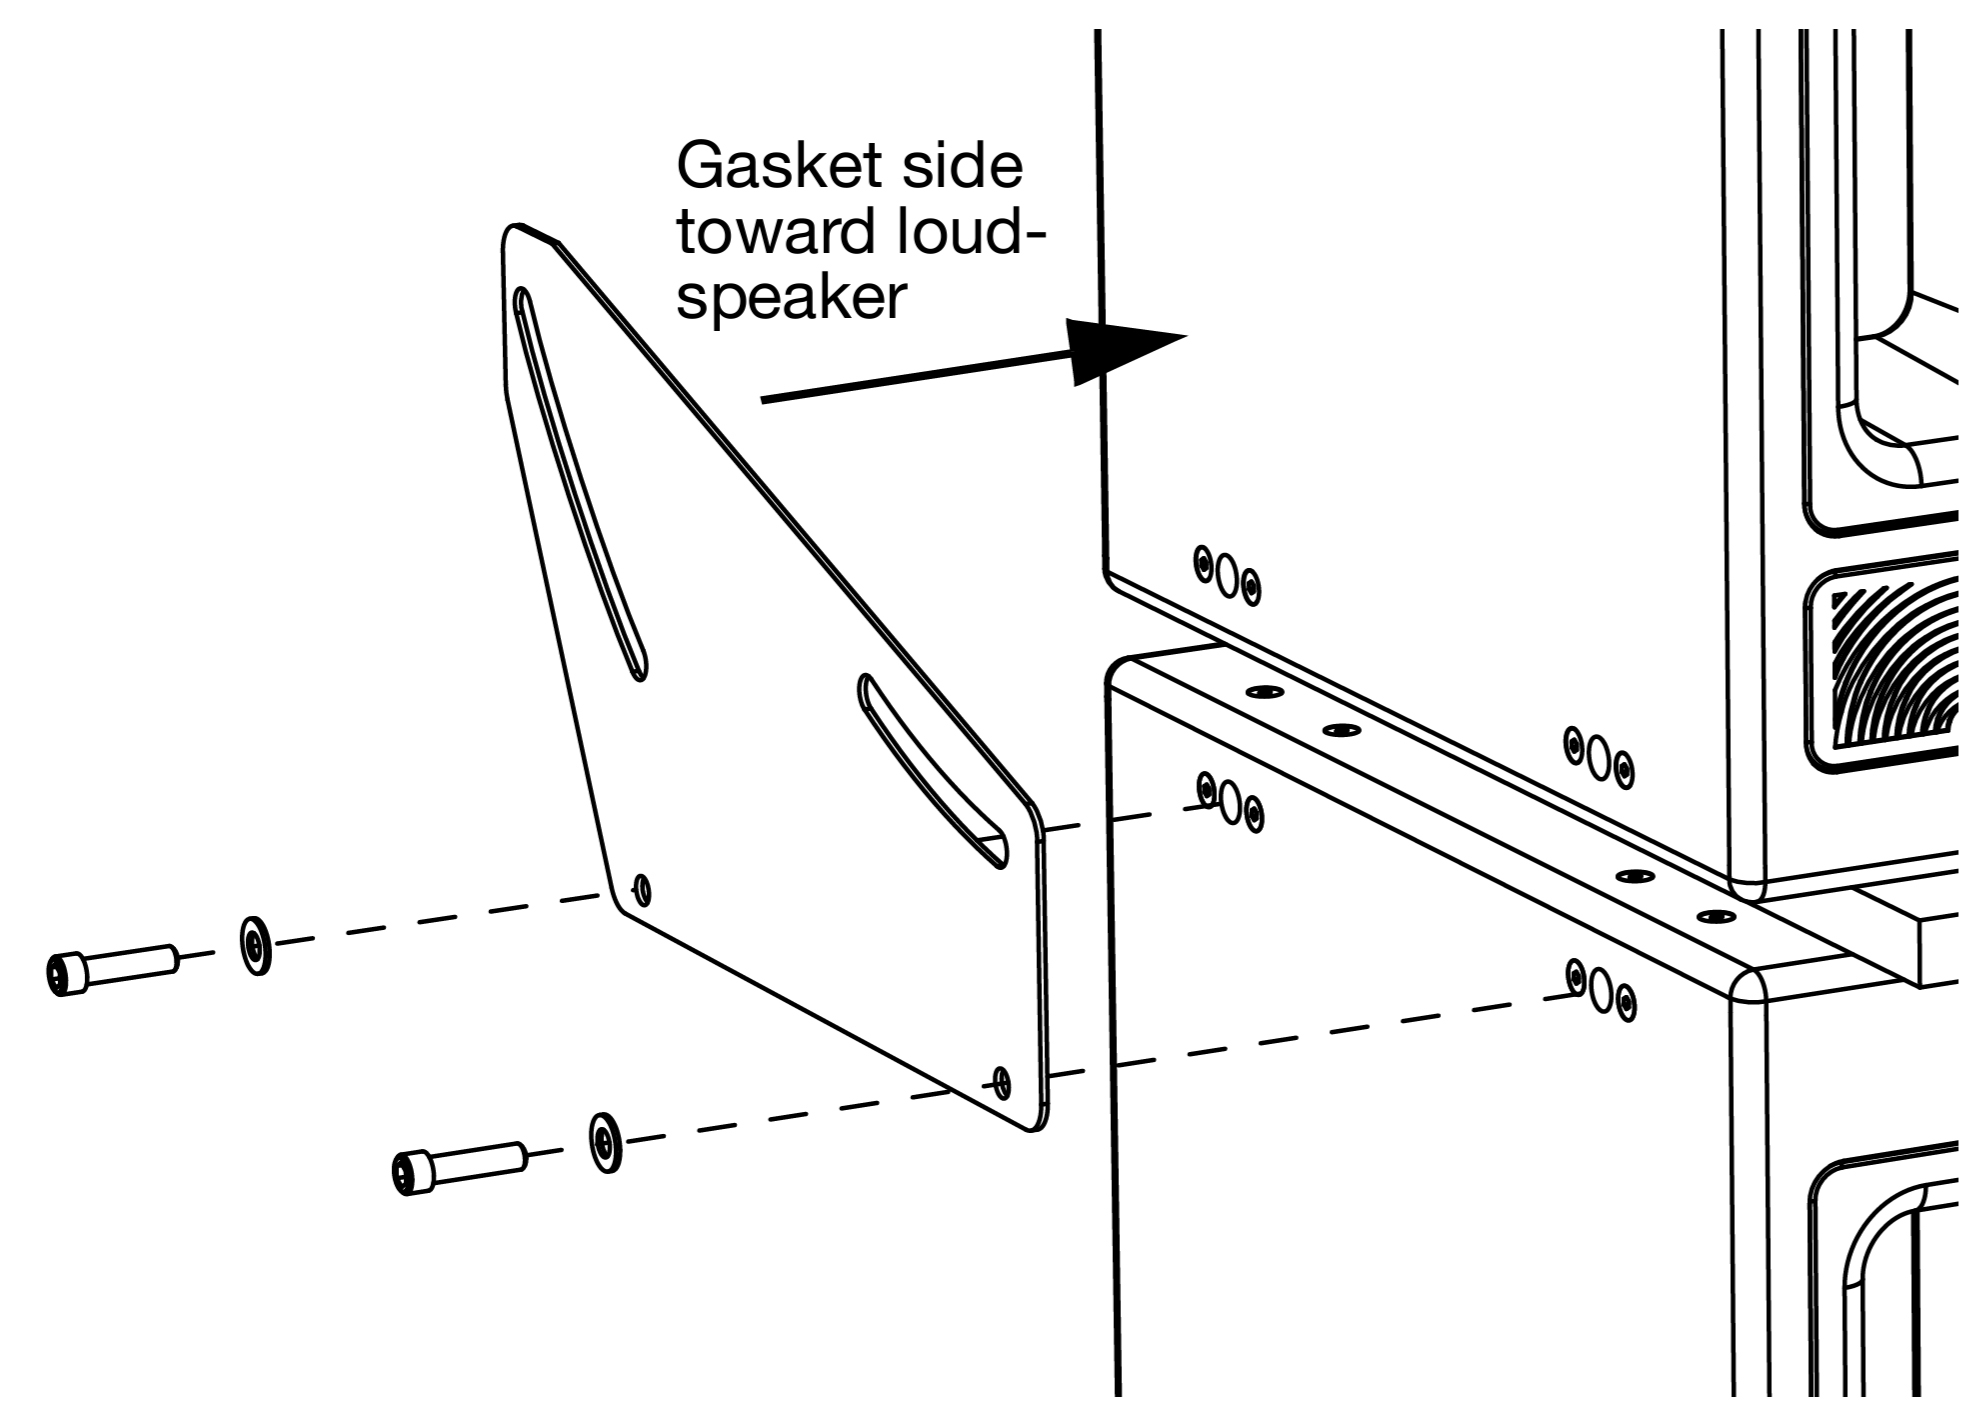
Secure the left bracket to the left side of the Acheron LF with two of the removed screws and two of the small flat washers (included in the Acheron stacking bracket kit). Use the bracket’s bottom screw holes and install the bracket so its rubber gasket faces the loudspeaker.
To mount the Acheron with downtilt, orient the bracket with the large end toward the rear of the loudspeakers. For available downtilt angles, see Stack Mount Downtilt Angles
To mount the Acheron with uptilt, orient the bracket with the large end toward the front of the loudspeakers. For available uptilt angles, see Stack Mount Uptilt Angles
Secure the right bracket to the right side of the AcheronLF with the remaining two screws (previously removed) and the remaining two small flat washers. Install the bracket so its rubber gasket faces the loudspeaker.
Secure the stacking brackets to the Acheron with the four 3/8-16 x 1.5-inch shoulder screws and four large 1/2-inch washers (both included with the Acheron stacking bracket kit). Insert the shoulder screws in the bracket’s top slots but don’t yet tighten them completely.
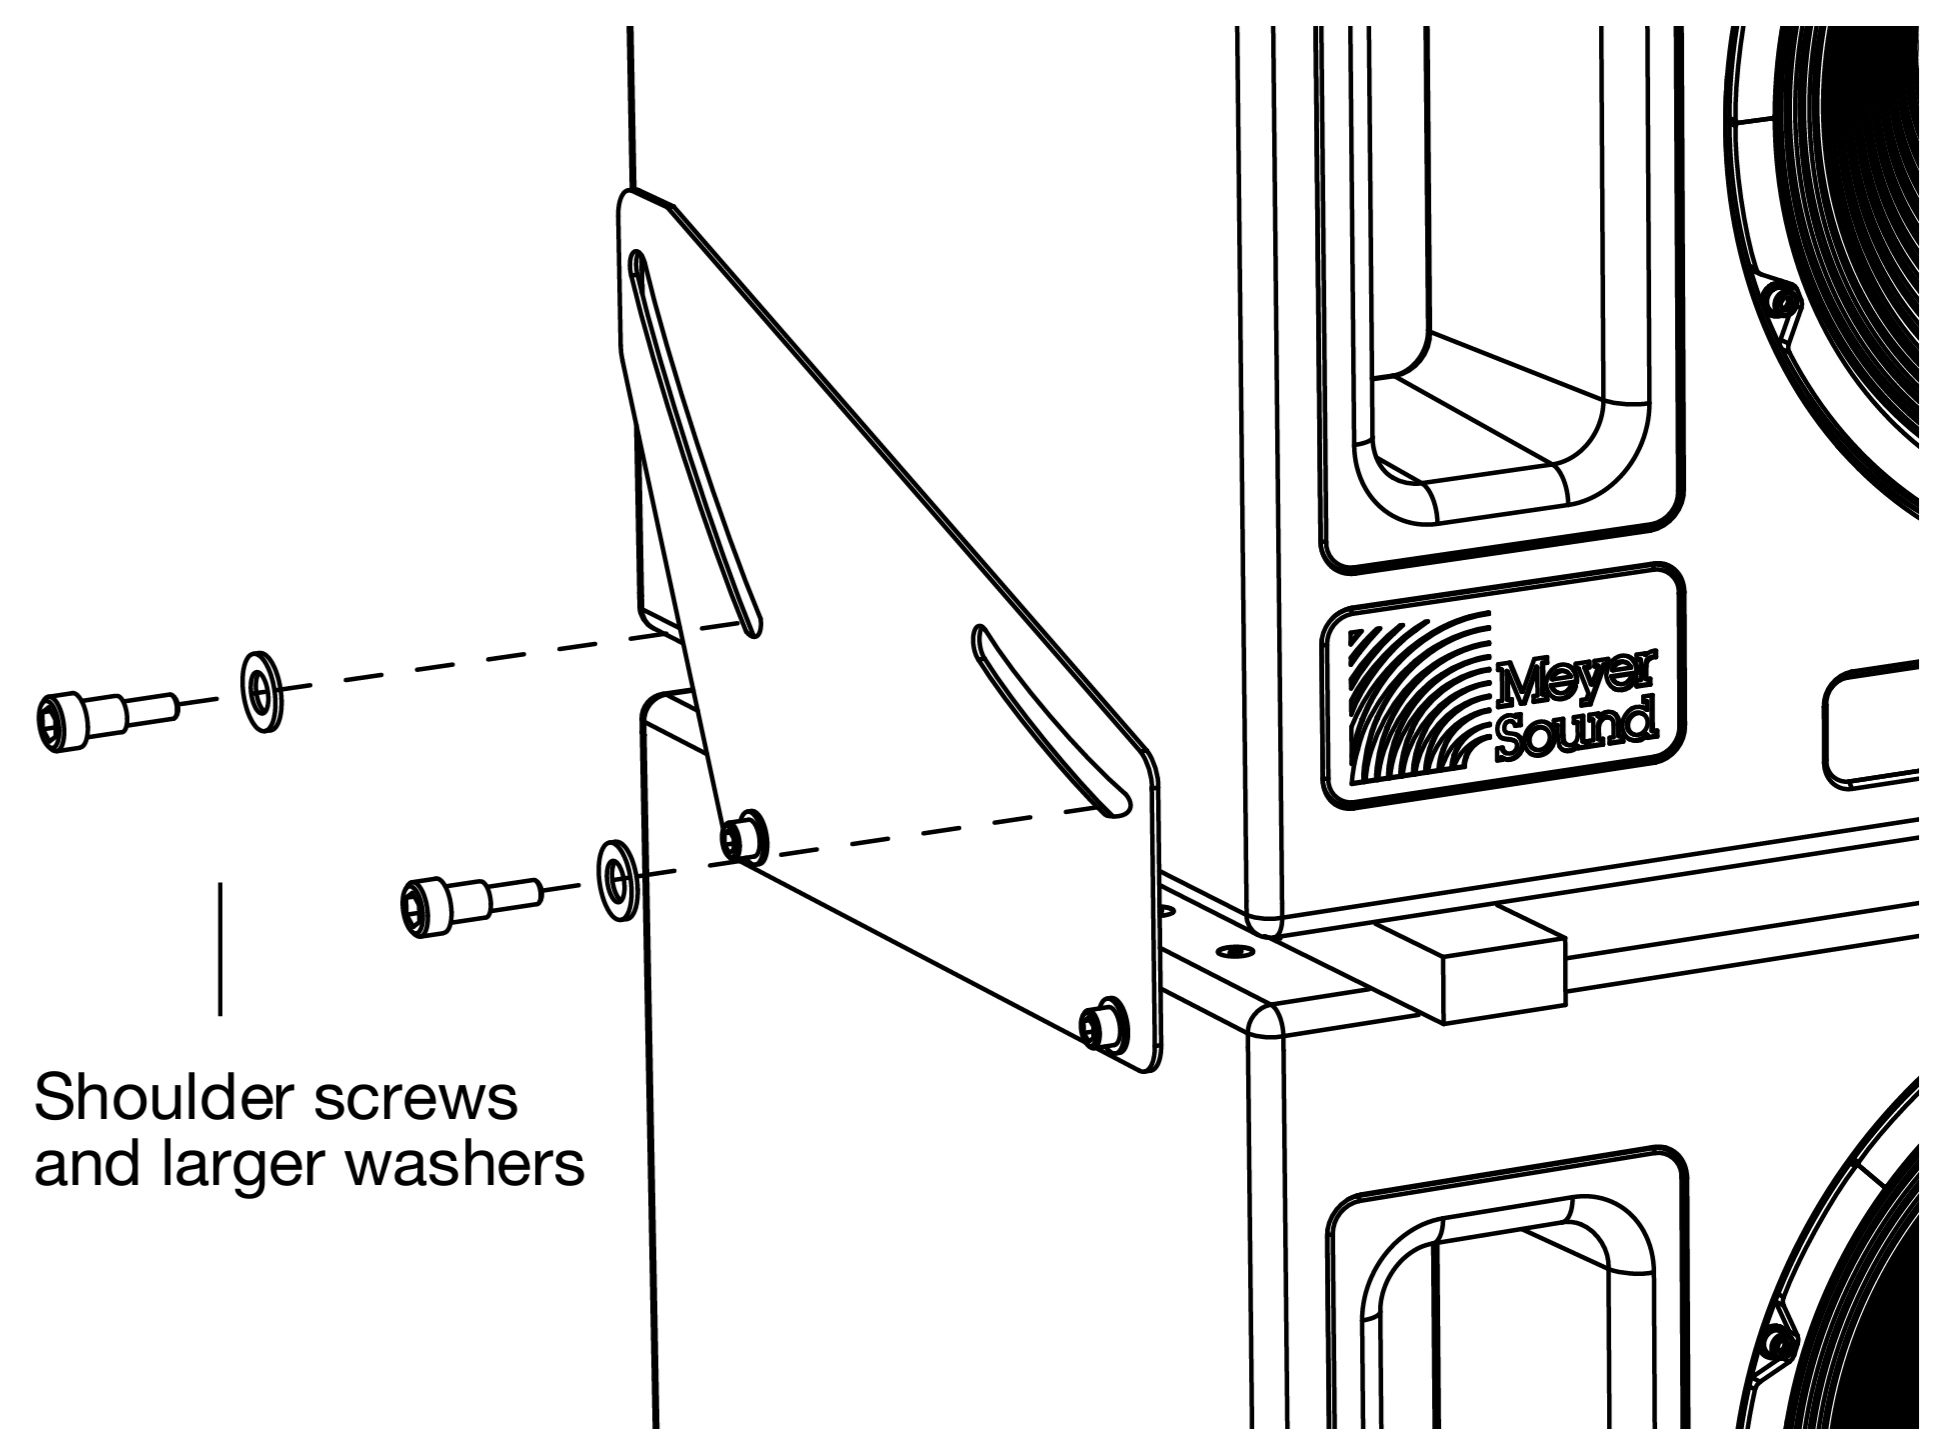
Tip
If necessary, tip the Acheron slightly to align its screw holes with the bracket holes.
Adjust the angle of the stacked Acheron — anywhere between 0 and 16 degrees — by tilting the unit up or down so the screws slide through bracket slots.
Tighten all four shoulder screws to secure the stacking bracket to the Acheron.
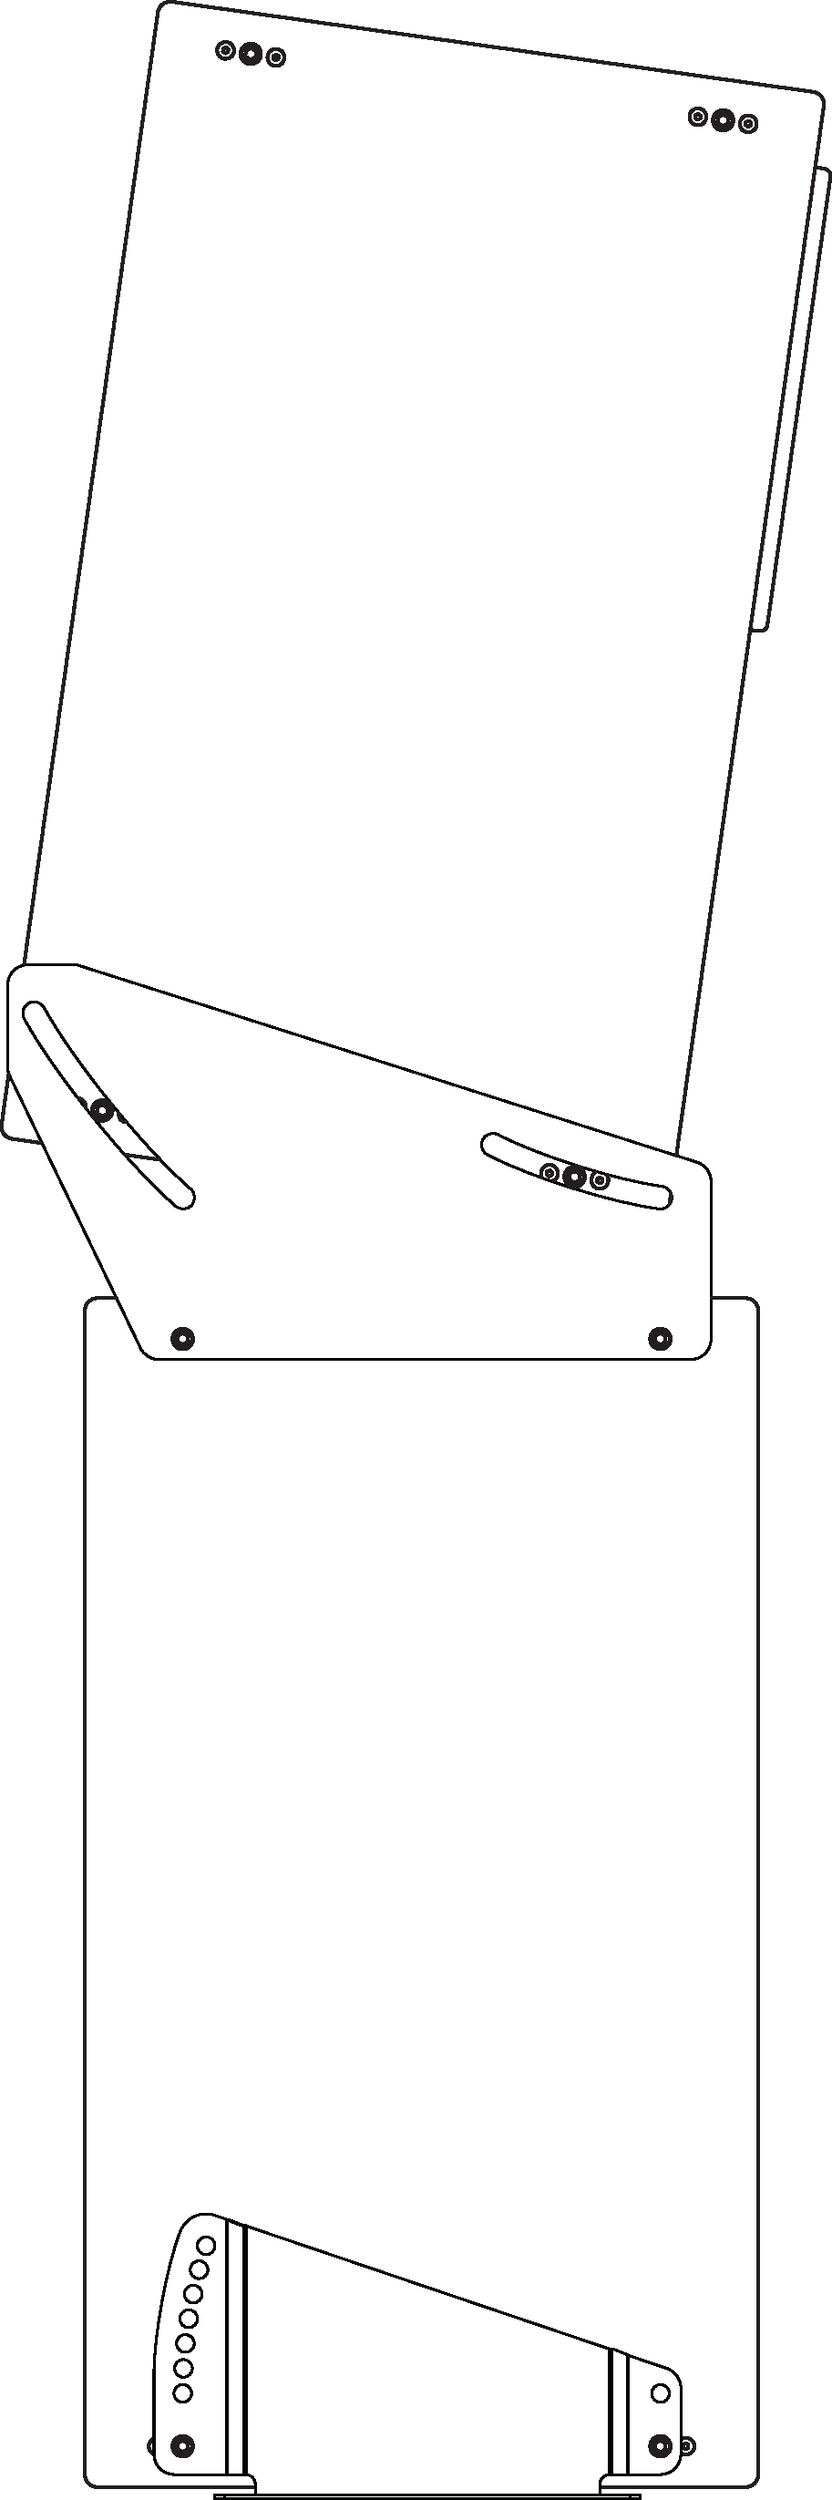
Stacking Acherons with Downtilt and Uptilt
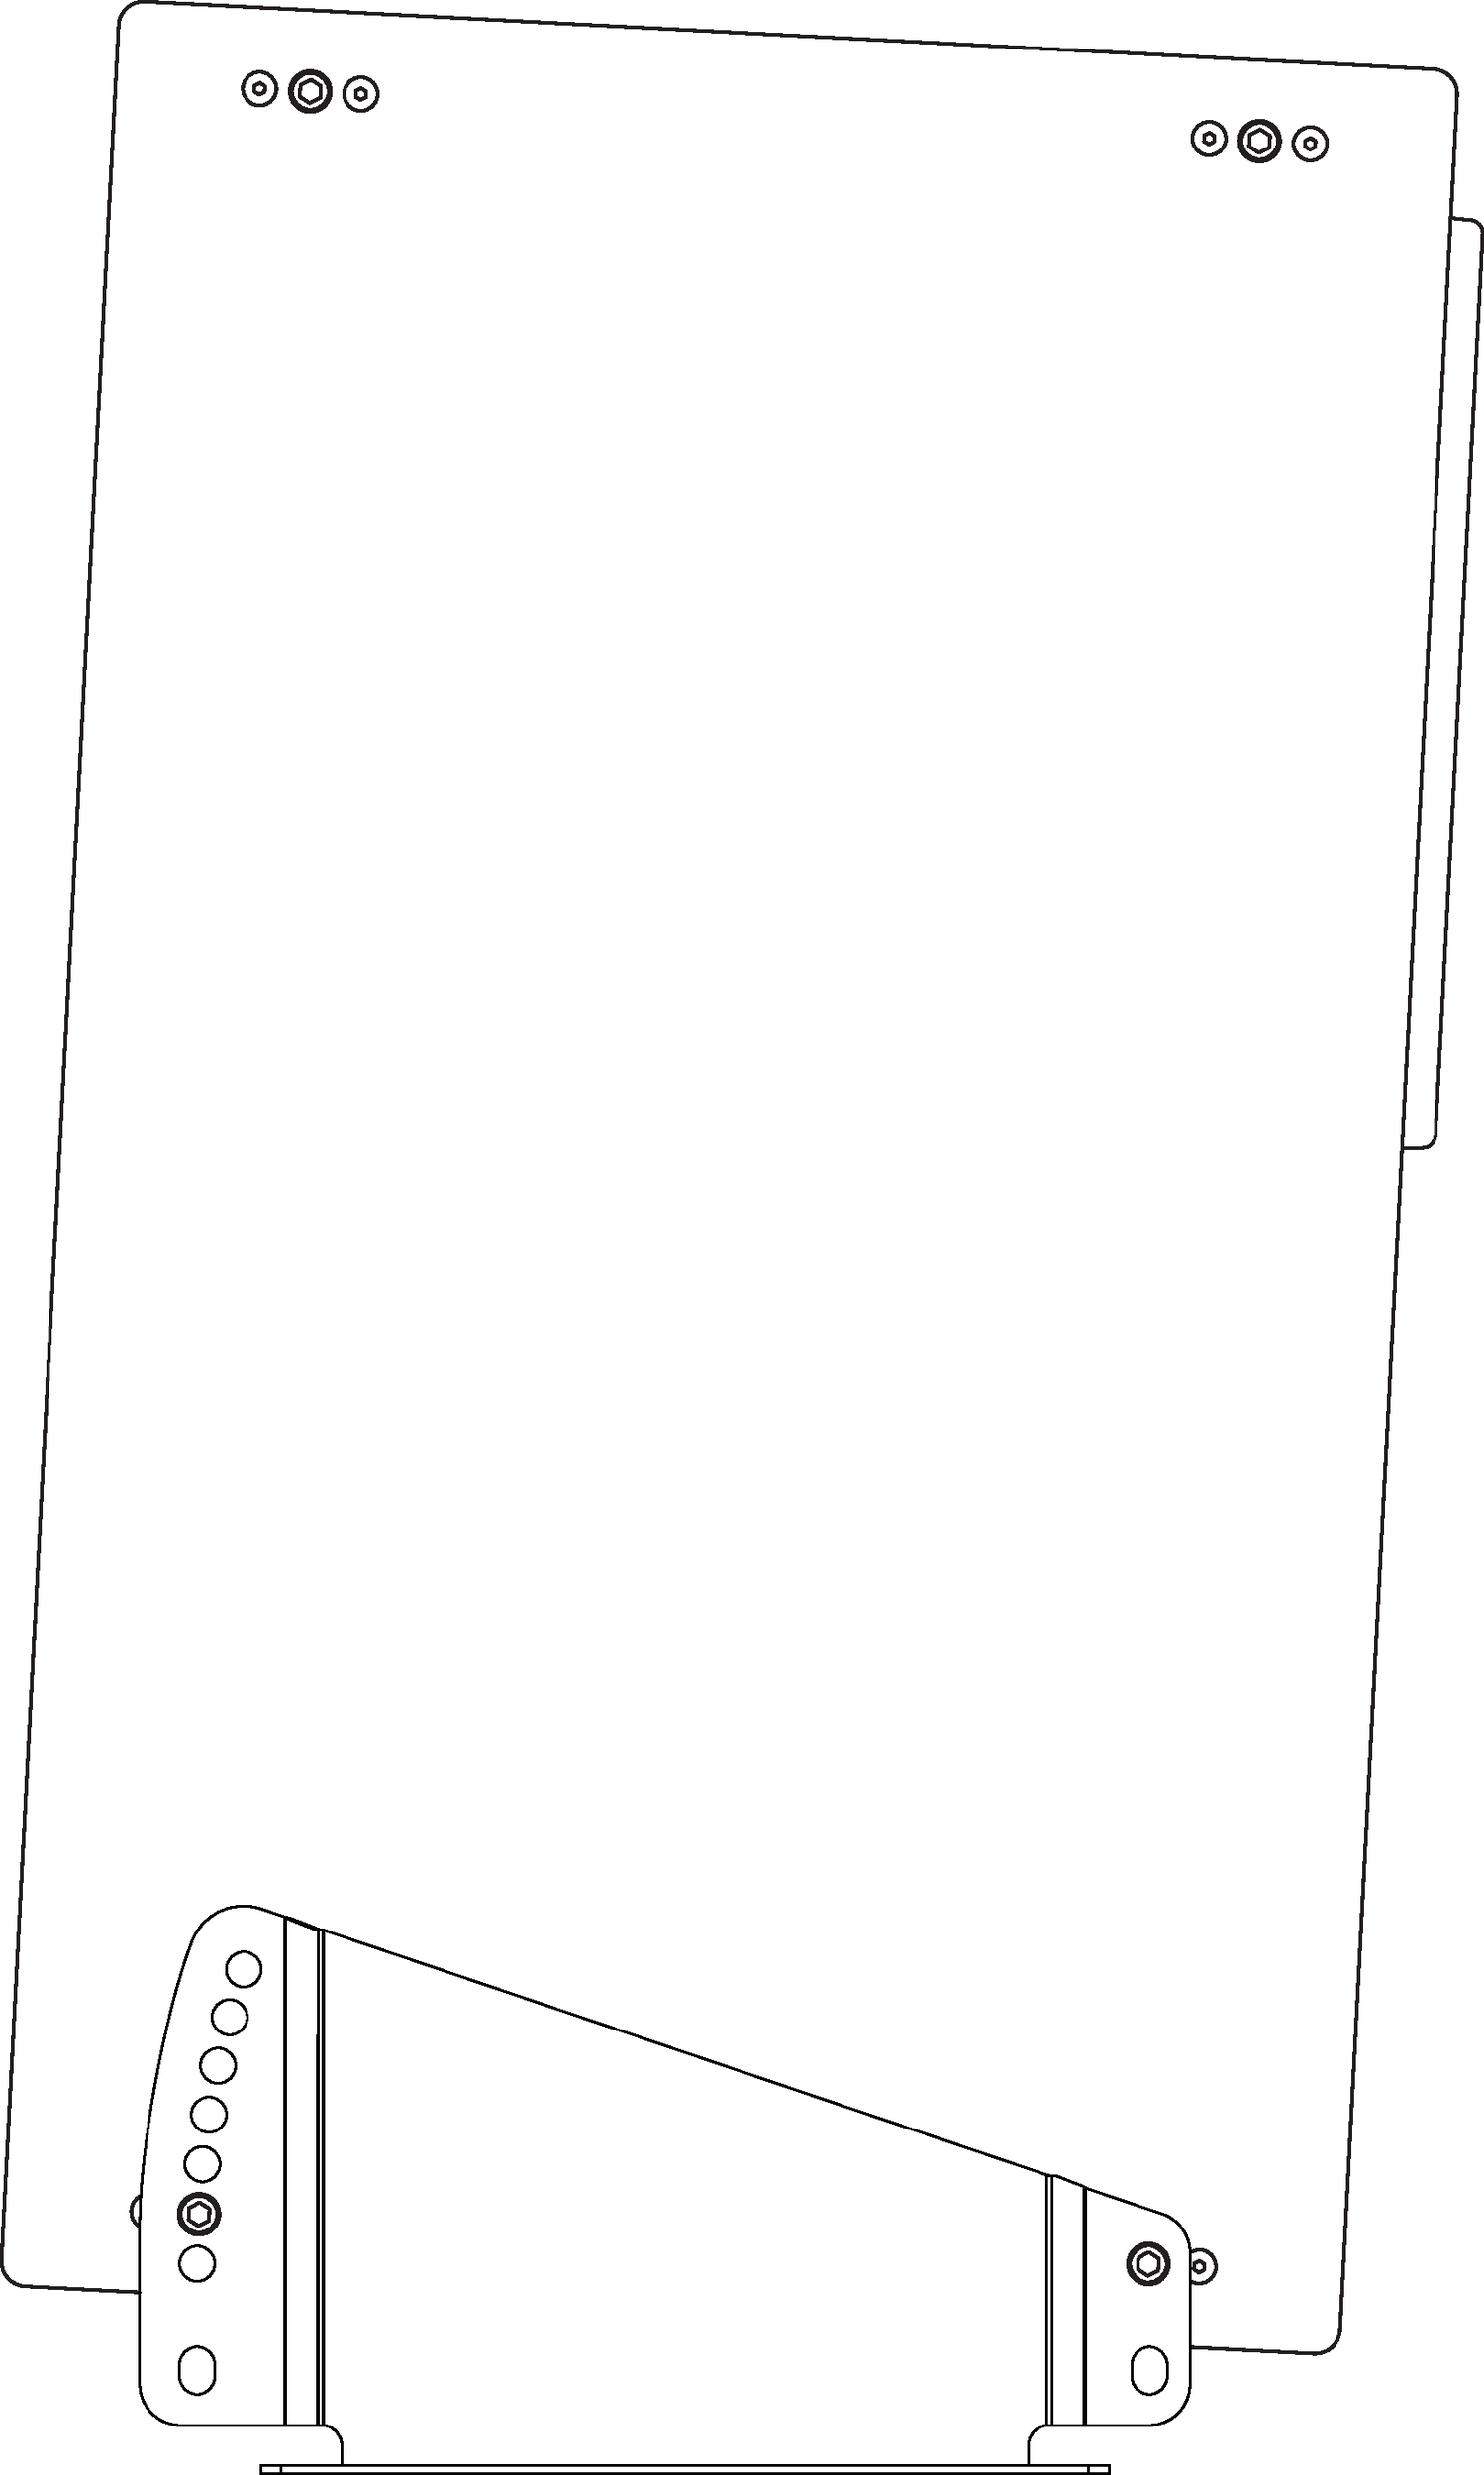
The Acheron stacking brackets can mount Acherons with either downtilt or uptilt. Available angles are anywhere from 0–16 degrees. The direction in which the brackets are oriented determines whether the loudspeaker can be mounted with downtilt or uptilt.
 |
AcheronLF and Stacked Acheron with 16-Degree Downtilt
Caution
When stacking an Acheron on top of an Acheron LF, the Acheron LF must be secured to the floor with the floor mount brackets. In addition, the Acheron LF should not be mounted with downtilt or uptilt.
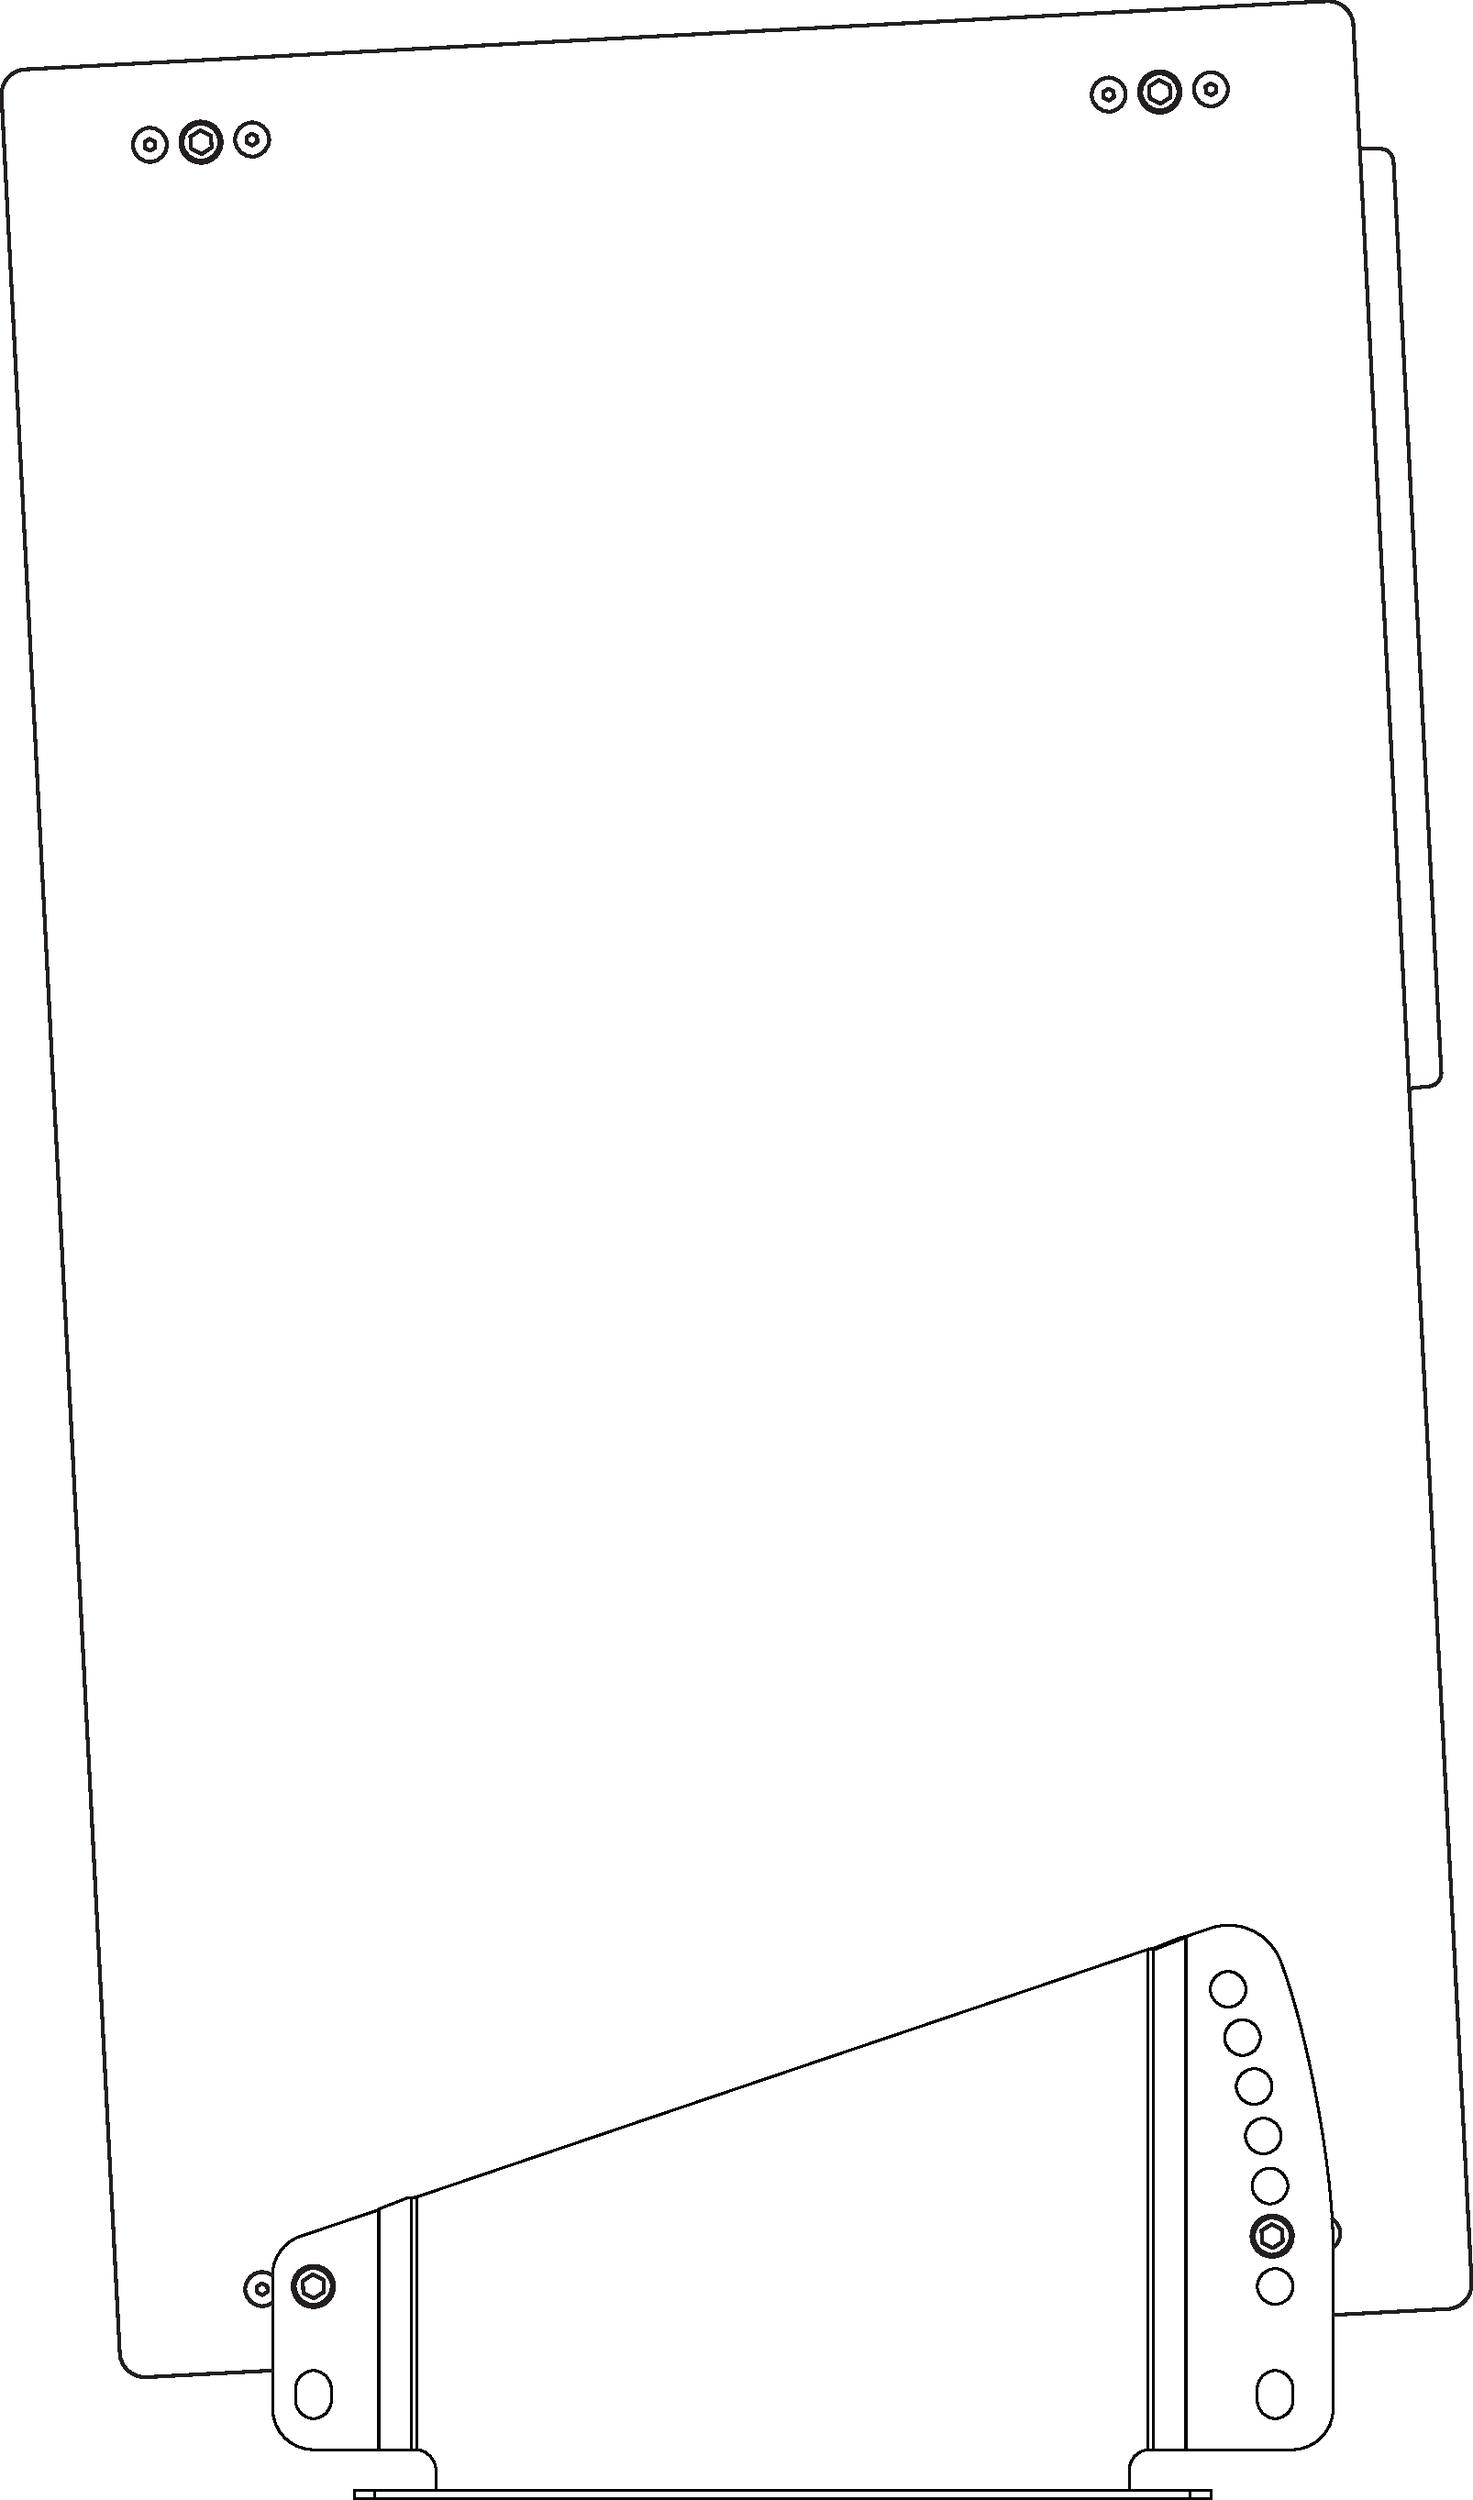
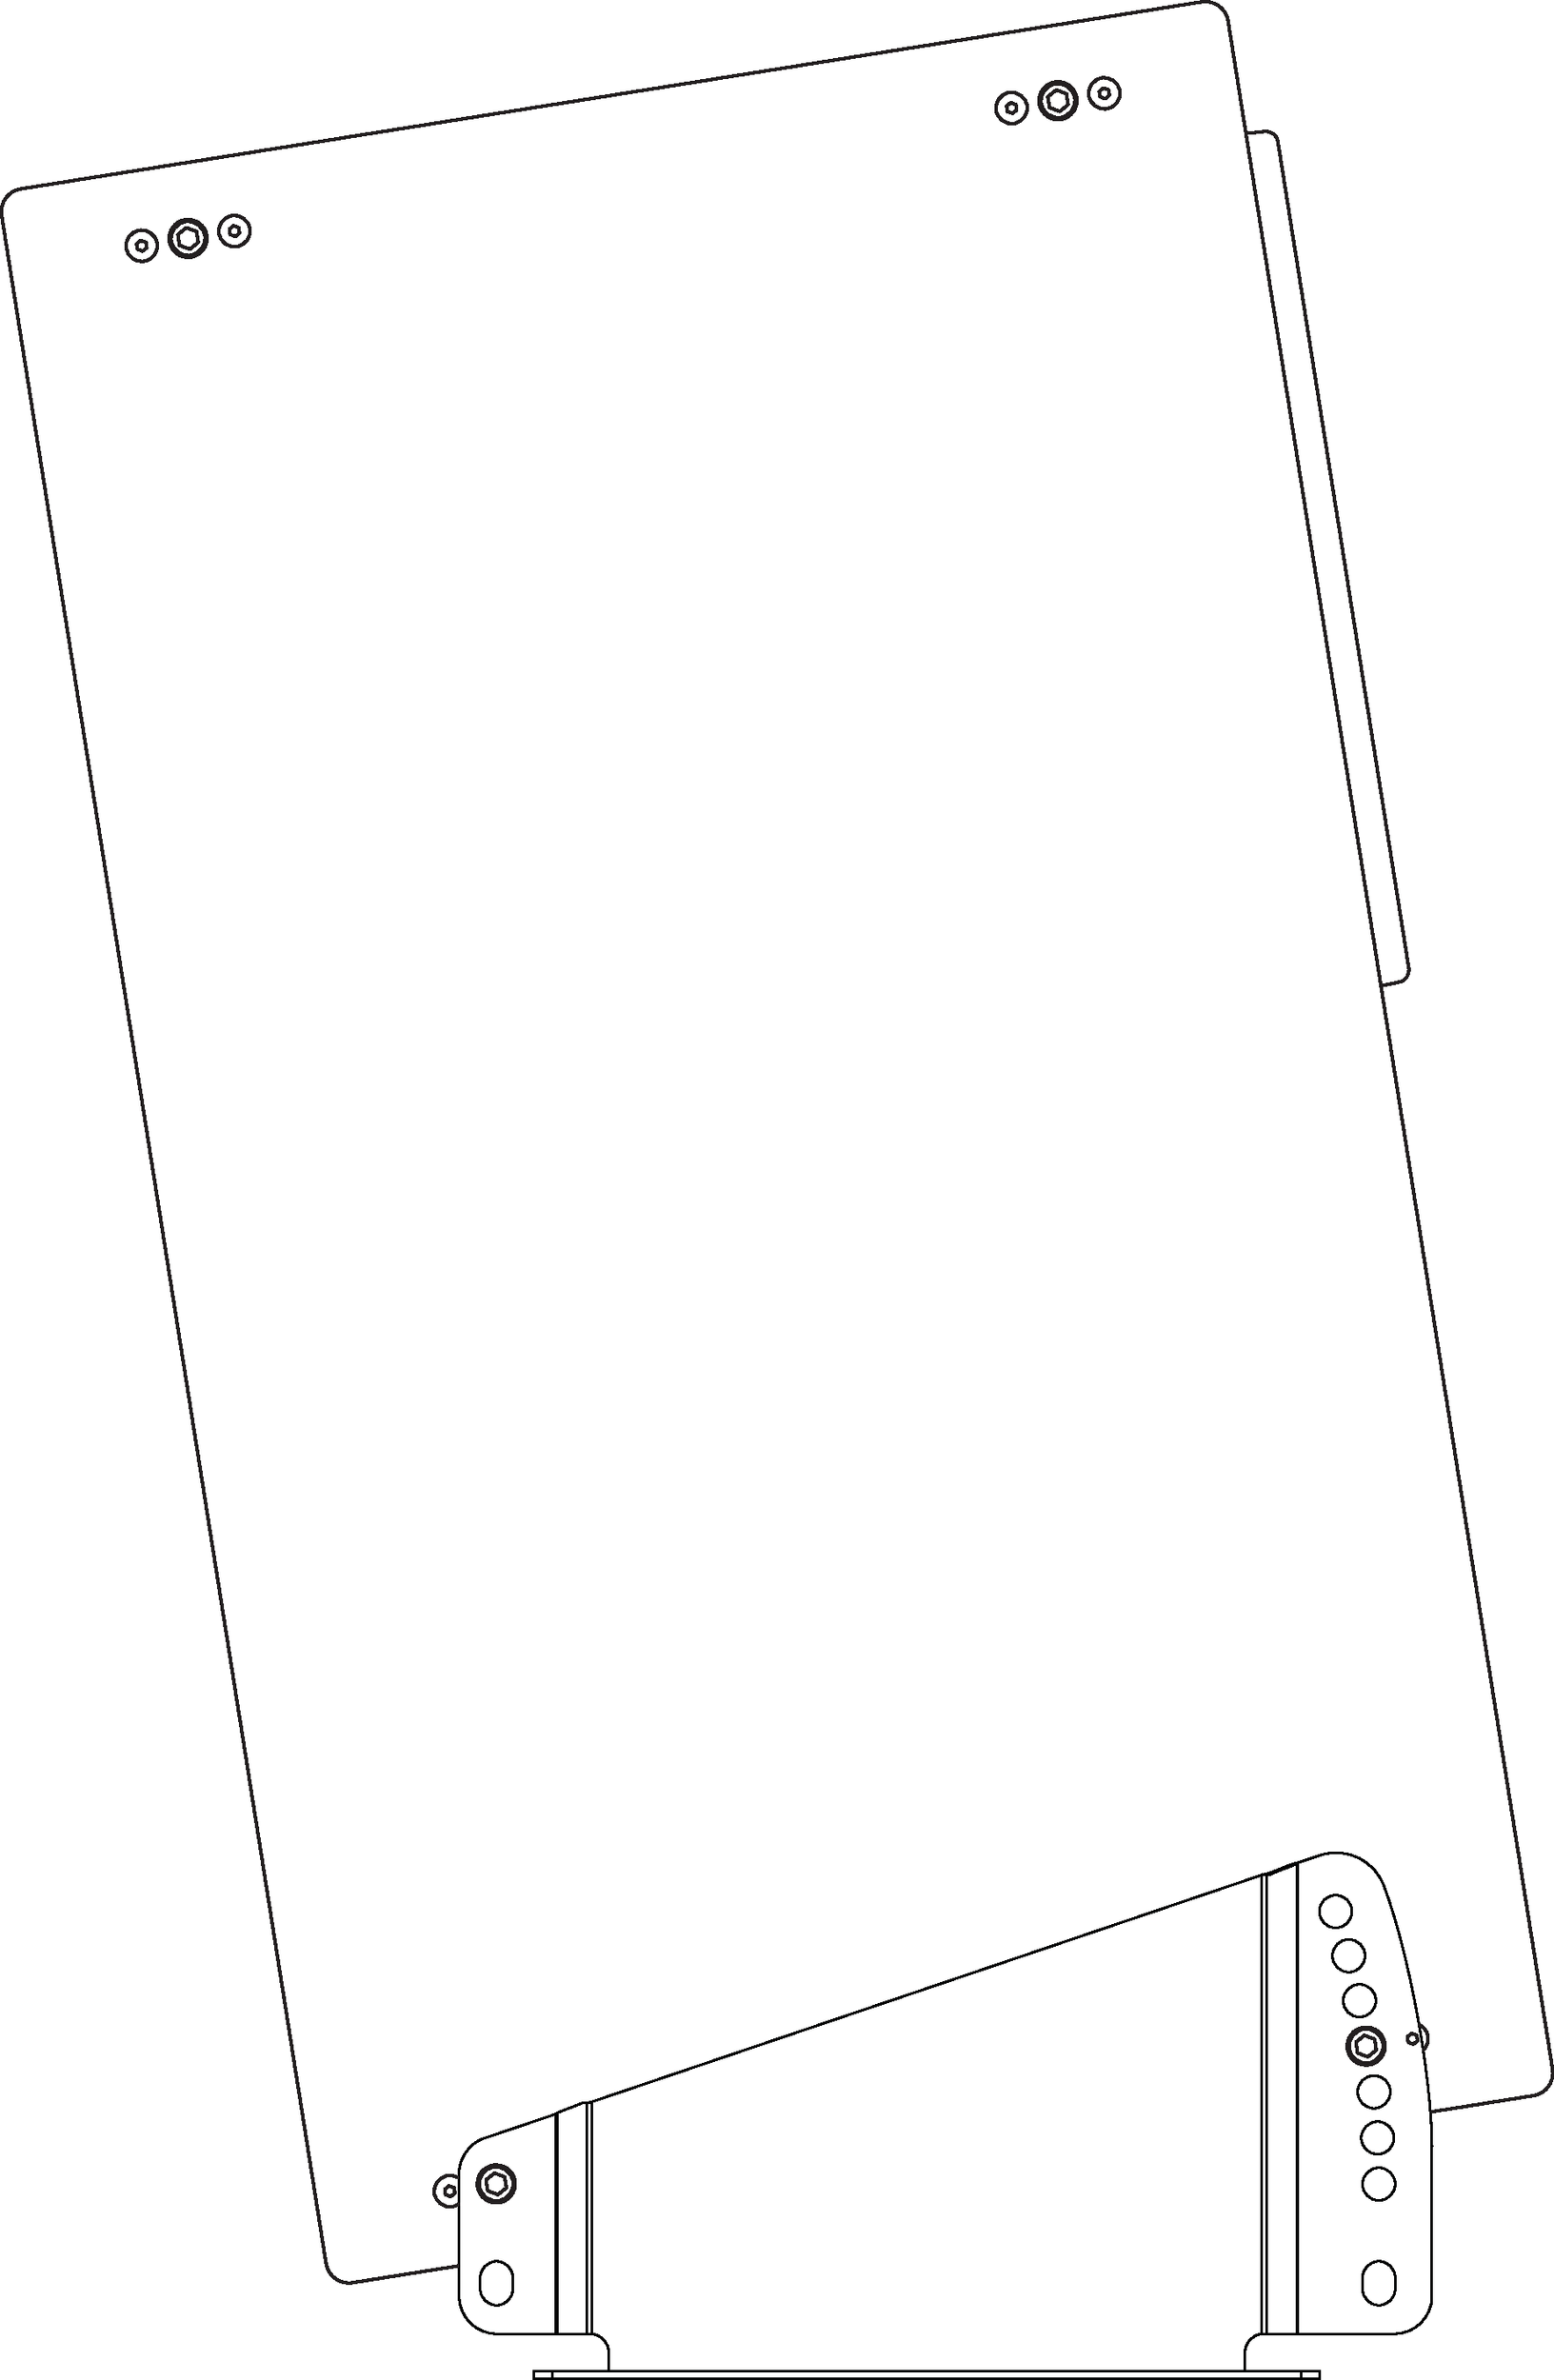
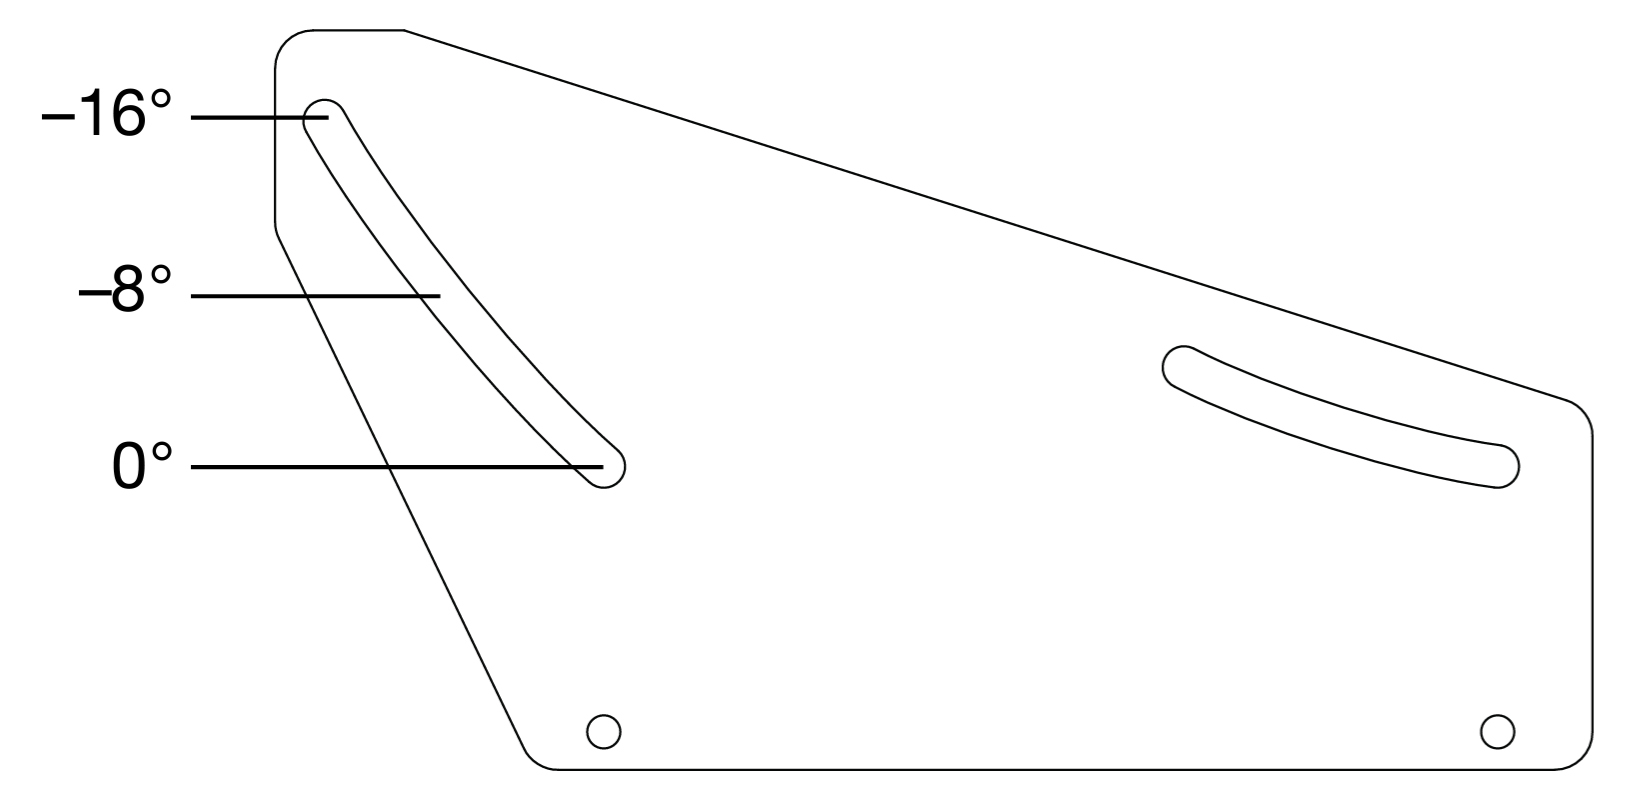
Stack Mount Downtilt Angles
When the stacking brackets are oriented with the bracket’s large end toward the rear of the loudspeakers, the Acheron can be mounted with downtilt angles of up to 16 degrees.
Make sure to install the brackets so the rubber gasket faces the loudspeaker. This ensures that the loudspeaker will not get scratched when adjusting the downtilt angle.
 |
Acheron Floor Mount Bracket Oriented for Downtilt
Make sure to install the brackets so the rubber gasket faces the loudspeaker. This ensures that the loudspeaker will not get scratched when adjusting the downtilt angle.
Figure 9. +8°
| Figure 10. +16°
|
Acheron Floor Mount Downtilt Angles
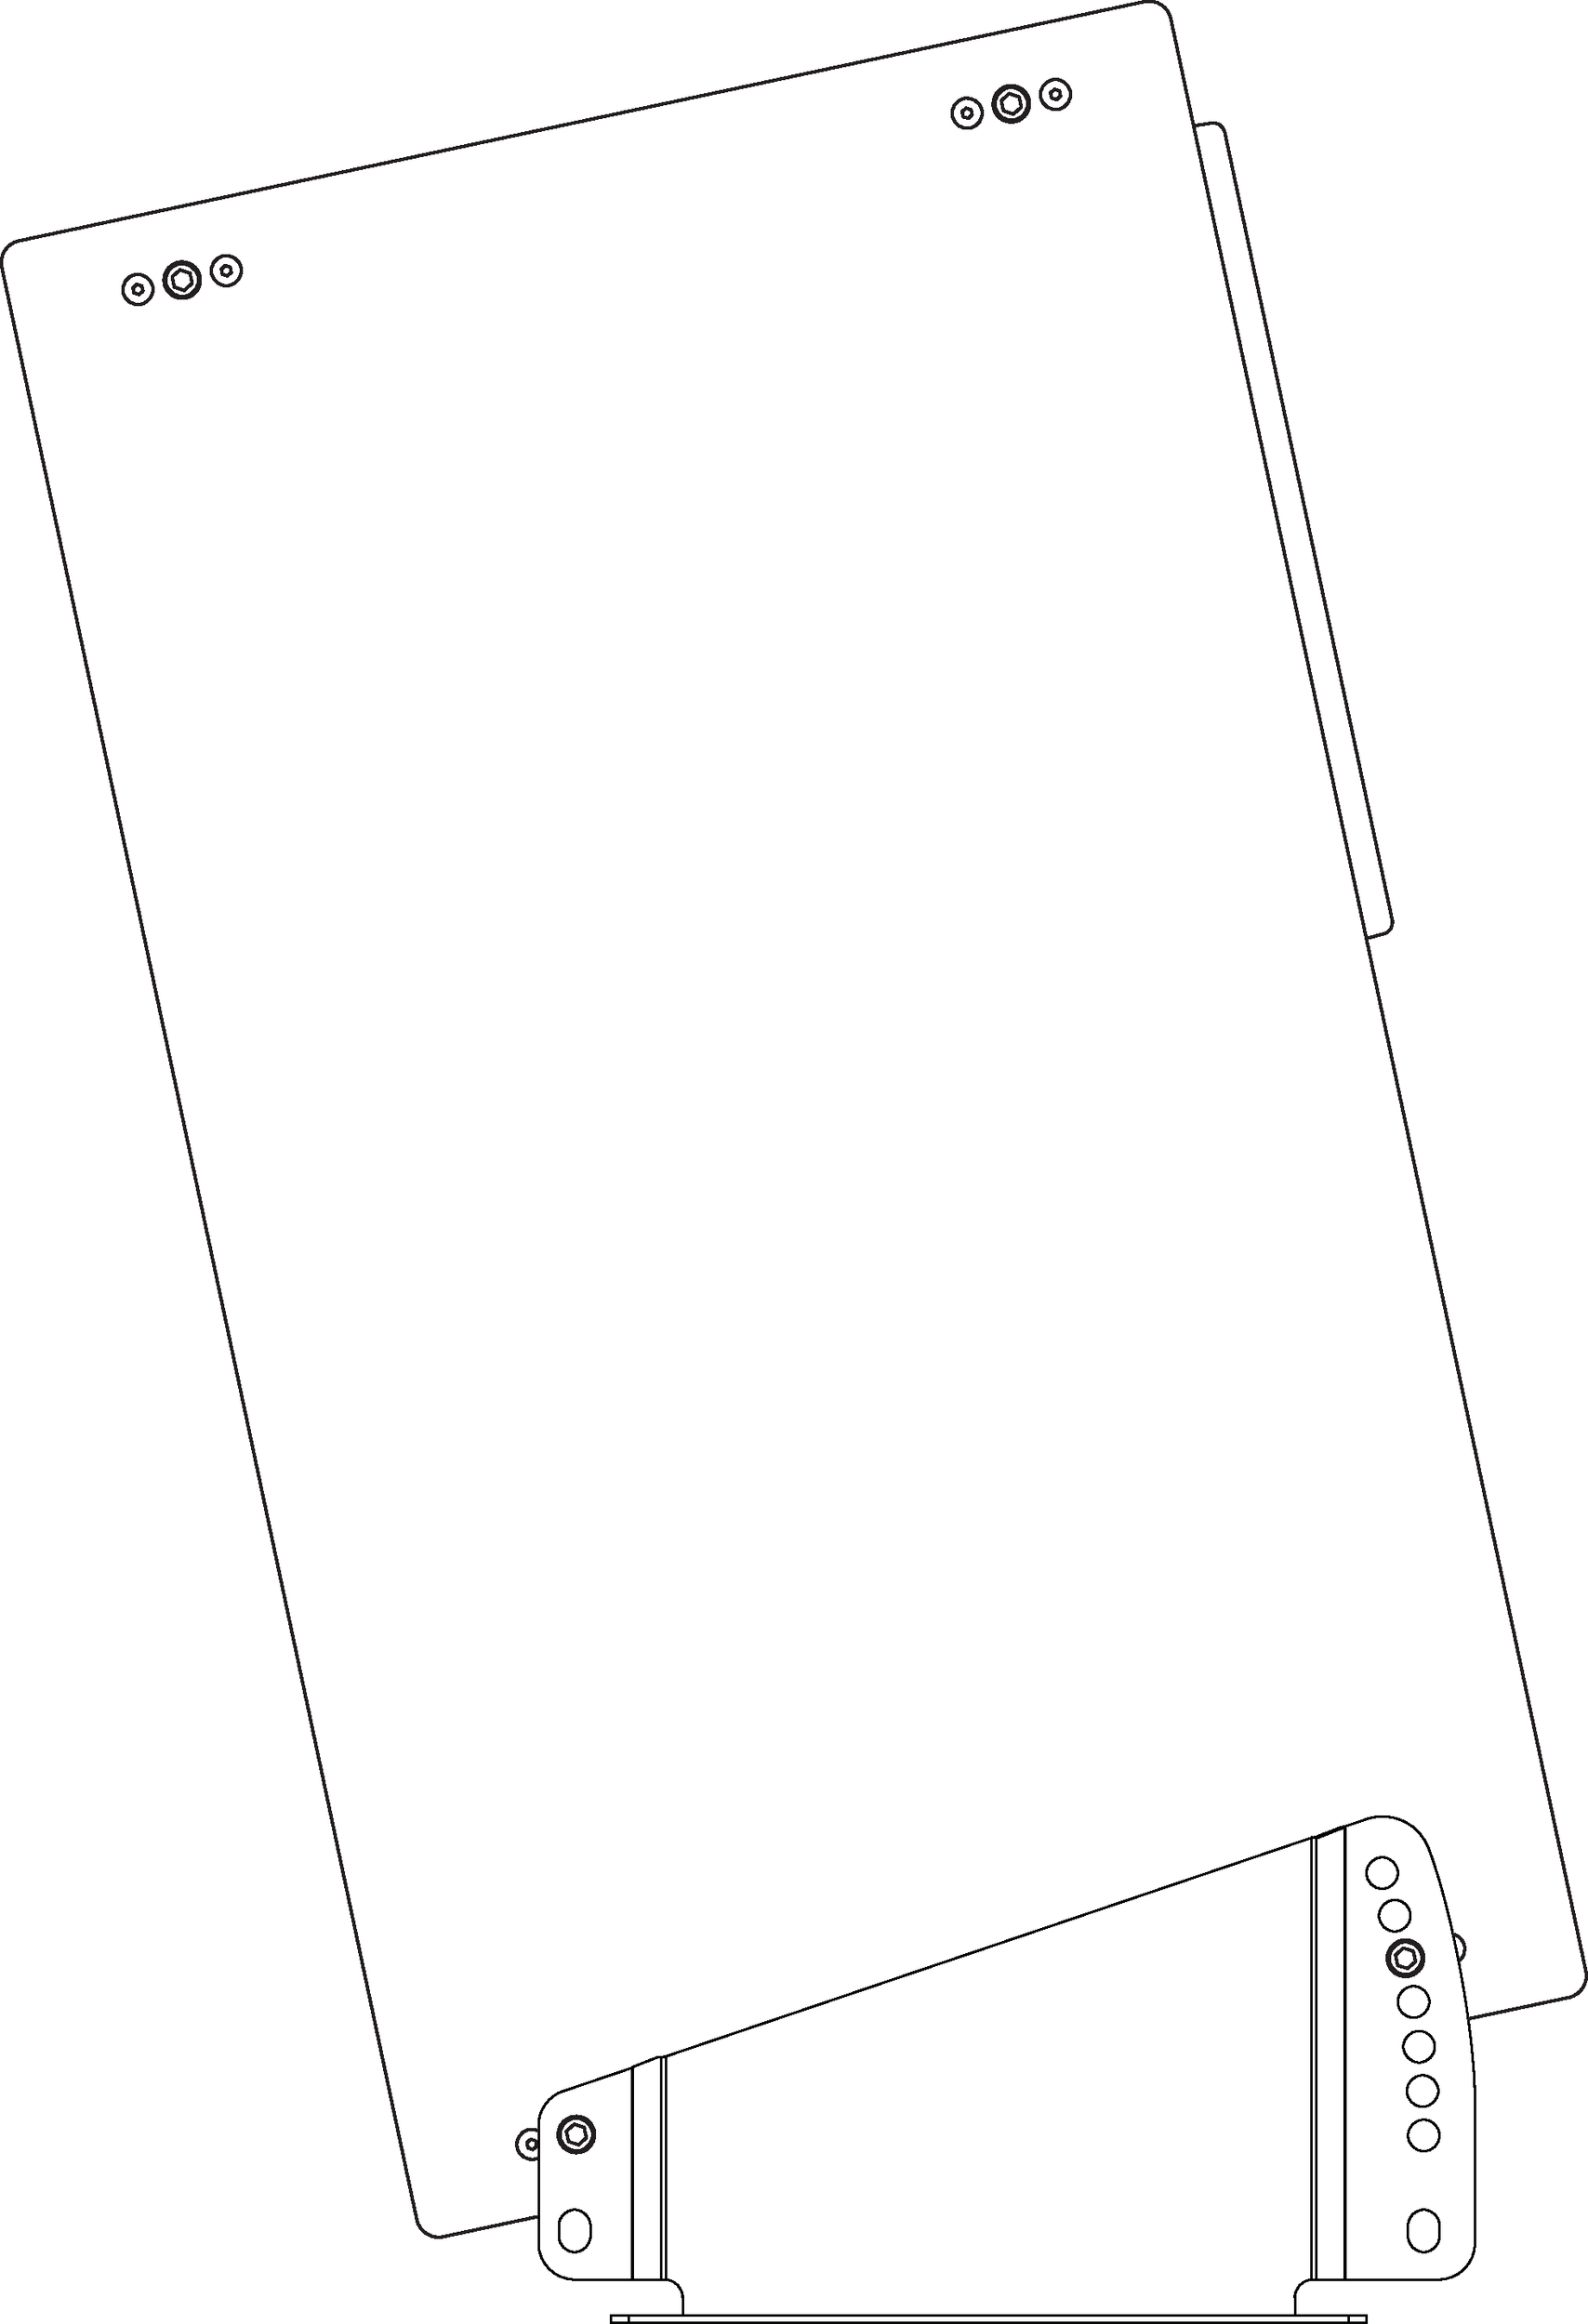
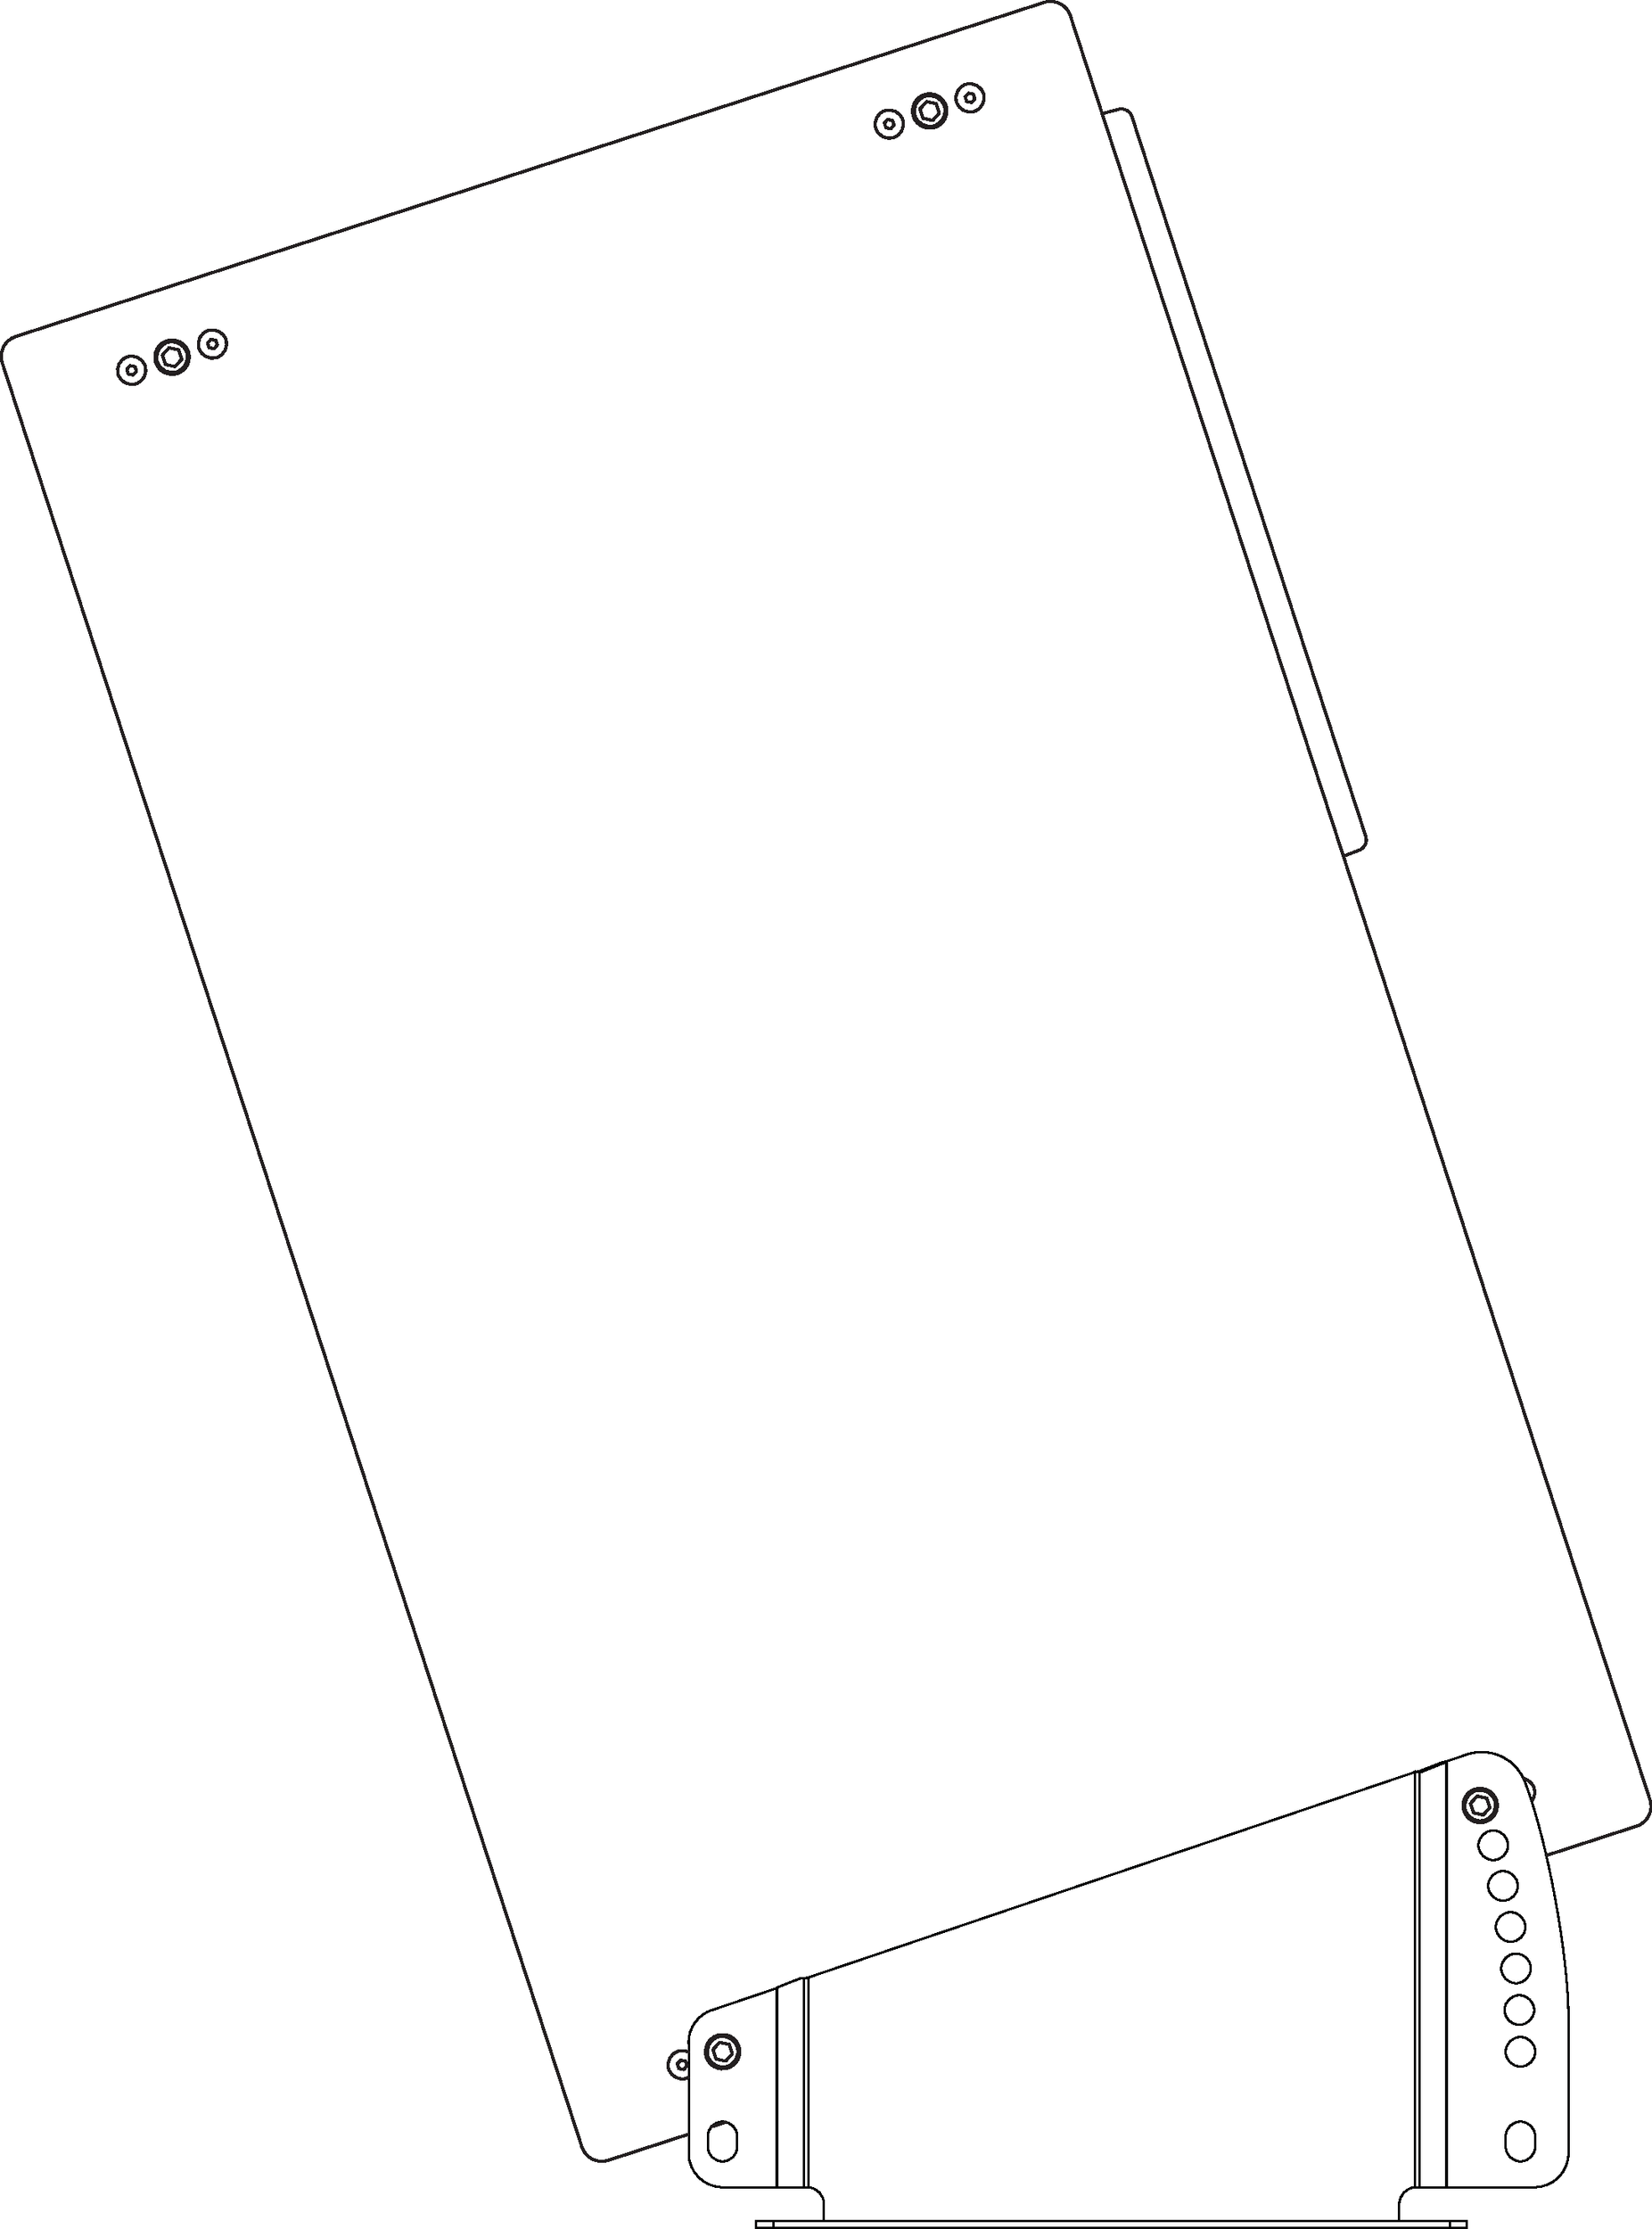
Stack Mount Uptilt Angles
When the stacking brackets are oriented with the bracket’s large end toward the front of the loudspeakers, the Acheron can be mounted with uptilt angles of up to 16 degrees.
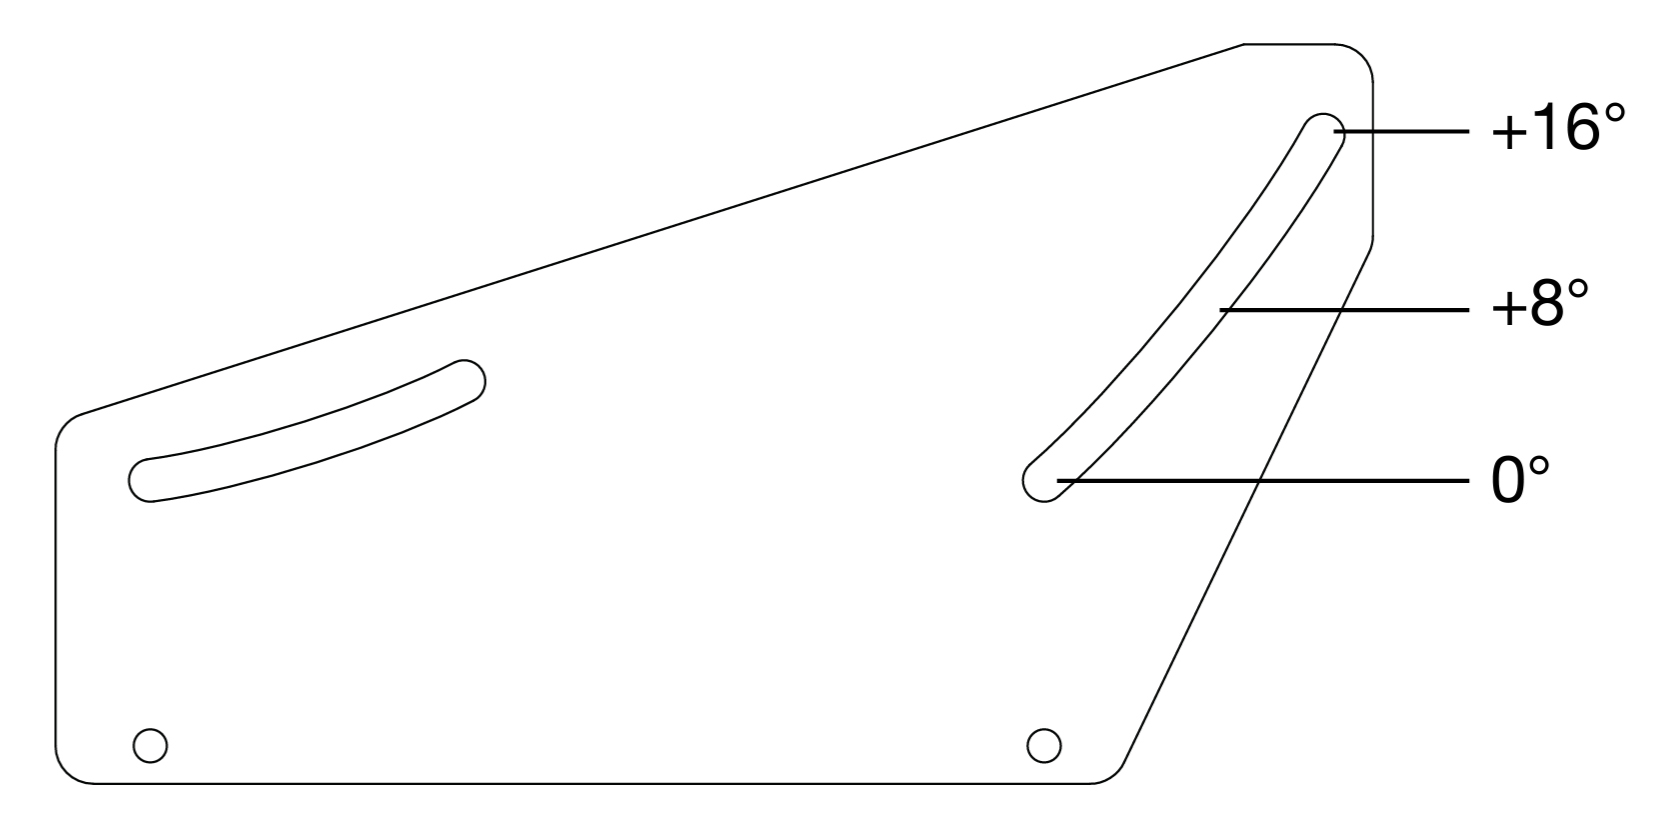 |
Acheron Floor Mount Bracket Oriented for Uptilt
Make sure to install the brackets so the rubber gasket faces the loudspeaker. This ensures that the loudspeaker will not get scratched when adjusting the uptilt angle.
Figure 11. +8°
| Figure 12. +16°
|