Optional Rain Hoods
A weather-protected version of the MM-10 subwoofer is available with rain hood kits that safeguard the subwoofer’s electronics from the elements in fixed, outdoor installations. The rain hood is available in both horizontal (PN 40.174.015.01) and vertical (PN 40.174.015.02) versions. The rain hood is made of a durable, high-impact polycarbonate that is also transparent, allowing the subwoofer's connections and LEDs to be visible.
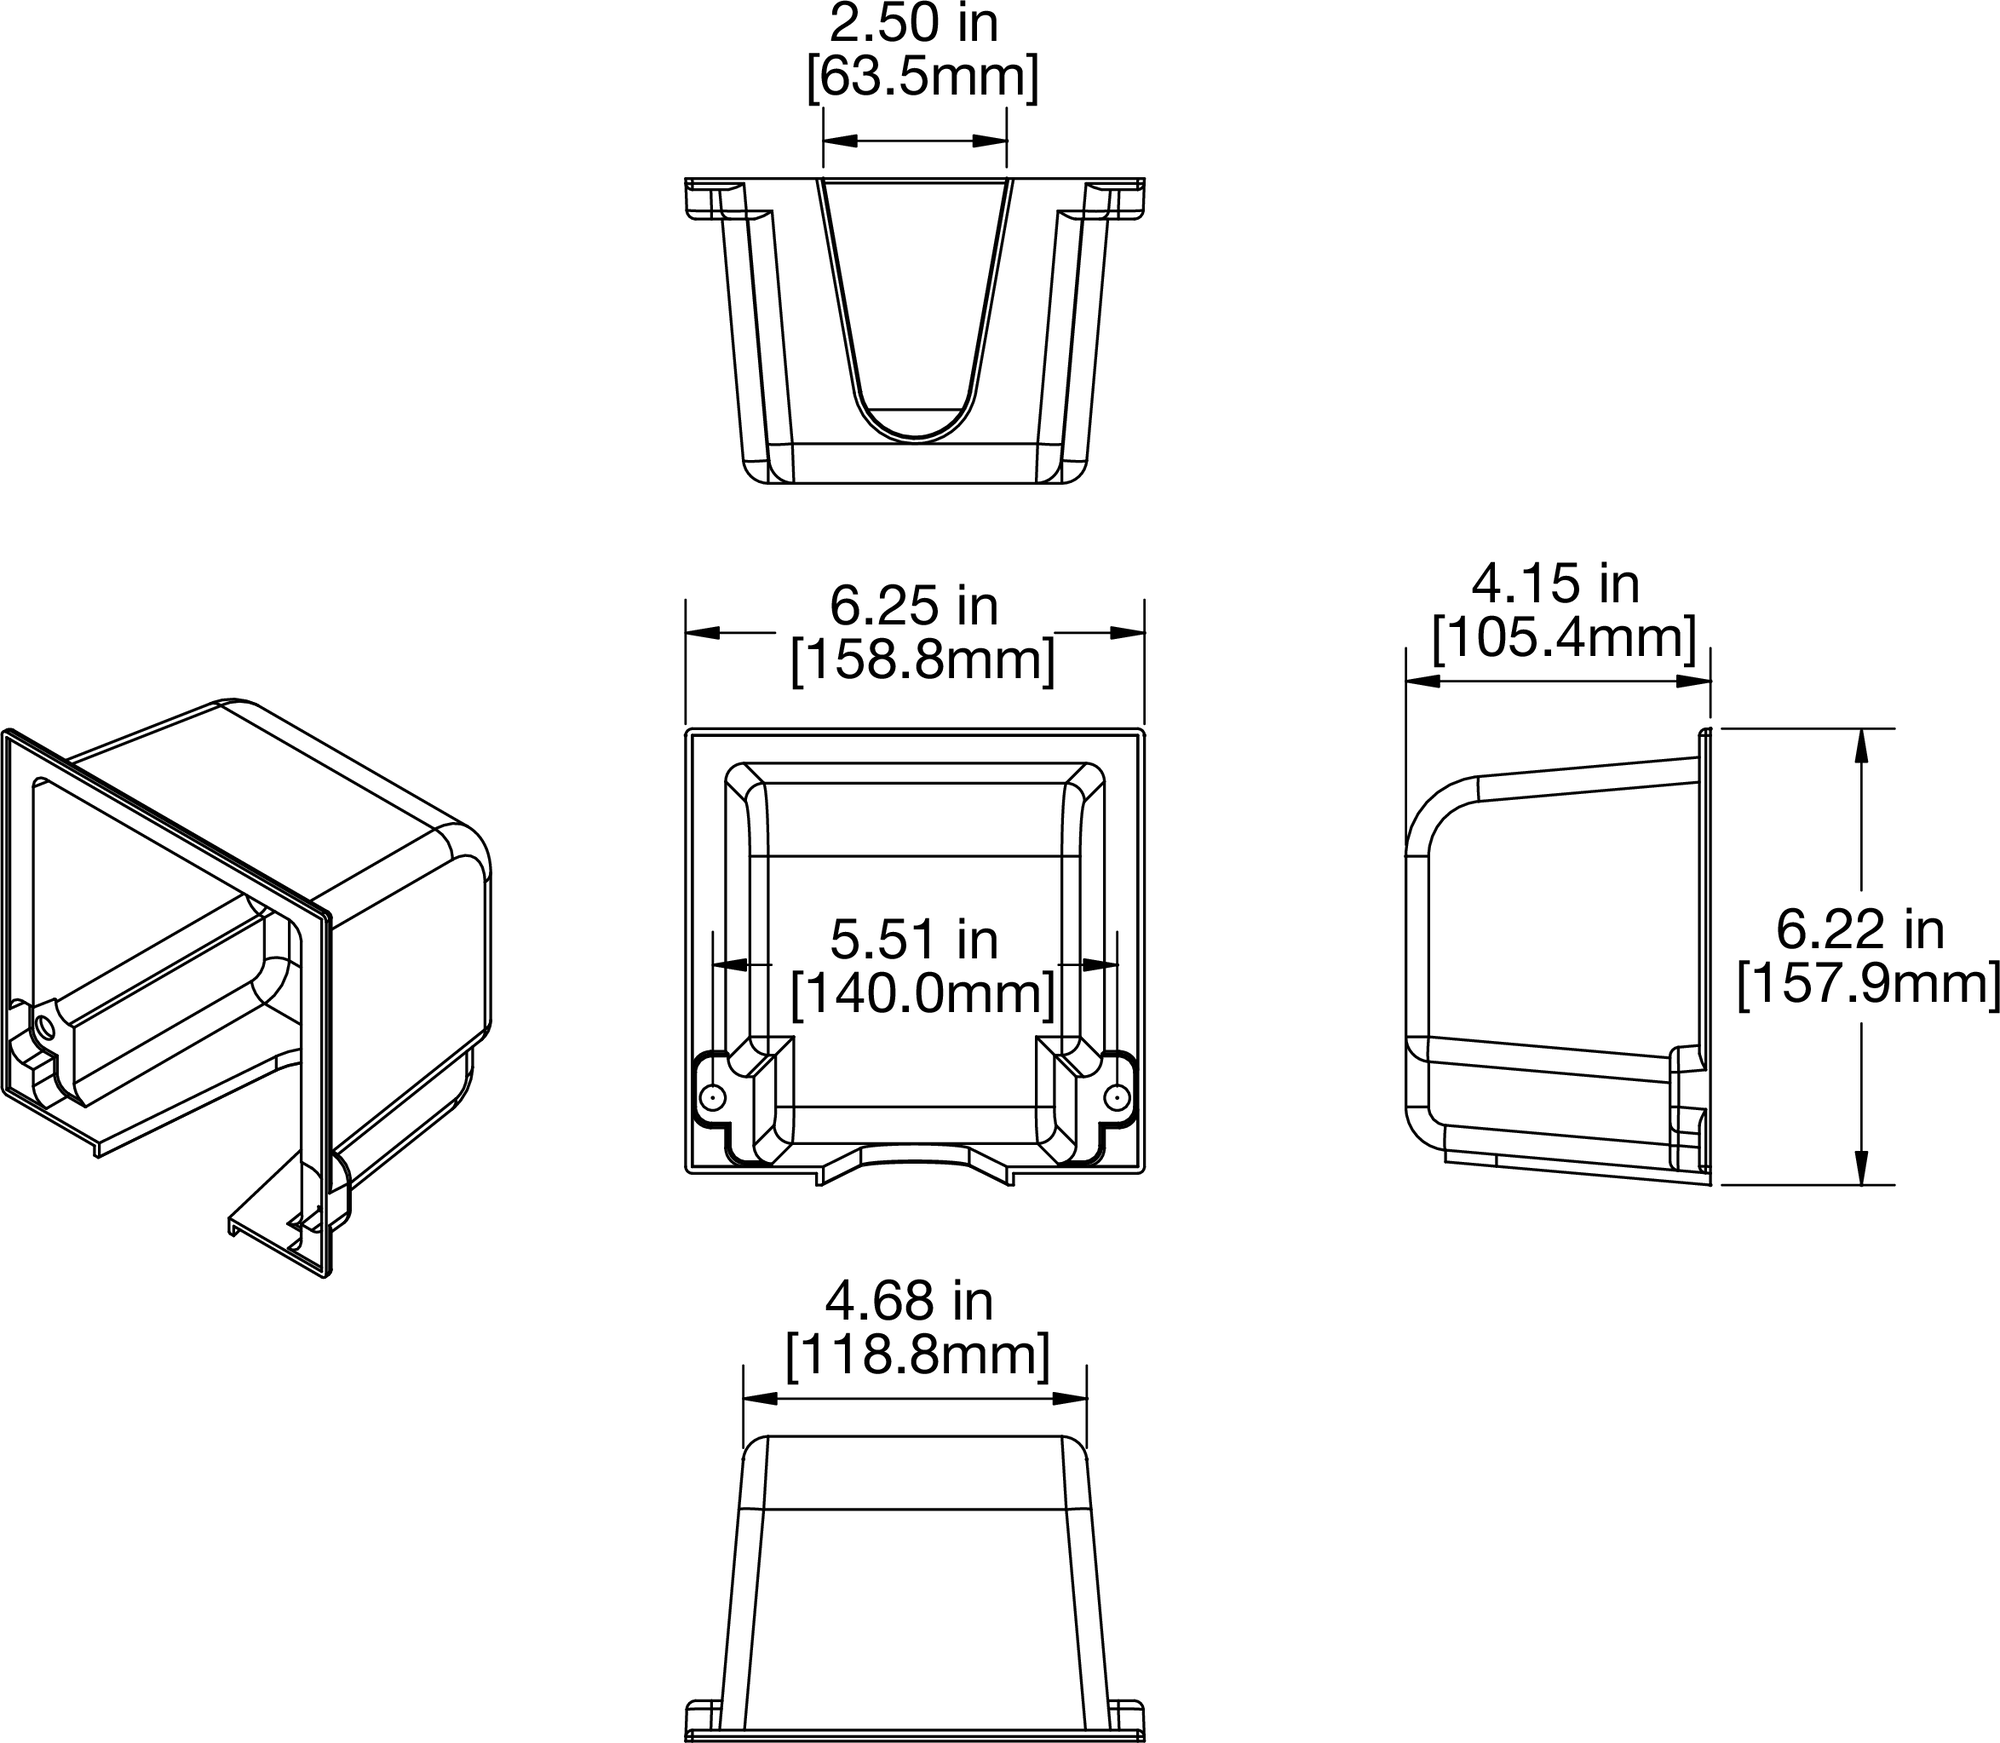 |
MM-10 Horizontal Rain Hood Dimensions
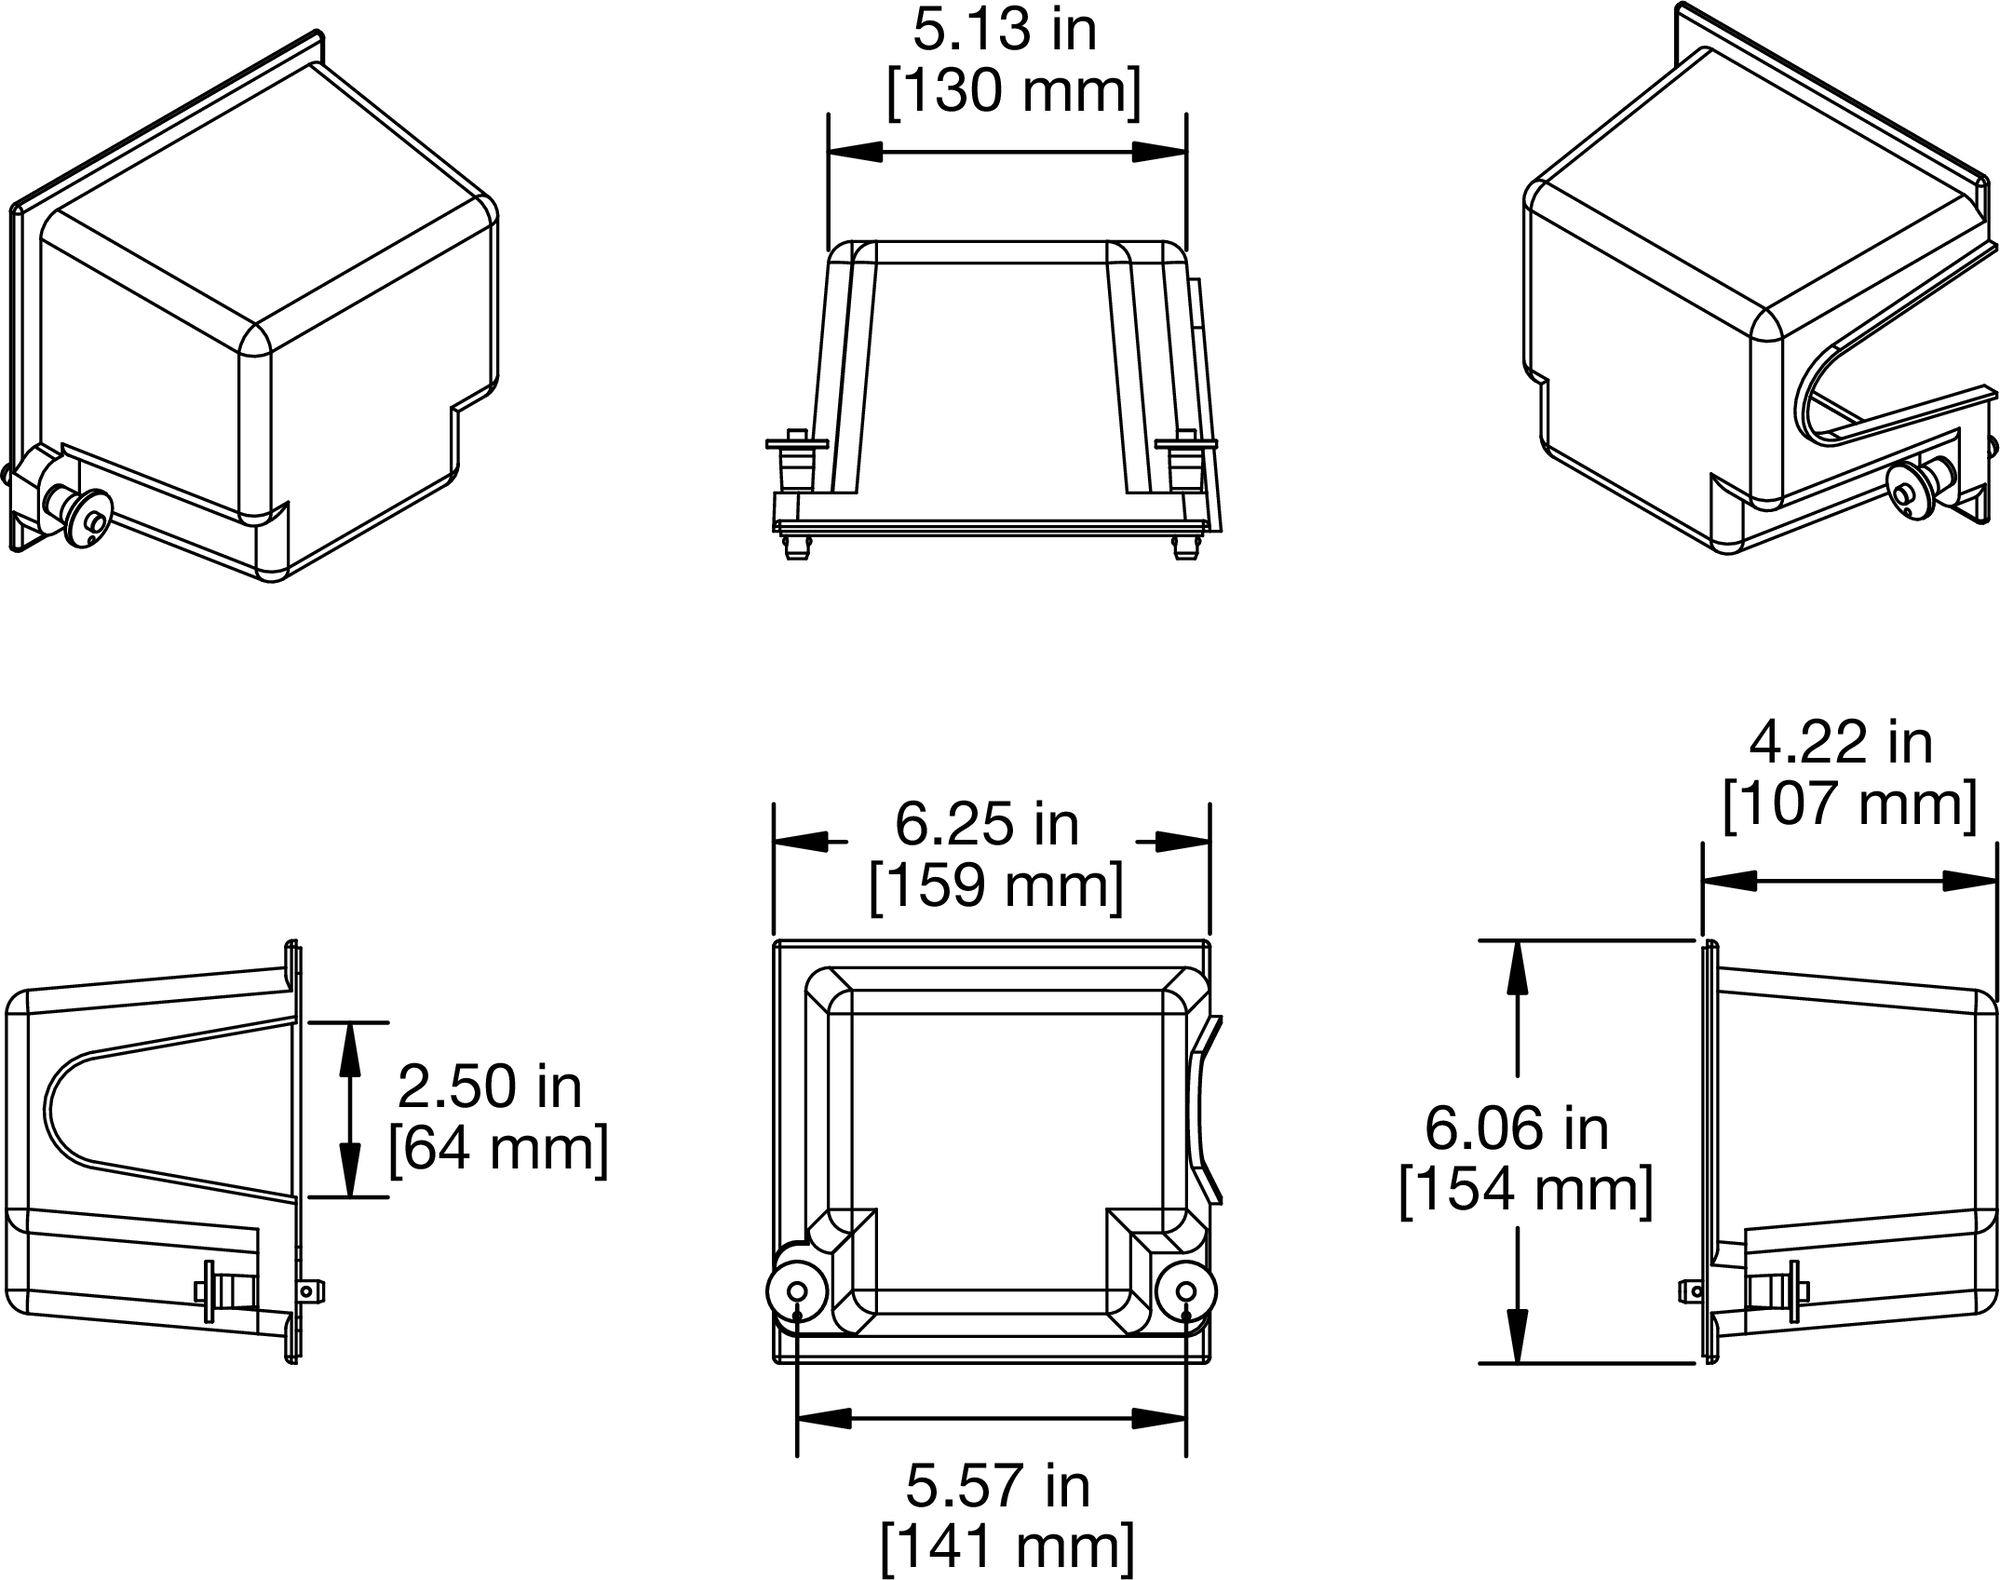 |
MM-10 Vertical Rain Hood Dimensions
Installing the Horizontal Rain Hood
Orient the MM-10 horizontally with its user panel to the left.
Attach any required cables to the subwoofer.
If the rain hood’s gasket material is not attached, firmly attach it to the rain hood’s inner edges. Do not attach the gasket directly to the user panel.
Attach the rain hood by slipping it under the flange at the top of the loudspeaker, placing it flush against the user panel. Align the rain hood’s holes with those in the panel.
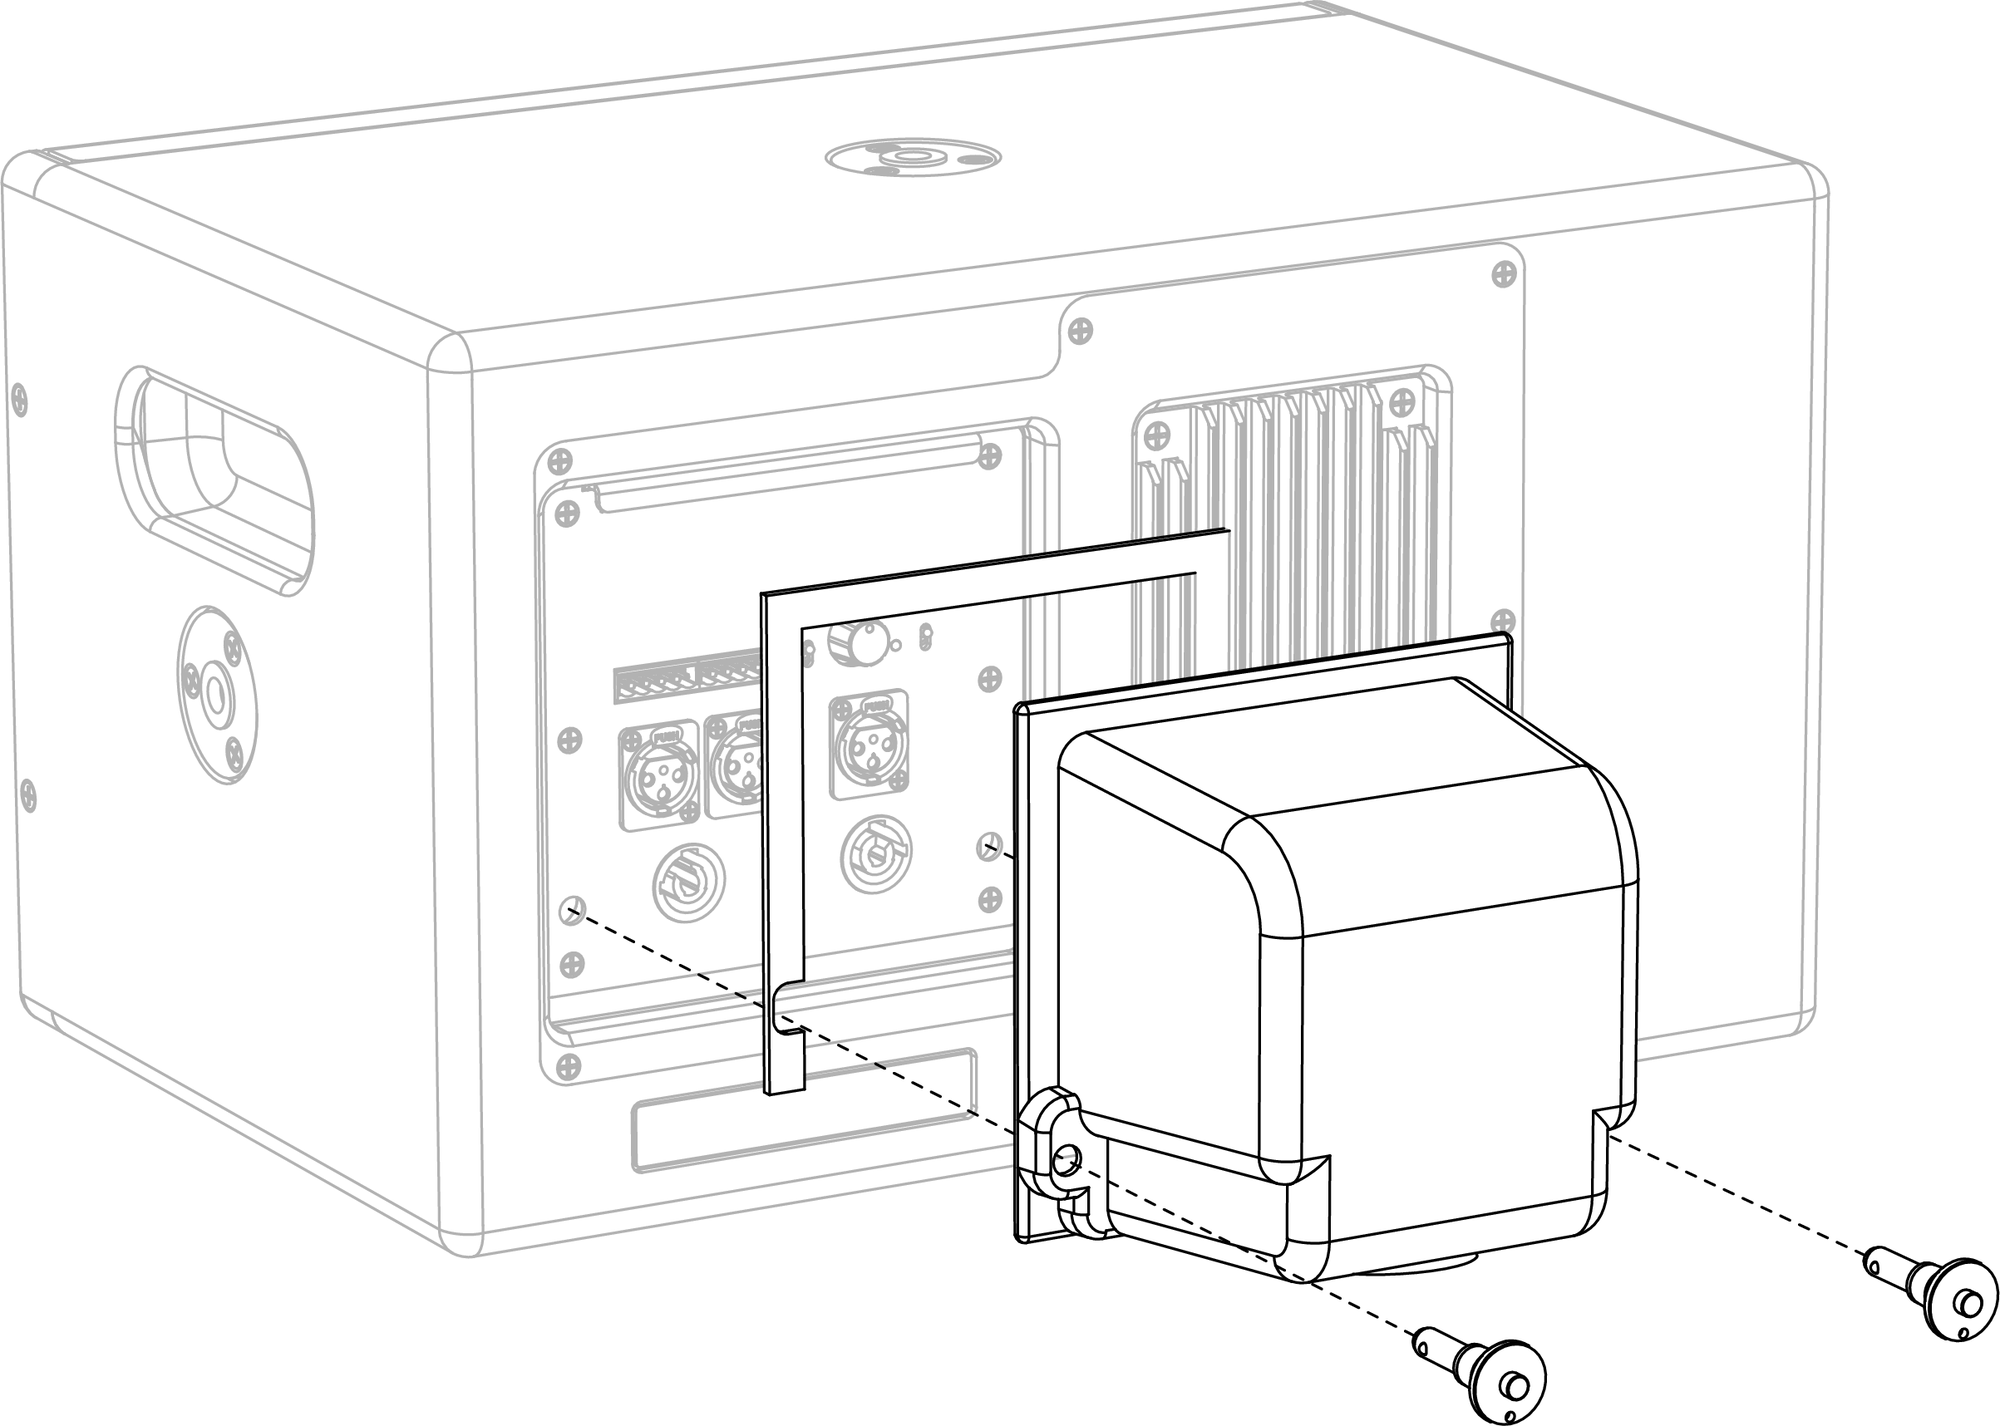
Secure the rain hood to the user panel by inserting the lock pins in the two bottom holes. Insert the pins all the way so they lock.
Installing the Vertical Rain Hood
Orient the MM-10 vertically with its user panel at the top.
Attach any required cables to the subwoofer.
If the rain hood’s gasket material is not attached, firmly attach it to the rain hood’s inner edges. Do not attach the gasket directly to the user panel.
Attach the rain hood by slipping it under the flange on the right side of the subwoofer, placing it flush against the user panel. Align the rain hood’s holes with those in the panel.
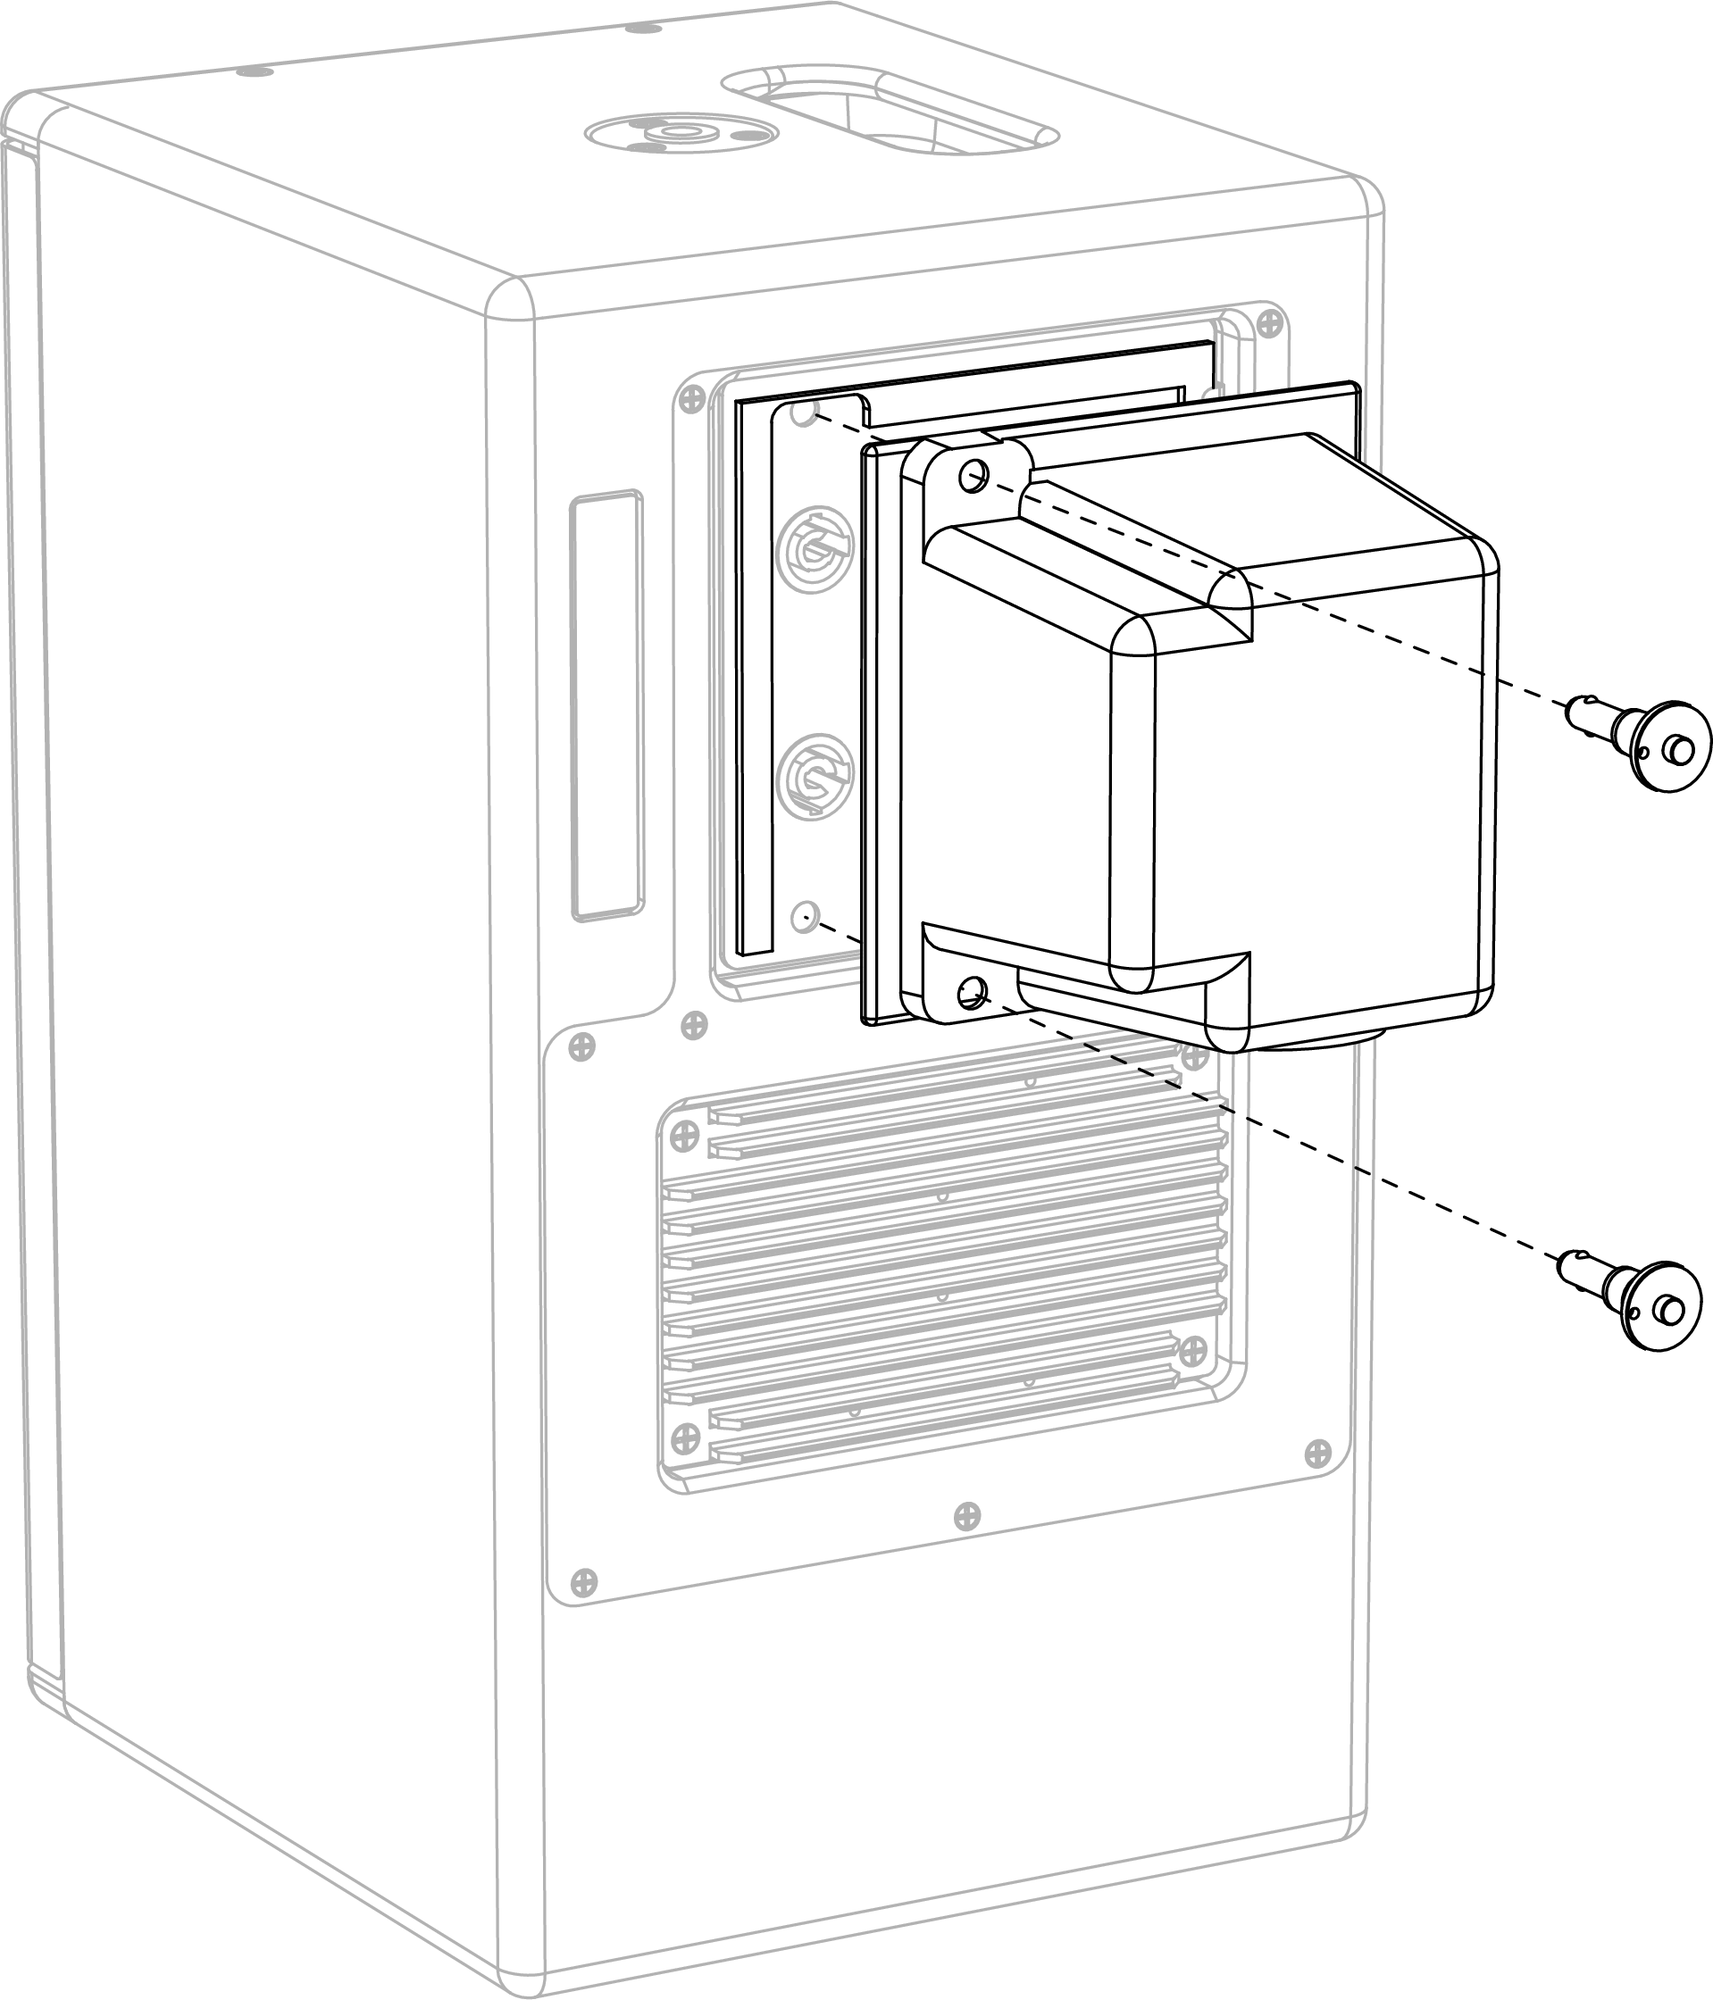
Secure the rain hood to the user panel by inserting the lock pins in the two left holes. Insert the pins all the way so they lock.
Tilt for Vertically-oriented, Weather-protected MM-10s
When installing vertically-oriented, weather-protected MM-10s, the units must be mounted at a 0-degree, or downward, tilt. This ensures that water will not accumulate in the front of loudspeaker.
Caution
When wiring loudspeaker cables, it is extremely important that each pin be wired correctly. Make sure that the 48 V DC from the external power supply is wired directly (and only) to the 48 V DC pins on the loudspeaker connector, and that the polarity is observed (negative to negative, positive to positive) to avoid damage to the loudspeaker. In addition, make sure that audio pins are wired correctly; polarity reversals for audio signals affect system performance.