Rain Hoods
Weather-protected ULTRA-X40/42 loudspeakers include a rain hood for indoor/outdoor touring and sheltered outdoor installations. Meyer Sound offers two rain hood models: A fixed rigid rain hood for permanent installations and a collapsible hood for portable applications. Please specify your rain hood when placing the order.
Rigid Rain Hood
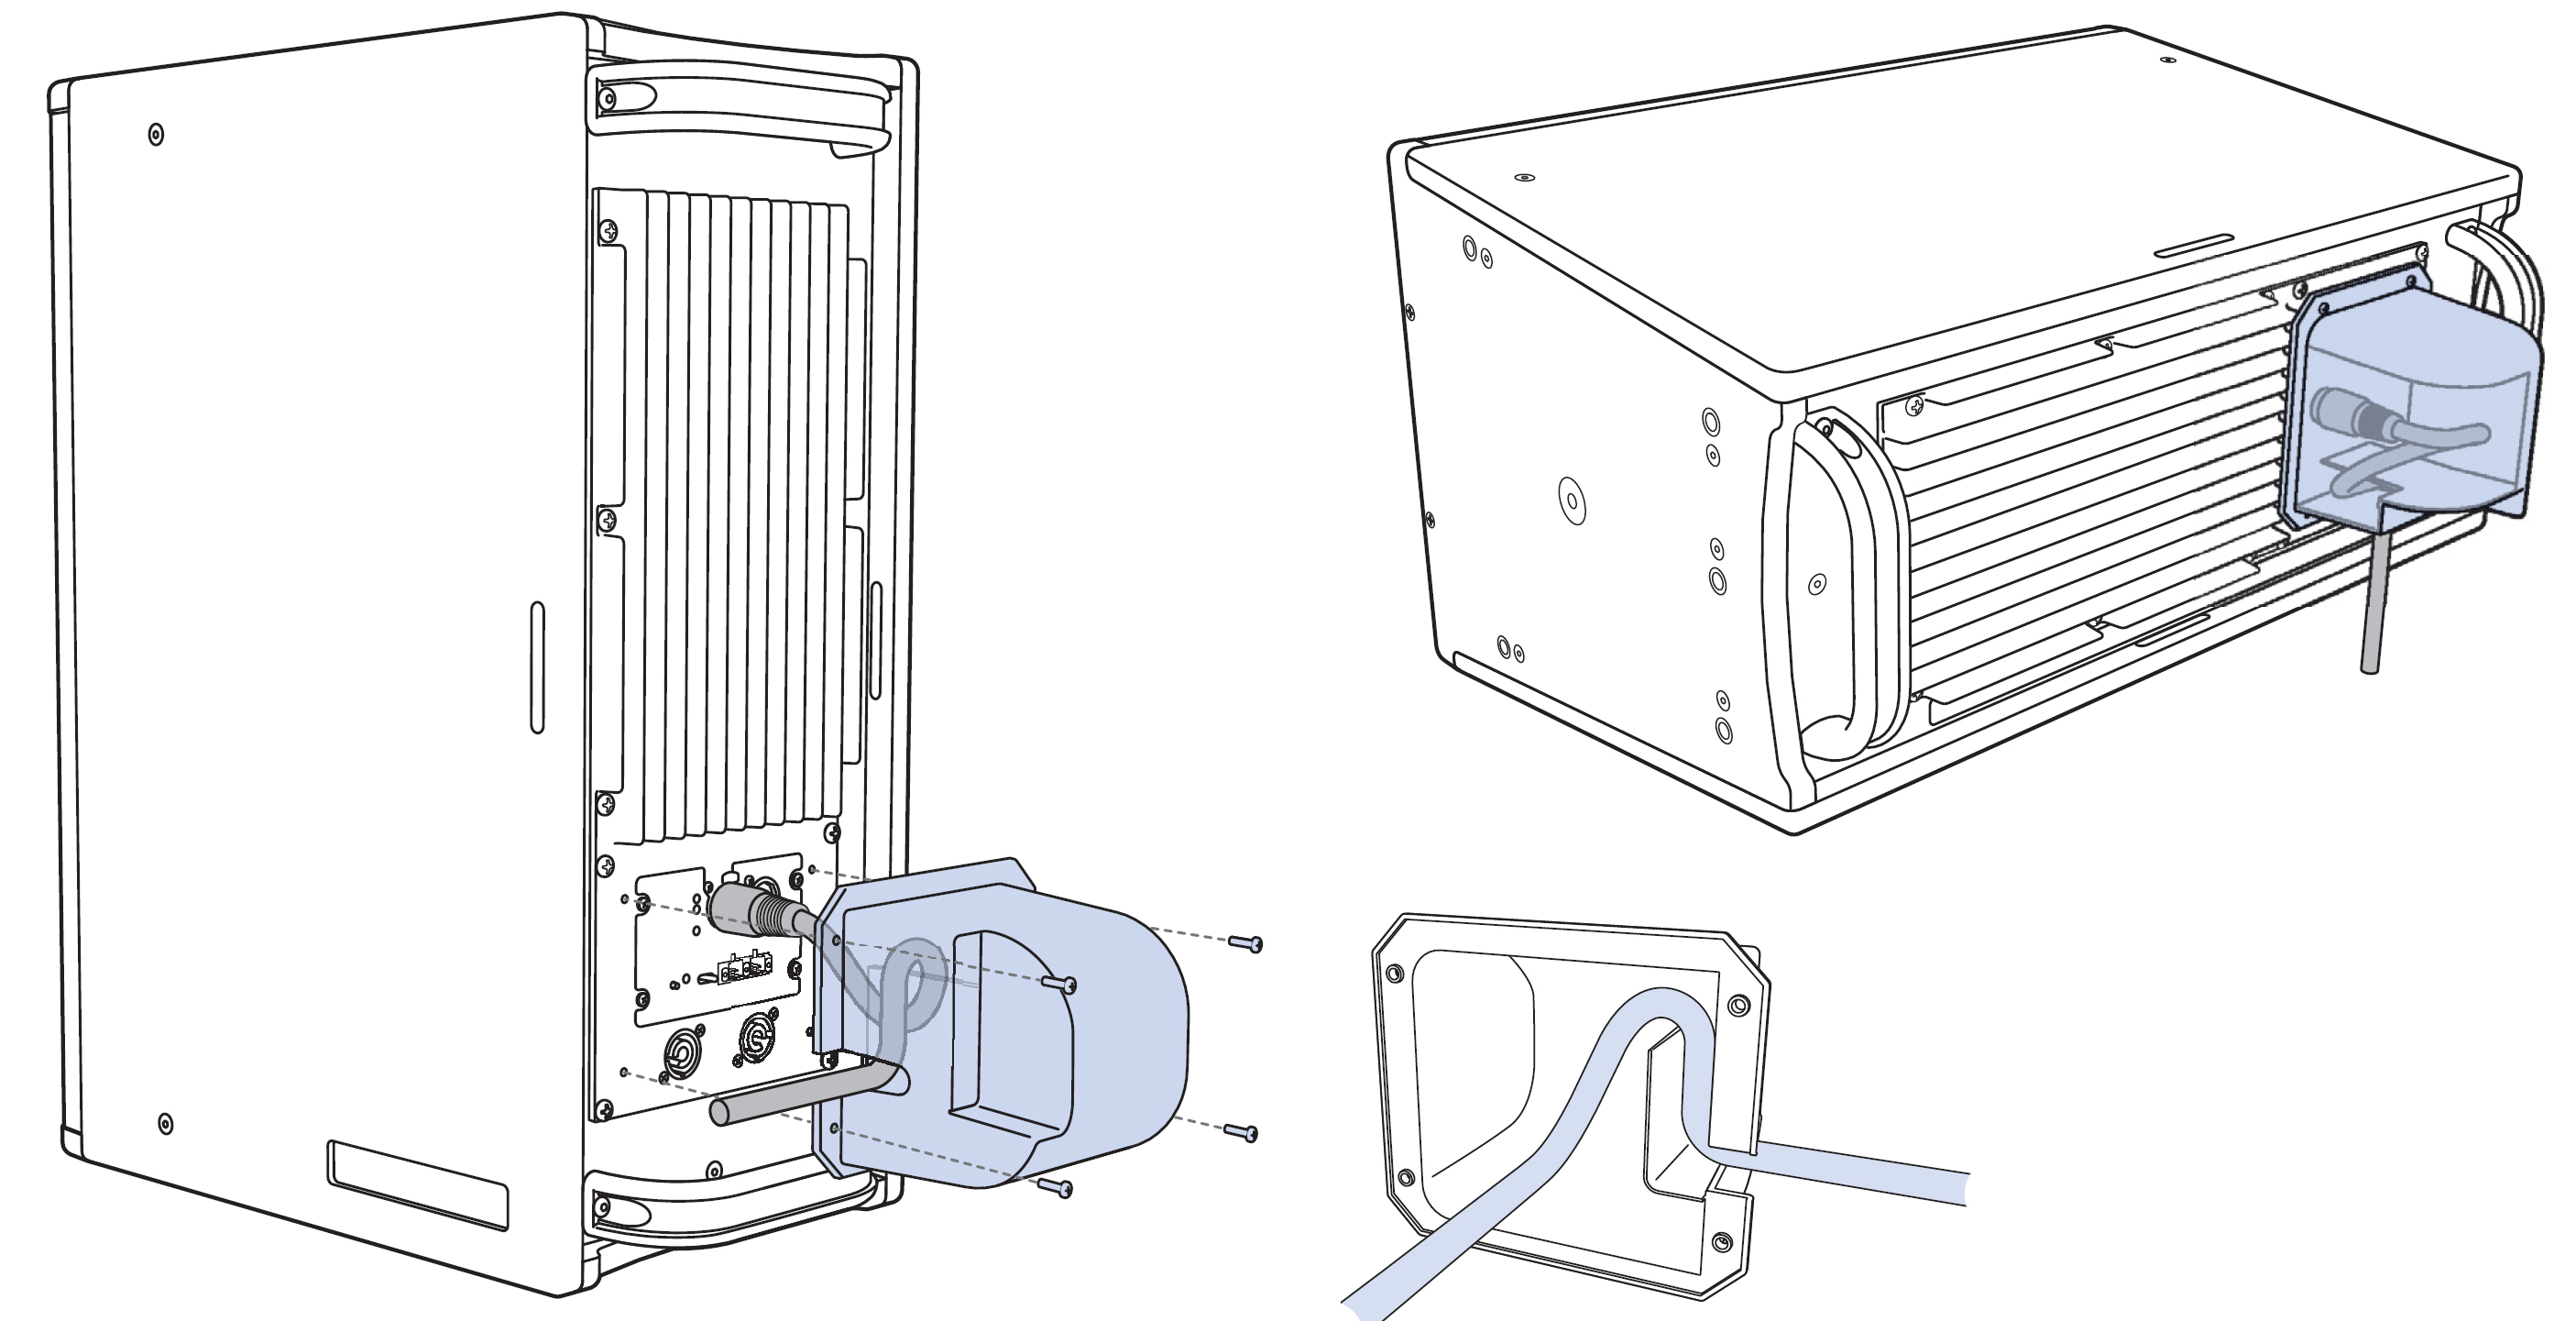
The ULTRA-X40/42 rigid removable rain hood is easily attached and removed with the included four screws, as shown in the figure below.
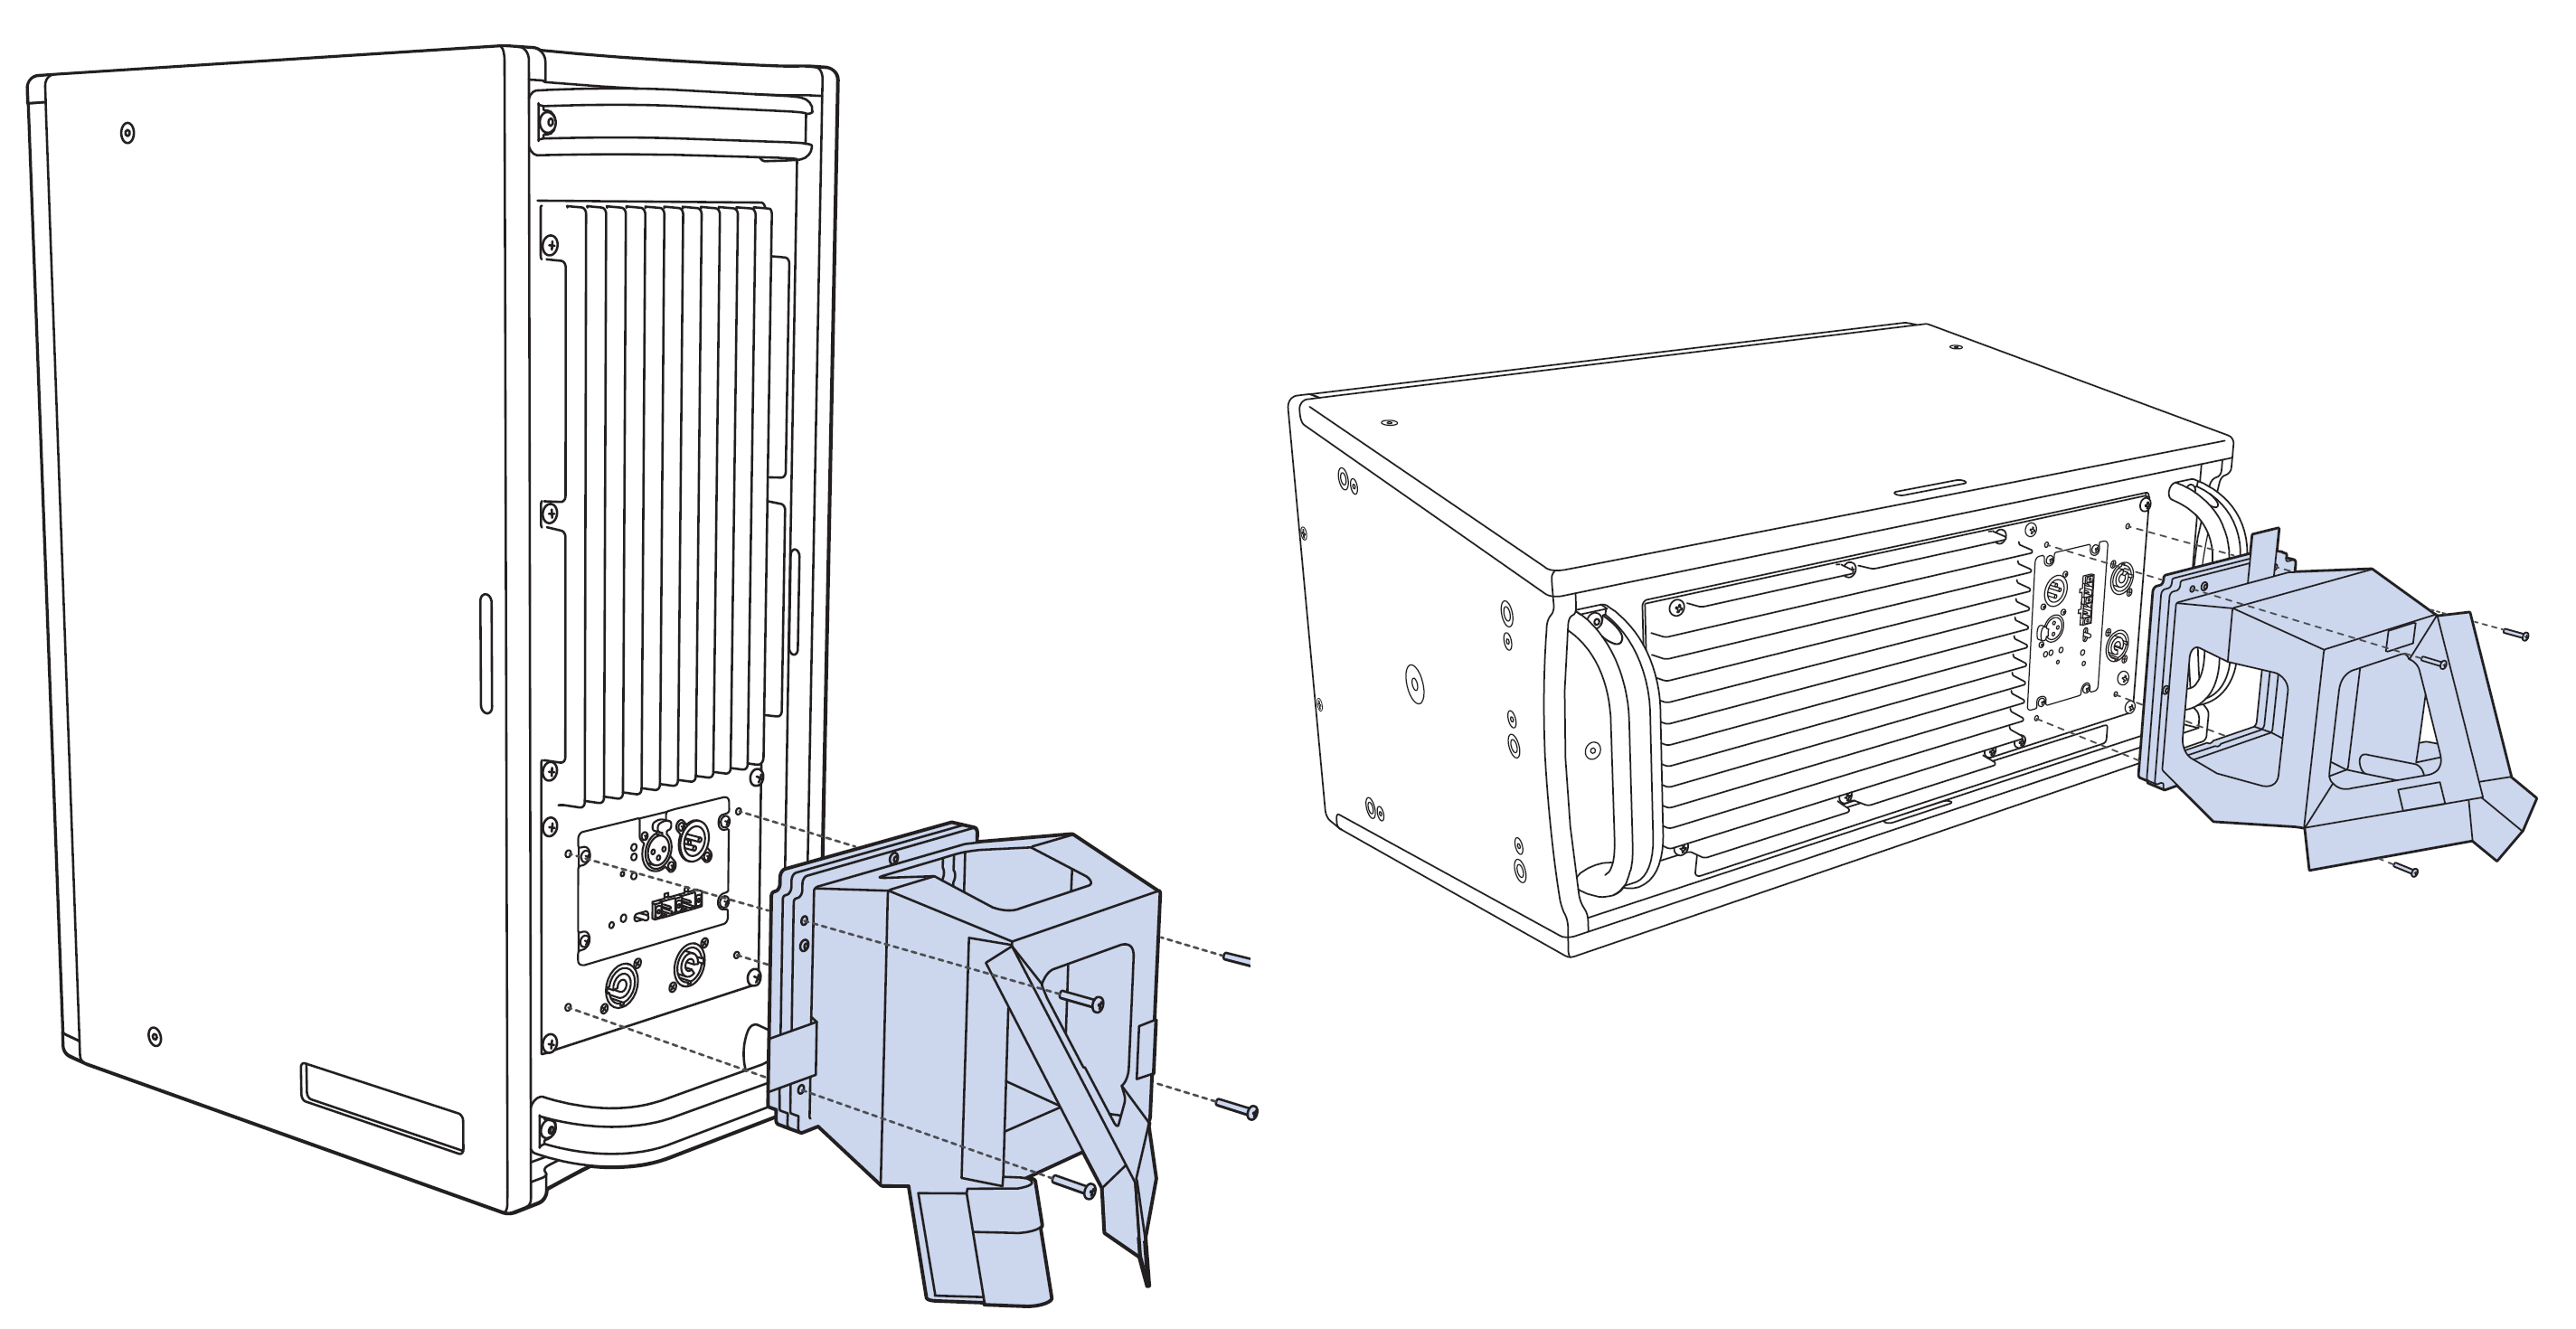
ULTRA-X40/42 with Rigid Rain Hood in Proper Vertical Orientation (left), Proper Horizontal Orientation (top right) and Correct Interior Cable Routing Illustration (bottom right)
Attach any required cables to the ULTRA-X40/42 loudspeaker.
Carefully route the cables, so that they wrap over and down the inner rain hood wall.
Attach the rain hood to the user panel, and secure it to the center of the panel with its four 6-32 screws.
Make sure to tighten the screws to create a good seal against the user panel. The recommended torque value for the screws is 10–12 in-lb (1.1–1.4 N-m).
Caution
There is only one proper vertical loudspeaker orientation and one proper horizontal loudspeaker orientation when the rain hood is installed.
The weather-protected ULTRA-X40/42 must be mounted with a 0° tilt, or preferably with a slight down-tilt. This angle shields the driver from the elements and does not allow water to accumulate. Do not tilt the cabinet up, as the drivers and cabinet will accumulate water.
Note
Weather-protected units using the rigid rain hood are rated IPX4 for water intrusion.
Collapsible Rain Hood
The ULTRA-X40/42 collapsible rain hood is installed on the unit when shipped. Four screws secure its frame permanently into place, as shown in the figure below. When using the rain hood, the loudspeaker has only one possible vertical and one possible horizontal position, as all cables must exit from the lower end of the loudspeaker.
ULTRA-X40/42 with collapsible rain hood in vertical (left) and horizontal (right) orientations
Detach the Velcro straps and extend the rain hood.
Lift the front flap.
Attach any required cables to the ULTRA-X40/42. (The clear windows let you easily locate the connectors on the user panel.)
Secure the cable protector with the Velcro attachments.
Secure the front flap Velcro edges.
To stow the rain hood, reverse the steps.
Although not recommended, if for any reason the rain hood is removed, make sure to tighten the screws when reinstalling to create a good seal against the user panel. The recommended torque value for the screws is 10–12 in-lb (1.1–1.4 N-m).
Caution
The weather-protected ULTRA-X40/42 must be mounted with a 0° tilt, or preferably with a slight down-tilt. This angle shields the driver from the elements and does not allow water to accumulate. Do not tilt the cabinet up, as the drivers and cabinet will accumulate water.
The ULTRA-X40/42 must be oriented so that the cord exits at the bottom of the rain hood. Use care when installing the loudspeaker to ensure the rain hood is positioned to work properly when unfolded.
Note
Weather-protected units using the collapsible rain hood are intended for portable uses and temporary outdoor deployment. The rain hood is designed to protect the connectors from direct exposure to rain.